C Compiler Exists Entirely In Vim

8cc.vim is a C compiler that exists as pure Vimscript. Is it small? It sure is! How about fast? Absolutely not! Efficient? Also no. But does it work and is it neat? You betcha!

Ever typed :wq to write the buffer and exit in Vim? When you do that, you’re using Vimscript. Whenever one enters command mode : in Vim, one is in fact using a live Vimscript interpreter. That’s the space in which this project exists and does its magic. Given enough time, anyway.

Vimscript itself was created by [Bram Moolenaar] in 1991. The idea was to execute batches of vim commands programmatically. It’s been used for a variety of purposes since then.

8cc is a lightweight C compiler that has been supplanted by chibicc, but that doesn’t matter much because as author [rhysd] admits, this is really just a fun concept project more than anything. It may take twenty minutes or more to compile “hello world”, but doing it entirely from within Vim is a trip.

Here’s How To Build A Tiny Compiler From Scratch

Believe it or not, building a tiny compiler from scratch can be as fun as it is accessible. [James Smith] demonstrates by making a tiny compiler for an extremely simple programming language, and showing off a hello world.

Here’s what happens with a compiler: human-written code gets compiled into low-level machine code, creating a natively-executable result for a particular processor. [James]’ compiler — created from scratch — makes native x64 Linux ELF binary executables with no dependencies, an experience [James] found both educational and enjoyable. The GitHub repository linked below has everything one needs, but [James] also wrote a book, From Source Code to Machine Code, which he offers for sale to anyone who wants to step through the nitty-gritty.

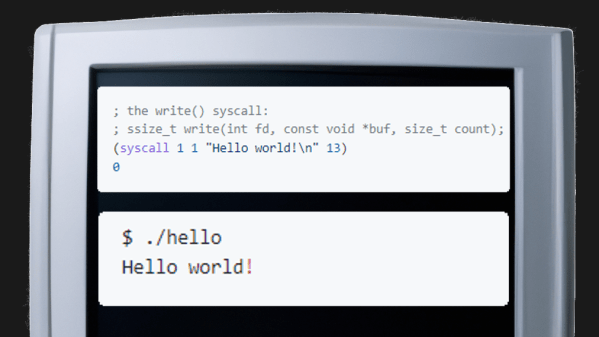
The (very tiny) compiler is on GitHub as The Pretty Laughable Programming Language. It’s tiny, the only data types are integers and pointers, and all it can do is make Linux syscalls — but it’s sufficient to make a program with. Here’s what the code for “Hello world!” looks like before being fed into the compiler:

; the write() syscall:
; ssize_t write(int fd, const void *buf, size_t count);
(syscall 1 1 "Hello world!\n" 13)
0

Working at such a low level can be rewarding, but back in the day the first computers actually relied on humans to be compilers. Operators would work with pencil and paper to convert programs into machine code, and you can get a taste of that with a project that re-creates what it was like to program a computer using just a few buttons as inputs.

Riding The Nostalgia Train With A 6502 From The Ground Up

In the very early days of the PC revolution the only way to have a computer was to build one, sometimes from a kit but often from scratch. For the young, impoverished hobbyist, leafing through the pages of Popular Electronics was difficult, knowing that the revolution was passing you by. And just like that, the days of homebrewing drew to a close, forced into irrelevance by commodity beige boxes. Computing for normies had arrived.

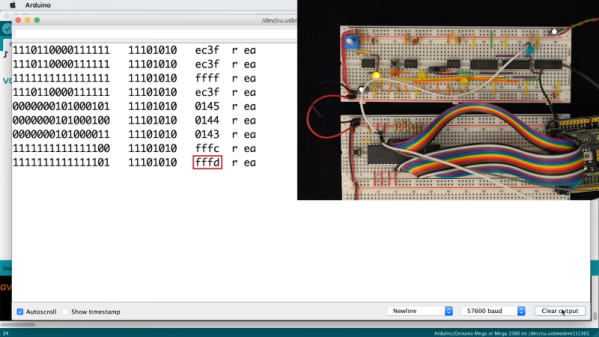
Many of the homebrewers-that-never-were are now looking back at this time with the powerful combination of nostalgia and disposable income, and projects such as [Ben Eater]’s scratch-built 6502 computer are set to scratch the old itch. The video below introduces not only the how-to part of building a computer from scratch, but the whys and wherefores as well. Instead of just showing us how to wire up a microprocessor and its supporting chips, [Ben] starts with the two most basic things: a 6502 and its datasheet. He shows what pins do what, which ones to make high, and which ones get forced low. Clocked with a custom 555 circuit that lets him single-step and monitored with an Arduino Mega-based logic analyzer, we get a complete look at the fetch and execute cycle of a simple, hard-wired program at the pin level.

This is one of those rare videos that was over too soon and left us looking for more. [Ben] promises a follow-up to add a ROM chip and a more complex program, and we can’t wait to see that. He’s selling kits so you can build along if you don’t already have the parts. There seems to be a lot of interest in 6502 builds lately, some more practical than others. Seems like a good time to hop on the bandwagon.

Continue reading “Riding The Nostalgia Train With A 6502 From The Ground Up”

Learn To Optimize Code In Assembly… For Android

When programming a microcontroller, there are some physical limitations that you’ll come across much earlier than programming a modern computer, whether that’s program size or even processor speed. To make the most use of a small chip, we can easily dig into the assembly language to optimize our code. On the other hand, modern processors in everyday computers and smartphones are so fast and have so much memory compared to microcontrollers that this is rarely necessary, but on the off-chance that you really want to dig into the assembly language for ARM, [Uri Shaked] has a tutorial to get you started.

The tutorial starts with a “hello, world” program for Android written entirely in assembly. [Uri] goes into detail on every line of the program, since it looks a little confusing if you’ve never dealt with assembly before. The second half of the program is a walkthrough on how to actually execute this program on your device by using the Android Native Deveolpment Kit (NDK) and using ADB to communicate with the phone. This might be second nature for some of us already, but for those who have never programmed on a handheld device before, it’s worthwhile to notice that there are a lot more steps to go through than you might have on a regular computer.

If you want to skip the assembly language part of all of this and just get started writing programs for Android, you can download an IDE and get started pretty easily, but there’s a huge advantage to knowing assembly once you get deep in the weeds especially if you want to start reverse engineering software or bitbanging communications protocols. And if you don’t have an Android device handy to learn on, you can still learn assembly just by playing a game.

ESP8266 BASIC Sets Up A Web Remote In No Time

One of the sticking points for us with our own Internet of Things is, ironically, the Internet part. We build hardware happily, but when it comes time to code up web frontends to drive it all, the thrill is gone and the project is only half-done.

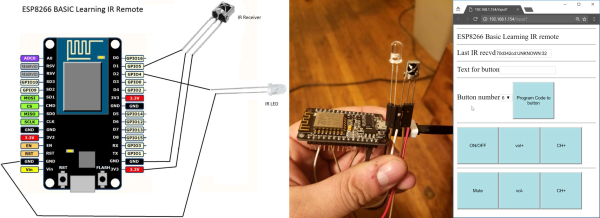
Including some simple web-based scripting functionality along with the microcontroller basics is one of the cleverest tricks up ESP8266 BASIC’s sleeves. BASIC author [mmiscool] puts it to good use in this short demo: a complete learning IR remote control that’s driven through a web interface, written in just a few lines of BASIC.

Note that everything happens inside the ESP8266 here, from hosting the web page to interpreting and then blinking back out the IR LED codes to control the remote. This is a sophisticated “hello world”, the bare minimum to get you started. The interface could look slicker and the IR remote could increase its range with more current to the LED, but that would involve adding a transistor and some resistors, doubling the parts count.

For something like $10 in parts, though, this is a fun introduction to the ESP and BASIC. Other examples are simpler, but we think that this project has an awesome/effort ratio that’s hard to beat.

Simple Clock Is Great Stepper Motor Project

You’d think that we’ve posted every possible clock here at Hackaday. It turns out that we haven’t. But we have seen enough that we’ve started to categorize clock builds in our minds. There are the accuracy clocks which strive to get every microsecond just right, the bizzaro clocks that aim for most unique mechanism, and then there are “hello world” clocks that make a great introduction to building stuff.

Today, we’re looking at a nice “hello world” clock. [electronics for everyone]’s build uses a stepper motor and a large labelled wheel that rotates relative to a fixed pointer. Roll the wheel, and the time changes. It looks tidy, it’s cyclical by design, and it’s a no-stress way to get your feet wet driving stepper motors. And it comes with a video, embedded below.

Continue reading “Simple Clock Is Great Stepper Motor Project”

Build An AM Radio Transmitter From A CPLD

[Alex Lao] has been playing around with the CPLD-like parts of a PSoC. Which is to say, he’s been implementing simple logic functions “in hardware” in software. And after getting started with the chip by getting accustomed to the different clock sources, he built a simple AM radio that transmits at 24 MHz.

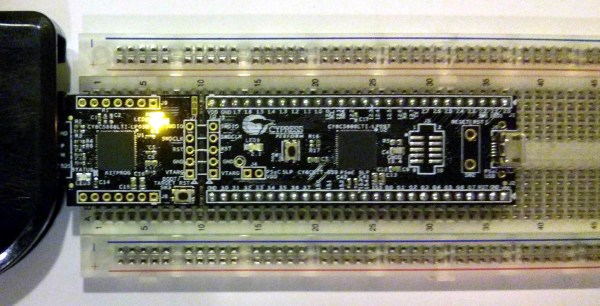
The device that [Alex] is learning on is a Cypress PSoC 5LP, or more specifically their (cheap) prototyping kit for the part. The chip itself is an ARM microprocessor core with a CPLD and some analog tidbits onboard to make interfacing the micro with the outside world a lot easier. [Alex] doesn’t even mess around with the microprocessor, he’s interested in learning the CPLD side of things.

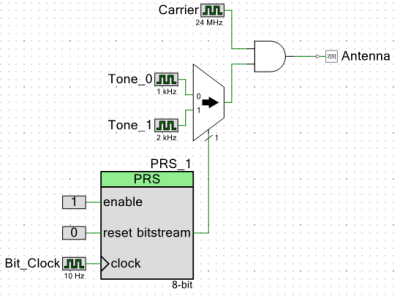
PRS-CircuitHe starts off with a 24 MHz carrier and a 1 kHz tone signal, and combines them with a logical AND function. When the tone is on, the carrier plays through; that’s AM radio at its most elemental. Everything is logic (square waves) so it’s a messy radio signal, but it’ll get the job done.

Adding a multiplexer up front allows [Alex] to play two tones over his “radio” station. Not bad for some simple logic, and a fantastic Hello World project for a CPLD. We can’t wait to see what [Alex] is up to next!

If you’re interested in getting your feet wet with either CPLDs in general or a CPLD + micro system like Cypress’s, the development kit that [Alex] is using looks like a cheap and painless way to start. (Relatively speaking — PSoCs are a step or two up a steep learning curve from the simpler 8-bit micros or an Arduino.) Hackaday’s own [Bil Herd] has a video on getting started with another member of the Cypres PSoC family, so you should also check that out.