When it comes to mechanical keyboards, there’s no end to the amount of customization that can be done. The size and layout of the keyboard is the first thing to figure out, and then switches, keycaps, and then a bunch of other customizations inside the keyboard like the mounting plate and whether or not to add foam strips and other sound- and vibration-deadening features. Of course some prefer to go the other direction with it as well, omitting the foam and installing keys with a more noticeable click, and still others go even further than that by building a separate machine to make their keyboard activity as disruptive as it could possibly be.
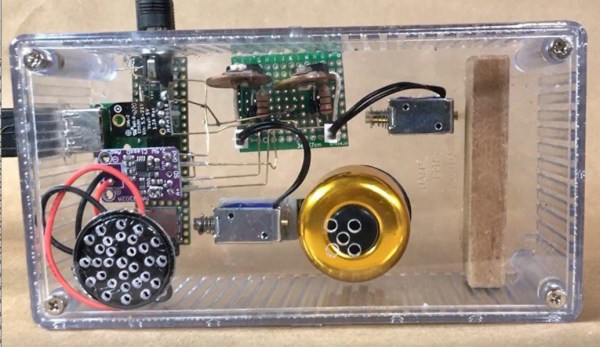
This started as a joke among [ac2ev] and some coworkers, who were already teasing about the distinct sound of the mechanical keyboard. This machine, based on a Teensy microcontroller, sits between any USB keyboard and its host computer, intercepting keystrokes and using a small solenoid to tap on a block of wood every time a keystroke is detected. There’s also a bell inside that rings when the enter key is pressed, similar to the return carriage notification for typewriters, and as an additional touch an audio amplifier with attached speaker plays the Mario power-up sound whenever the caps lock key is pressed.
[ac2ev] notes that this could be pushed to the extreme by running a much larger solenoid powered by mains electricity, but since this was more of a proof-of-concept demonstration for some coworkers the smaller solenoid was used instead. The source code for the build can be found on the project’s GitHub page and there’s also a video of this machine in action here as well. Be careful with noisy mechanical keyboards, though, as the sounds the keys produce can sometimes be decoded to determine what the user is typing.