A beige keyboard with blue and grey keys sits on a colorful deskmat atop a wooden desk. A small box with a round Touch ID button sits next to the keyboard.

Standalone Touch ID For Your Desktop Mac

With the proliferation of biometric access to mobile devices, entering a password on your desktop can feel so passé. [Snazzy Labs] decided to fix this problem for his Mac by liberating the Touch ID from a new Apple keyboard.

When Apple introduced its own silicon for its desktops, it also revealed desktop keyboards that included their Touch ID fingerprint reader system. Fingerprint access to your computer is handy, but not everyone is a fan of the typing experience on Apple keyboards. Wanting to avoid taping a keyboard under his desk, [Snazzy Labs] pulled the logic board from the keyboard and designed a new 3D printed enclosure for the Touch ID button and logic board so that the fingerprint reader could reside close to where the users hands actually are.

One interesting detail discovered was the significantly different logic boards between the standard and numpad-containing variants. The final enclosure designs feature both wireless and wired versions for both the standard and numpad logic boards if you should choose to build one of your own. We’re interested to see if someone can take this the next step and use the logic board to wire up a custom mechanical keyboard with Touch ID.

If [Snazzy Labs] seems familiar, you may recognize him from their Mac Mini Mini. If you’re more in the mood to take your security to the extreme, check out this Four Factor Biometric Lockbox that includes its own fingerprint reader.

Continue reading “Standalone Touch ID For Your Desktop Mac”

Two-Thirds Keyboard Is Inspired By The Typesetting Era

We see all kinds of custom keyboard builds around here. Most of them are intended to optimize typing to the user’s desires. This glorious build from [Attoparsec] isn’t one of those, and is instead part of the growing joke keyboard genre. The so-called Two-Thirds Keyboard is inspired by the long-gone typesetting era.

The build is based on the typecases used in the era when type was assembled by hand. Typesetters would grab “majuscule” letters from the upper case of type, and “miniscule” letters from the lower case of type, when setting a page, which would go on to influence how we refer to those letters today. Letters that came up more often, like e and s, would get larger compartments in the type cases, while rarer letters like z and q would get smaller compartments. The Two-Thirds keyboard replicates this by giving the most common letters the biggest keys, while rarer letters and upper-case majuscule letters get smaller keys. The overall layout matches that of the popular Two-Thirds California Case of type that grew popular in the US in the typesetting era.

There were some engineering issues in building the keyboard. While stabilizers are available for wide keys like Enter and Space in regular keyboard designs, stabilizing keys that are wide and high is fussy. The build relies on multiple switches to enable them to move cleanly. Nor were 2×2 and 2×3-sized custom keycaps readily available. In the end, resin printing was key to producing all the necessary components.

Typing on the keyboard is not quick, but lower speeds were probably acceptable in the typesetting era. Regardless, [Attoparsec] used it for a full week to do it justice, going from around 10  wpm to 22 wpm by the end of the test.

It’s a fun build, but by no means the slowest keyboard we’ve ever seen.

Continue reading “Two-Thirds Keyboard Is Inspired By The Typesetting Era”

Osprey Keyboard Lets The NRF52840 Spread Its Wings

While most people don’t care whether they use one finger or ten, some people want to better themselves by learning how to touch-type. And honestly, there’s no easier way to do that than by getting into the ergo keyboard game. Even if you consider yourself a touch-typist already, an ortholinear or column-staggered keyboard may teach you otherwise, as you find yourself trying to type ‘c’ with your index finger (for example) and failing miserably.

[ebastler] chose the best of all routes and decided to build his own perfect keyboard, called the Osprey. It’s a wireless, column-staggered 40% that runs on ZMK firmware, which of course is open-source, as is the PCB itself and the thick and travel-ready printed enclosure. Although [ebastler] has yet to implement either one of these additional inputs, the Osprey also supports a thumbstick and a track pad.

Brain-wise, it’s a bare nRF52840 chip along with a TI BQ24075 for battery charging. The interesting thing about this implementation is that [ebastler] used and abused Nordic sample schematic #4, which utilizes both DC-DC converter stages of the chip. We can’t wait to see what this trailblazing build will mean for the community!

Rotary Dial Number Pad Is The Perfect Prank For Retro-Phone Enthusiast

We’re not sure about the rest of you, but to us, a keyboard without a number pad all the way over to the right just seems kind of — naked? We might not be accountants, but there’s something comforting about having the keypad right there, ready for those few occasions when you need to enter numbers more rapidly than would be possible with the row of number keys along the top of the keyboard.

What we are sure about, though, is that rapid numeric keying is not what this rotary dial numpad keyboard is all about. In fact, it’s actually an April Fool’s prank [Squidgeefish] played on a retro-phone-obsessed coworker, and it worked out pretty well. Starting with an old telephone dial from what must be an exceptionally well-stocked parts bin, [Squidgeefish] first worked out the electrical aspects of interfacing the dial with a cheapo mechanical keyboard. It turns out that there’s a lot of contact bounce in those old dials, leading to some software hacks to keep the Arduino happy.

There was also a little hackery needed to stuff a USB hub into the keyboard, as well as literal hacking of the keyboard’s PCB. A 3D printed enclosure allows the rotary dial to nestle into the place where the regular numpad would be, and it looks pretty good. We also like forcing the issue by replacing the entire row of number keys with a single massive prank key.

While this was all for fun, there are a couple of cool tips here, like chucking a bit of printer filament in a Dremel tool to stir-weld parts together. And even though we’ve seen that parametric keycap generator before, it is pretty cool to see it in action.

Trackball Split Keyboard Will Roll Into Your Heart

One of the nicest problems to have with a split keyboard, even a monoblock split, is deciding what to put in the middle. Most people go for either the mouse, or else their beverage of choice. Some might sub in a bowl of snacks later on in the day. Personally, we most often use the space for holding notes.

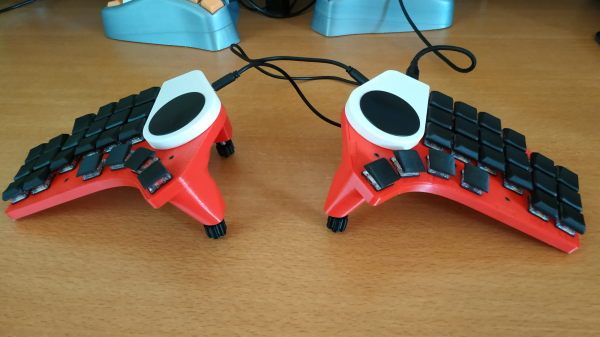
[AlSaMoMo] went with the mouse, but decided to make it a permanent installation. They planted a trackball in the middle of Batreeq, their awesome little monoblock split. For a while now, [AlSaMoMo] has been using 30-key ‘boards and wanted to see about integrating a trackball. Not only that, Batreeq has a fun-looking scroll ring and haptic feedback. Plus, it just looks fantastic.

Even though Batreeq is vaguely bat-shaped, the word translates to ‘penguin’, which, on second glance, the keyboard does appear a bit villainous. But fear not, Batreeq’s PCB is open source, as are all of [AlSaMoMo]’s keyboards.

Want to have more space between your hands? Check out this split that uses VGA connections.

Via KBD #103

Colorful Split Keyboard Uses VGA Connections

When it comes to building a split keyboard, you have a lot of options when it comes to the cable. Many will use a standard 3.5 mm TRRS cable, and others might use something more esoteric like RJ-45 to run between the halves. This only works if you’re using two controllers; if you only want one controller, you have to pass the matrix from one side to the other, which typically requires more than the four wires offered by the aforementioned choices. While rummaging around, [Joe Scotto] found a VGA cable and thought, why not use that?

This lovely Barbie-themed peripheral is a split version of an earlier board he built called the ScottoFly, which is a monoblock split with a void in the middle. As with that one, this is hand-wired using thicc brass insulated with heat-shrink, uses a solid 3D-printed plate, and a printed case. And like a madman, [Joe] coiled the cable.

Unfortunately, this proved to be problematic in the wire breakage sense, or so he thought. The real problem turned out to be that the middle row of pins on a VGA connector all act like ground, so they can’t be used to pass rows and columns. However, there were still enough viable pins to send the 4×5 matrix across. Be sure to check out the build video after the break.

Continue reading “Colorful Split Keyboard Uses VGA Connections”

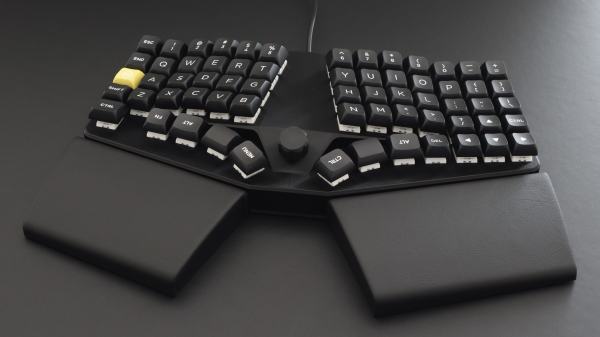
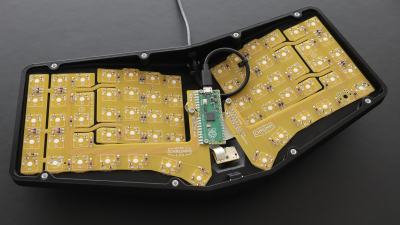
Keyboard One Is An Ear Of Corne

There are all kinds of avenues into the mechanical keyboarding hobby, and one of the more well-traveled ones runs between coworkers. [crsayen] aka [DrJamesOIncandenza] has one such relationship, and was turned on to the CRKBD a while back by an office mate. For the uninitiated, that’s short for Corne keyboard, which is a column-staggered 3×6 split keyboard with three thumb keys per hand.

While [JOI] liked the Corne well enough, especially with chocs, he got the occasional craving to slap (that’s what we’re calling typing on linears from now on — slapping vs. clacking) on some silent MX switches and so built this Corne-derivative monoblock split called Keyboard One. Aside from the more obvious differences,

We think this looks rather spanking for a first keyboard, sort of like a slightly smaller Alice or something. But you don’t have to go to great lengths to obtain [JOI]’s knowledge, for everything is on GitHub. [JOI] says they sort of regret going 3×6, but are already planning another build with more keys. See, that’s the spirit.

Via KBD #101