K’nex Pinball Machine Is A Playable Work Of Art

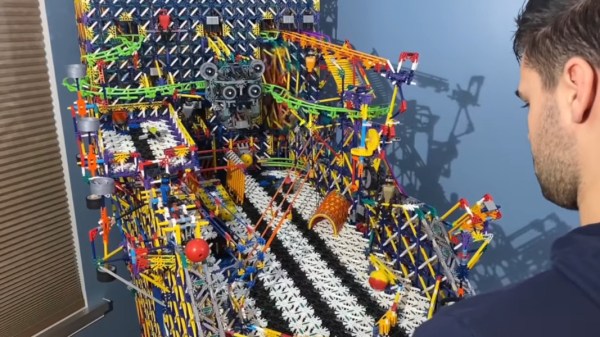
It’s really a wonder that we missed this one, what with all the extra time in front of a computer we’ve had over the last year or so. But better late than never, we always say, so behold, (a little at a time, because there’s quite a lot to look at), [Tyler Bower]’s pinball machine built entirely from K’nex.

Where do we even start? This is a full-size pinball machine, as in 7′ tall, 5′ long, and 3′ wide. [Tyler] estimates that it’s made from about 16,000 pieces, or around 73 pounds of plastic, much of which was obtained locally and is secondhand. Many of those pieces make up the ten drill motor-driven chain lifts in the back — these move the ball through the machine after it goes through one of the track triggers and return it to the playfield in various delightful ways.
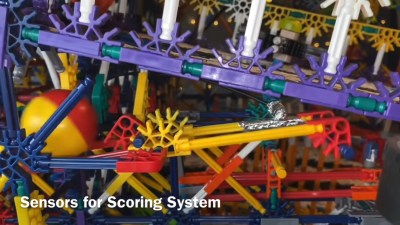
Speaking of ways to score, there are nine of them total, and some are harder to get to than others. They all involve some really amazing K’nex movement, and each one uses aluminum foil switches to trigger scoring through a MaKey MaKey.

Of course there’s a multi-ball mode, but our favorite has to be the trap door in the playfield that gets you to the mini pinball game in the upper left, because only the best pinball games have some kind of mini game. Either that, or our favorite is the rotating arm that swings around gracefully and drops the ball on a track. Anyway, all nine elements are explored in the video after the break, which frankly we could watch on repeat. If you’re hungry for more details, there’s quite a bit of info in the description.

The only thing this machine is missing is a tilt switch, but as you’ll see in the video, it would probably get triggered quite often. Is this somehow not cool enough for you? Here’s a slightly bigger K’nex ball machine that doesn’t seem to move as much, but also isn’t a full freaking pinball machine complete with meta game.

Continue reading “K’nex Pinball Machine Is A Playable Work Of Art”

Make A Tesla Coil Winding Rig With K’Nex

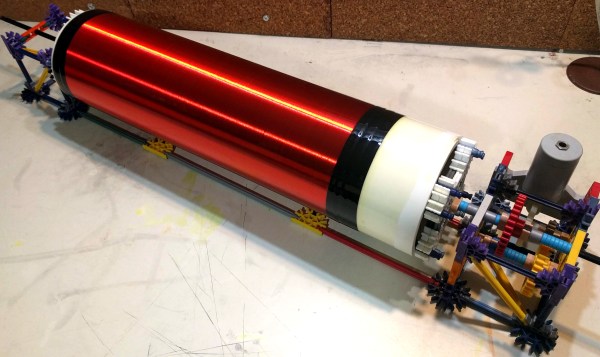
Instructables user [birdycrazy] built a winding rig from a PVC pipe and a bunch of K’Nex. He had recently started a Tesla coil project and needed an efficient way to wind the secondary coil. All of the designs for DIY winding rigs he found on the Internet required parts he didn’t have or simply cost a bunch of money. Then he realized he’d been building with K’nex a lot, and why not build a tool to help him?

He ended up investing only his K’nex elements and a length of 4” PVC pipe for the project. He used a K’nex 12V motor because it plugs in rather than requiring batteries. After the coil had been completely wound he set it to rotate the assembly over a period of several days while the varnish coating dried.

[birdycrazy] has several cool K’nex projects including a couple of automatic transmissions and a differential, all made with the toy. Also be sure to check out the K’nex whiteboard plotter, the Citadel monster K’nex castle, and the K’nex skeeball table we published in the past.

The Citadel Is The King Of K’nex Builds.

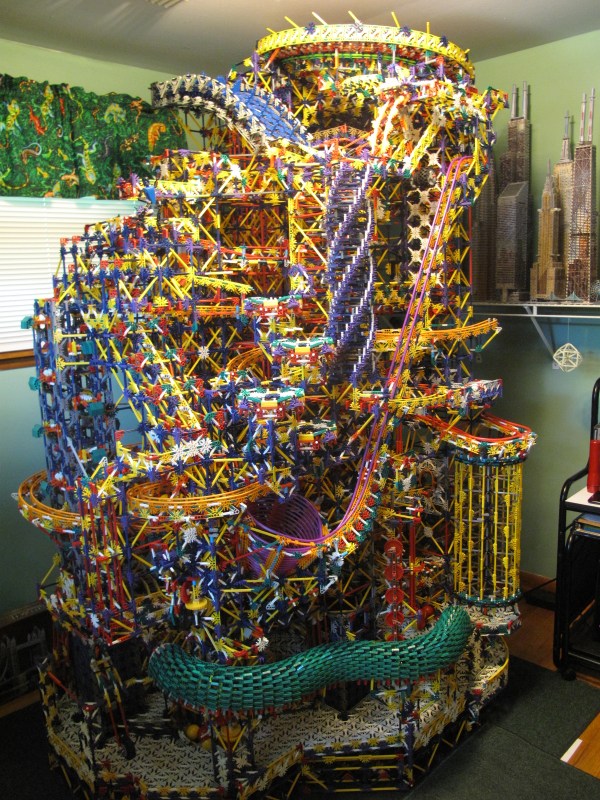
Following one’s passion can lead to amazing results. Sometimes this results in technological marvels; other times, one marvels at the use of the technology. An exemplary display of the latter is The Citadel.

Over the course of three years, redditor [Shadowman39] pieced together this monstrous K’nex structure. With over 17 different paths(!), 45 different elements, and over 40,000 parts, you would expect some meticulous planning to go into its construction — but that’s not the case! [Shadowman39] assembled it largely on the fly with only a few elements needing to be sketched out and only the main elevator proving to be troublesome. Three motors power the structure — one for the main elevator, one for the smaller lifts on the bottom, and one for the release gates.

This is an absolute leviathan hobby project. To satiate the obvious curiosity of anyone who stumbles across this picture, its intricacies can be seen in the video:

Continue reading “The Citadel Is The King Of K’nex Builds.”

Sweet Stepper Of [Jeremy]’s Rocks Out With Its Box Out

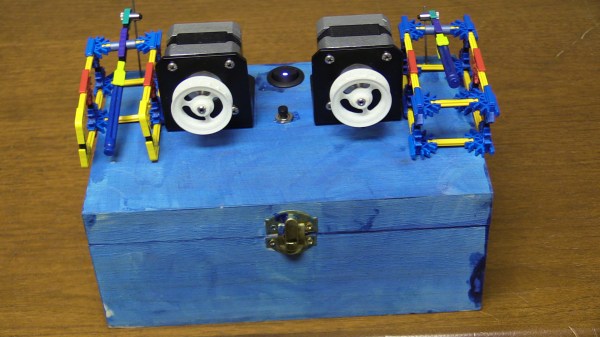
Inspired by the floppy drive orchestras of others, [Jeremy] has built a Pi-driven MIDI music box with stepper motor resonators and outlined the build on hackaday.io.

Control for the motors comes from an Iteaduino Mega 2560. The music starts as a MIDI file, gets processed into a text file, and is played over serial by a Raspberry Pi. He’s added percussion using K’NEX instruments and 9g servos, which we think is a nice touch. It can be powered via LiPo or from the wall, and [Jeremy] baked in protection against blowing up the battery. As he explains in the tour video after the break, the box is clamped to a wooden table to provide richer sound.

[Jeremy]’s favorite part of the build was enclosing the thing as it was his first time using panel-mount components. Stick around to see a walk-through of the guts and a second video demonstrating its musical prowess.

Continue reading “Sweet Stepper Of [Jeremy]’s Rocks Out With Its Box Out”

Mechanical Skeeball Built From Knex

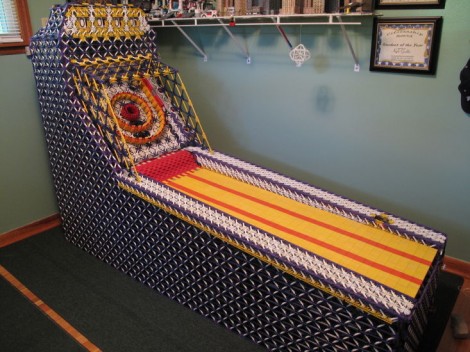
We don’t really know what to say. This Skeeball cabinet is built entirely from Knex. It works exactly how you’d expect Skeeball to work. You plug in quarter and it dispenses balls and keeps score.

[Shadowman39] worked on the build for more than a year. Everything that went into it is a Knex part with the exception of a few rubber bands, and the paper numbers that are used on the scoreboard. There are six motors which drive the machine. Four of them are responsible for turning the scoreboard digits, the others handle ball return.

The link at the top starts off with a bunch of images of the various parts, but you’ll want to watch the video after the break for a closer look. It shows the coin hopper in greater detail. It’s built to only accept quarters and to reject all other coins.

Continue reading “Mechanical Skeeball Built From Knex”

Sliding Camera Mount Is Good Enough For Amateur Photography

[Unihopper] built this sliding camera mount to add some motion to his freestyle unicycle videos. It’s extremely simple, but still pulls off a pretty nice effect as you can see in the clip after the break.

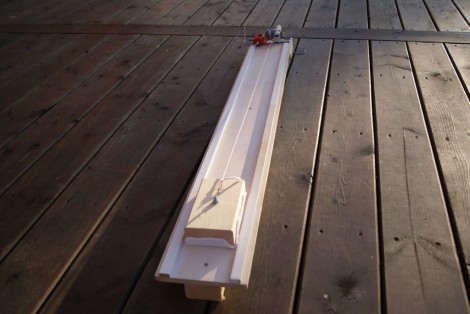
The image above shows the mount without a camera attached.  You can see the threaded peg on the block in the foreground which is used for that purpose. Felt has been wrapped around the base of the block, which rides in a wooden channel. The string, which connects to an eye hook in the wood block, is attached to a spool on the far end of the plank. A K’nex motor drives that spool, slowly sliding the camera toward it.

Unlike other toy-based sleds, the use of a track system helps to maintain proper orientation of the camera. Obviously this isn’t going to achieve the perfectly smooth and precise motion you’d get out of a sled system like this rail and linear bearing version. But honestly, most of us don’t have cameras of the quality to warrant that type of high-end system. Continue reading “Sliding Camera Mount Is Good Enough For Amateur Photography”

knex_plotter

K’nex Whiteboard Plotter

[Jerry] has been wanting to put together a whiteboard plotter for some time and just recently got around to building one.

The plotter draws pretty much about anything he can imagine on a white board measuring just shy of 2′ x 3′. The design first started off with a Basic Stamp board at the helm, which he sourced from another project he no longer had any use for. The Stamp worked for awhile, but eventually he ran into problems due to the board’s limited 128 bytes of program space. Needing a more robust micro controller, he switched to an Arduino mid-project, which he says runs the plotter far faster than the Stamp ever did.

The plotter uses a pair of stepper motors mounted on a horizontal platform situated above the whiteboard. Much like this large-format printer we featured earlier this week, the steppers vary the length of a pair of fishing lines, moving the pen precisely across the board.  As you can see in the image above, [Jerry] has been able to create some pretty intricate patterns with his plotter, and we imagine they will only get better with more refinement.

Be sure to check out his site for more details on his build process as well as several additional samples of the plotter’s capabilities.