Kodak Film Factory Revealed

Anybody born before the mid 1990s will likely remember film cameras being used to document their early years.  Although the convenience of digital cameras took over and were then themselves largely usurped by mobile phones, there is still a surprising variety of photographic film being produced.  Despite the long pedigree, how many of us really know what goes into making what is a surprisingly complex and exacting product? [Destin] from SmarterEveryDay has been to Rochester, NY to find out for himself and you can see the second in a series of three hour-long videos shedding light on what is normally the strictly lights-out operation of film-coating.

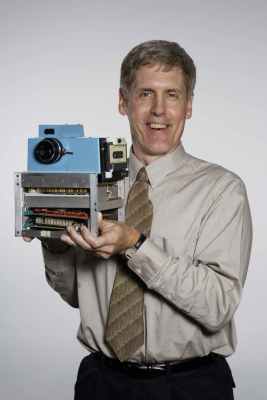
Kodak first digital camera 1975
Kodak’s first attempt at a digital camera in 1975. The form-factor still left something to be desired…

Kodak have been around in one form or another since 1888, and have been producing photographic film since 1889. Around the turn of the Millennium, it looked as though digital photography (which Kodak invented but failed to significantly capitalize on) would kill off film for good, and in 2012 Kodak even went into Chapter 11 bankruptcy, which gave it time to reorganize the business.

They dramatically downsized their film production to meet what they considered to be the future demand, but in a twist of fortunes, sales have surged in the last five years after a long decline. So much so, in fact, that Kodak have gradually grown from running a single shift five days per week a few years ago, to a 24/7 operation now. They recently hired 300 Film Technicians and are still recruiting for more, to meet the double-digit annual growth in demand.

[Destin] goes to great lengths to explain the process, including making a 3D model of the film factory, to better visualize the facility, and lots of helpful animations.  The sheer number of steps is mind-boggling, especially when you consider the precision required at every step and the fact that the factory runs continuously… in the dark, and is around a mile-long from start to finish.  It’s astonishing to think that this process (albeit at much lower volumes, and with many fewer layers) was originally developed before the Wright Brothers’ first powered flight.

We recently covered getting a vintage film scanner to work with Windows 11, and a little while back we showed you the incredible technology used to develop, scan and transmit film images from space in the 1960s.

Continue reading “Kodak Film Factory Revealed”

Test Equipment, Shim Washers, And A 30 Year Old Space Telescope

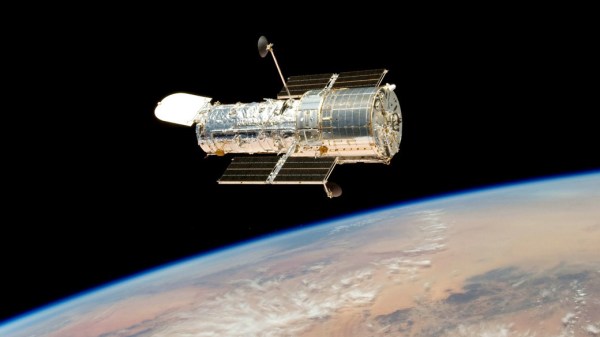
This year marks the 30th anniversary of the Hubble Space Telescope. When you see all the great pictures today, it is hard to remember that when it first launched, it was nearly a failure, taking fuzzy pictures. The story of how that problem was fixed while the telescope was whizzing through space is a good one. But there’s another story: how did a $1.5 billion satellite get launched with defective optics? After all, we know space hardware gets tested and retested and, typically, little expense is spared to make sure once a satellite is in orbit, it will work well for a long time.

The problem was with a mirror. You might think mirrors are pretty simple, but it turns out there’s a lot to know about mirrors. For astronomy, you need a first surface mirror which is different from your bathroom mirror which almost certainly reflects off the back of the glass. In addition, the mirrors need a very precise curve to focus light.

Continue reading “Test Equipment, Shim Washers, And A 30 Year Old Space Telescope”

The Photo Lab That Flew To The Moon

When planning a trip by car these days, it’s pretty much standard practice to spin up an image of your destination in Google Maps and get an idea of what you’re in for when you get there. What kind of parking do they have? Are the streets narrow or twisty? Will I be able to drive right up, or will I be walking a bit when I get there? It’s good to know what’s waiting for you, especially if you’re headed someplace you’ve never been before.

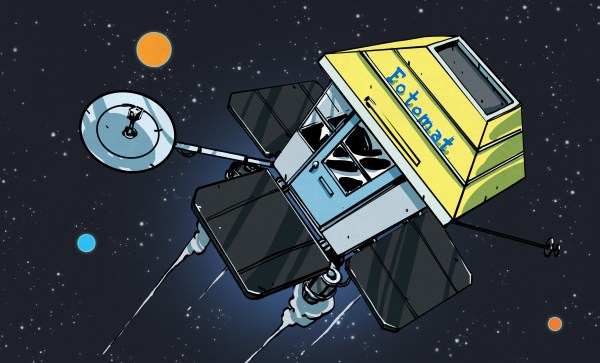
NASA was very much of this mind in the 1960s, except the trip they were planning for was 238,000 miles each way and would involve parking two humans on the surface of another world that we had only seen through telescopes. As good as Earth-based astronomy may be, nothing beats an up close and personal look, and so NASA decided to send a series of satellites to our nearest neighbor to look for the best places to land the Apollo missions. And while most of the feats NASA pulled off in the heyday of the Space Race were surprising, the Lunar Orbiter missions were especially so because of how they chose to acquire the images: using a film camera and a flying photo lab.

Continue reading “The Photo Lab That Flew To The Moon”

Retrotechtacular: Kodak Built World’s First DSLR… Using A Canon Camera Body

worlds-first-dslr

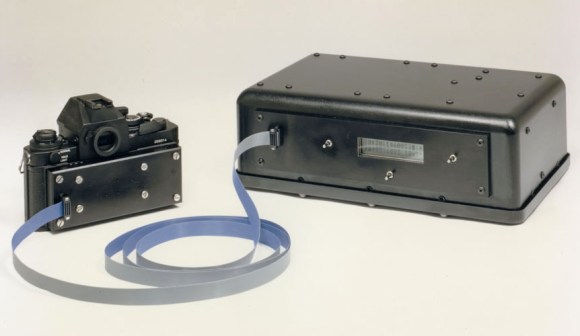
It has been far too long since we’ve seen an installment of Retrotechtacular, and this is a great one to start back with. It’s always a treat to get the story from the horse’s mouth. How about the tale of the world’s first Digital Single-Lens Reflex camera? [Jame McGarvey] shared the story of how he developed the device in 1987.

That’s it shown above. It’s not surprising to see that the only real modification to the camera itself is the back cover. The difference between an SLR and a DSLR is really just the D, which was accomplished by adding a CCD in place of the film.

The entire story is a treat, but there are a couple of nuggets the we enjoyed most. The possibly-clandestine purpose of this device is intriguing. It was specifically designed to pass as a film camera which explains the ribbon cable connecting the CCD module to the control box which would be stored in a camera bag. It is also delightful to hear that the customer who tasked Eastman Kodak with developing the system preferred Canon camera bodies. So this Kodak DSLR indeed used a Canon F-1 body.

Once you get done looking this one over you will also enjoy learning how a CCD actually works.

[Thanks Ben]

Retrotechtacular is a weekly column featuring hacks, technology, and kitsch from ages of yore. Help keep it fresh by sending in your ideas for future installments.

Binoculars As A Zoom Lens

It may seem trivial at first, but the effect [Dan] gets when using binoculars as a telephoto lens is surprising. The images are well in focus with great colors. This technique not only brings your subject mater closer but also provides a depth-of-focus feature not normally available on simple cameras or camera phones.

The proof is in the example footage found after the break, but you’ll also find a video tutorial detailing the build. [Dan] already had the expensive components are a pair of mini binoculars and a Kodak Zx3 pocket camcorder. The camcorder is the same form factor as a smart phone so using different hardware will be a breeze. He started off by building a prototype out of paper. Basically it’s a bracket that properly aligns the camera with one lens of the binoculars. Once he had everything lined up he transferred his measurements to some sheet metal. The bracket for the binoculars is attached to the one for the camera using bolts and wing nuts to make it adjustable. One important part of the design is to gut a hole for access to the binocular focus wheel.

Continue reading “Binoculars As A Zoom Lens”

Building Removable Epoxy Mounting Brackets

[Jykazu] wanted to use an external lens with his Kodak Zi8 but he didn’t want to alter the camera or glue something onto it. His solution was to build a bracket out of epoxy dough. He first covers the camera in scotch tape to protect the finish, then he kneads the dough to mix the two parts together, using it to form the bracket that you can see above. After curing, the bracket barely sticks to the smooth tape and can be gently removed. A lens cap with a hole drilled in it is glued to this bracket and works like a charm for connecting the lens. Check out his manufacturing method in the videos after the break.

This is a great method for many applications. Last year we saw a product called Sugru which seems to be made for this type of thing but [Jykazu’s] epoxy method is just as impressive.

Continue reading “Building Removable Epoxy Mounting Brackets”

DoomBox: Classic Keys Meet Tiny Screen

The doomBox is a dedicated gaming rig for lovers of ID Software’s classic title. [JJ] built this from an old Kodak DC290 camera that had a broken lens. Since this runs the Digita OS, he was able to use the Doom port that already exists. But the camera’s factory buttons were not well suited as controls. By whipping up his own button board, and using the traditional keyboard keys for the button caps, he achieved a much more comfortable (yet squint-inducing) gaming experience. The finished project resides in an all-too-familiar black project box. See him fire it up after the break.

The original Doom for Digita OS pages seem to be down so here’s an alternate if you’re interested.

Update: Looks like the original website is back up.

Continue reading “DoomBox: Classic Keys Meet Tiny Screen”