One wouldn’t expect there to be much to cause envy in the world of desk lamps, after all whether it’s a classic Anglepoise or a dollar store LED affair if it does its job of casting the requisite quantity of light where it’s needed, most of us are happy. But then we saw [Ronny Ziss]’s LED arc desk lamp, and suddenly all other lamps simply aren’t good enough any more. If it’s not a wall-to-wall arc of LEDs spanning the length of the desk, it quite simply no longer cuts the mustard. We’ve entered the world of lamp envy, folks, and it’s a poorly-illuminated place to be.
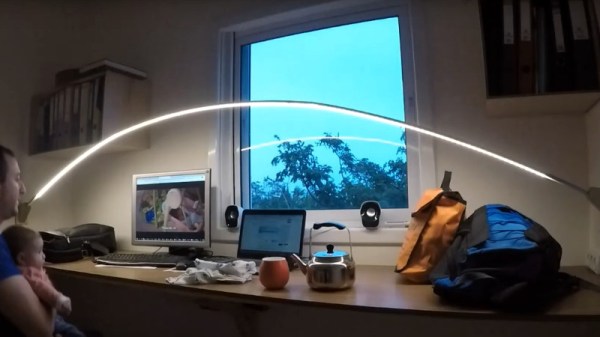
As you can see in the video below the break both the hardware and the software of this lamp are impressive in their own right, the structure being an aluminium extrusion carrying an addressable white LED strip fitted into an arc between two custom plywood blocks on the walls either side of the desk. The software is controlled through a rotary encoder, and allows command of the position, width, and brightness of the illuminated portion, as well as having a hidden Pong game. Sadly he doesn’t reveal the software or the microcontroller in question, however the task is not an onerous one and it’s likely most Hackaday readers could put it together using their board or processor of choice.
In years of lamp projects on Hackaday, we can’t find another quite like this one. Conventional lamp projects can still be stylish though.