It Takes A Lot To Build A Hacker’s Laptop

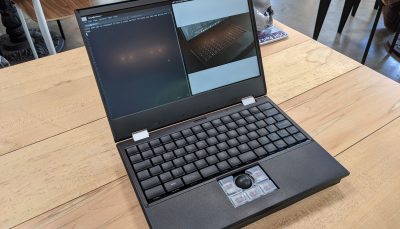
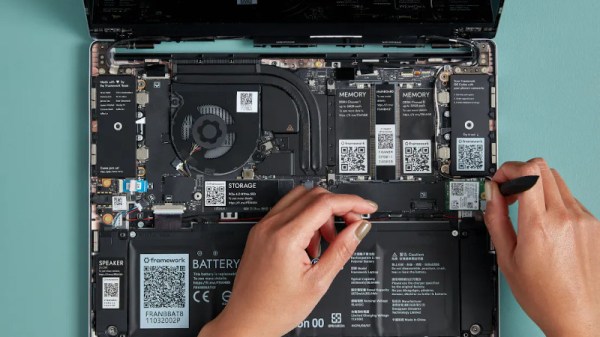
An essential tool that nearly all of us will have is our laptop. For hardware and software people alike it’s our workplace, entertainment device, window on the world, and so much more. The relationship between hacker and laptop is one that lasts through thick and thin, so choosing a new one is an important task. Will it be a dependable second-hand ThinkPad, the latest object of desire from Apple, or whatever cast-off could be scrounged and given a GNU/Linux distro? On paper all laptops deliver substantially the same mix of performance and portability, but in reality there are so many variables that separate a star from a complete dog. Into this mix comes a newcomer that we’ve had an eye on for a while, the Framework. It’s a laptop that looks just like so many others on the market and comes with all the specs at a price you’d expect from any decent laptop, but it has a few tricks up its sleeve that make it worth a glance.

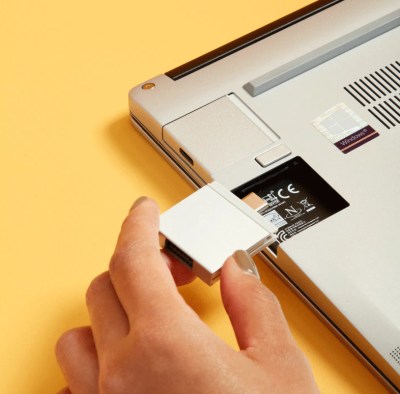
These USB-C based modules are a neat idea.

Probably the most obvious among them is that as well as the off-the-shelf models, it can be bought as a customised kit for self-assembly. Bring your own networking, memory, or storage, and configure your new laptop in a much more personal way than the norm from the big manufacturers. We like that all the parts are QR coded with a URL that delivers full information on them, but we’re surprised that for a laptop with this as its USP there’s no preinstalled open source OS as an option. Few readers will find installing a GNU/Linux distro a problem, but it’s an obvious hole in the line-up.

On the rear is the laptop’s other party trick, a system of expansion cards that are dockable modules with a USB-C interface. So far they provide USB, display, and storage interfaces with more to come including an Arduino module, and we like this idea a lot.

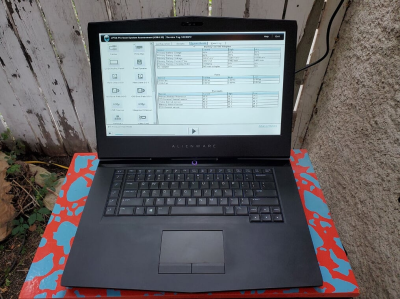
It’s all very well to exclaim at a few features and party tricks, but the qualities that define a hacker’s laptop are only earned through use. Does it have a keyboard that will last forever, can it survive being dropped, and will its electronics prove to be fragile, are all questions that can be answered only by word-of-mouth from users. It’s easy for a manufacturer to get those wrong — the temperamental and fragile Dell this is being typed on is a case in point — but if they survive the trials presented by their early adopters and match up to the competition they could be on to a winner.

Is It A Cyberdeck Or A Vintage Toshiba?

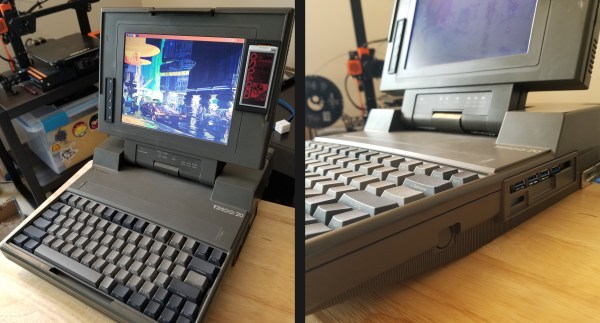
Cyberdecks, the portable computers notable for a freely expressed form factor, owe much to post-apocalyptic sci-fi. But they are not always the most practical devices. There’s a reason that all laptops share a very similar form factor: it’s a convenient and functional way to make a computer to take anywhere. So for the ideal compromise, why not make a cyberdeck from a vintage laptop? That’s exactly what [Valrum] has done with a non-functioning Toshiba 3100/20, upgrading the display and slipping in a Raspberry Pi 4, along with a handy removable USB e-ink supplementary screen (The red/black rectangle to the right of the main screen).

These older machines were so bulky that once their original hardware is removed there is plenty of space for upgrades. Even the screen enclosure is big enough to hide the LCD driver board behind a modern panel.  It follows a well-worn path for Raspberry Pi builds of using a Teensy as a USB keyboard controller, but unexpectedly the stock keyboard has been entirely replaced with a hand-wired one, which is nicely executed to appear superficially as though it was original. In an amusing twist this machine has no battery, not because it wouldn’t be possible but because the original Toshiba didn’t have one either. The USB ports are brought out to the space where the floppy would once have been.

With a plentiful supply of unexceptional or non functional older laptops to be had it’s clear that there’s a rich vein to be mined in this type of build. It’s something we’ve seen done before, in a more famous Toshiba laptop.

Upgrading The PowerBook 100 With A Fresh New Battery

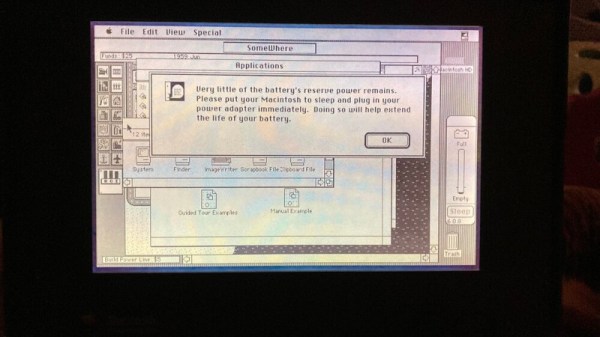
The PowerBook 100 was one of the earliest Apple laptops released, coming not long after the breakout Macintosh Portable. Unlike modern hardware, it relied on sealed lead acid batteries. [360alaska] has such a laptop whose original battery is long dead, so they set about building a replacement battery with lithium cells instead.

The battery and its associated support circuitry is a mite unconventional in its design, but it gets the job done. The build uses two lithium polymer pouch cells in place of the original four cell sealed-lead acid battery, to replicate the roughly 7.2V nominal voltage. Because of this, unfortunately the stock PowerBook charger can’t provide enough voltage to fully charge the LiPo cells up to their full 8.4 volts.

The workaround selected is that when the batteries fall below 80% state of charge, relays disconnect the cells from their series configuration powering the laptop, and instead connect each cell to its own single-cell charger board. Once charging is complete, the relays switch back out of charging mode so the batteries power the laptop once more. The only major drawback is that withdrawing the power adapter while the batteries are on charge will cut all power to the laptop.

It may not be perfect, but [360alaska] has succeeded in building a drop-in battery solution for the PowerBook 100 that can be used with the stock charger. Laptop batteries can be a fraught thing to deal with; often there are safeguards or DRM-type issues to navigate to get them to work around. Sometimes open-source designs are the best solution out there.

A Lot Of Effort For A Pi Laptop

Building a Raspberry Pi laptop is not that uncommon. In fact, just a few clicks from any of the major electronics suppliers will have the parts needed for such a project speeding on their way to your house in no time at all. But [joekutz] holds the uncontroversial belief that the value in these parts has somewhat diminishing returns, so he struck out to build his own Pi laptop with a €4 DVD player screen and a whole lot of circuit wizardry to make his parts bin laptop work.

The major hurdle that he needed to overcome was how to power both the display and the Pi with the two small battery banks he had on hand. Getting 5V for the Pi was easy enough, but the display requires 8V so he added one lithium ion battery in series (with its own fuse) in order to reach the required voltage. This does make charging slightly difficult but he also has a unique four-pole break-before-make switch on hand which doesn’t exactly simplify things, but it does make the project function without the risk of short-circuiting any of the batteries he used.

The project also makes use of an interesting custom circuit which provides low voltage protection for that one lonely lithium battery as well. All in all it’s a master course in using some quality circuit-building skills and electrical theory to make do with on-hand parts (and some 3D printing) rather than simply buying one’s way out of a problem. And the end result is something that’s great for anything from watching movies to playing some retro games.

Continue reading “A Lot Of Effort For A Pi Laptop”

E-Ink Laptop, First Steps

[Alexander Soto] prefers the reduced eye-strain of an e-ink display, but he doesn’t have a portable solution to use at different work stations. The solution? Make your own e-ink laptop. Once you see his plan, it’s not as crazy as it sounds.

[Alexander] got his inspiration from an earlier Dasung Paperlike Pro teardown that we covered back in 2018. His plan is to shoehorn the e-ink panel into a “headless” Thinkpad T480 laptop. This particular model ES133TT3 display is 13.3 inches (about 40 cm) with a much-better-than-normal laptop resolution of 2200 x 1650 pixels. It is driven over HDMI and is perfect fit for the Thinkpad enclosure.

Unfortunately, these displays haven’t gone down in price since 2018. They’re still in the $1000+ price range, more expensive than many laptops. But if you really want the reduced eye-strain of e-ink in a laptop format, you’re going to have to shell out for it.

It’s a pretty ambitious project. We’re looking forward to following his progress and see how the finished laptop goes together. Do check out the extensive list of e-ink references on his project page, too. If you want to experiment with a less expensive e-ink project, have a look at the PaperTTY project for your Raspberry Pi.


Think Your Laptop Is Anemic? Try An MSDOS One

If someone gifted you a cheap laptop this holiday season, you might be a little put out by the 2GB of RAM and the 400 MHz CPU. However, you might appreciate it more once you look at [Noel’s Retro Lab’s] 4.8 Kg Amstrad PPC512 He shows it off inside and out in the video below.

Unlike a modern laptop, this oldie but goodie has a full keyboard that swings out of the main body. The space below the keyboard contains the LCD screen, which [Noel] is going to have to replace with an LCD from another unit that was in worse shape but had a good-looking screen. In this video, he gets as far as getting video output to an external monitor, but neither LCD shows any sign of life. But he’s planning more videos soon.

Continue reading “Think Your Laptop Is Anemic? Try An MSDOS One”

Waveshare’s Pi CM3 Laptop Arrives A Bit Too Late

The good news it that you can now buy a pretty decent laptop that’s based around the Raspberry Pi Compute Module (CM). The bad news is that it was conceived before anyone knew the interface was going to change for the new CM4, so it doesn’t have any of the features that would make it really interesting such as support for PCI-Express. Oh, and it costs $300.

Waveshare, the company that most of us know best as a purveyor of e-paper displays, also made some rather interesting design choices on their laptop. See that black pad under the keyboard? No, it’s not a trackpad. It’s just a decorative cover that you remove to access an LED matrix and GPIO connectors. Make no mistake, a laptop that features a GPIO breakout right on the front is definitely our jam. But the decision to install it in place of the trackpad, and then cover it with something that looks exactly like a trackpad, is honestly just bizarre. It might not be pretty, but the Pi 400 seemed to have solved this problem well enough without any confusion.

On the other hand, there seems to be a lot to like about this product. For one, it’s a very sleek machine that doesn’t have the boxy and somewhat juvenile look that seems so common in other commercial Pi laptops. We also like that Waveshare included a proper Ethernet jack, something that’s becoming increasingly rare even on “real” laptops. As [ETA PRIME] points out in the video after the break, the machine also has a crisp IPS display and a surprisingly responsive keyboard. Though the fact that it still has a “Windows” key borders on being offensive considering how much it costs.

But really, the biggest issue with this laptop is when it finally hit the market. If Waveshare had rushed this out when the CM3 was first introduced, it probably would have been a more impressive technical achievement. On the other hand, had they waited a bit longer they would have been able to design it around the far more capable CM4. As it stands, the product is stuck awkwardly in the middle.

Continue reading “Waveshare’s Pi CM3 Laptop Arrives A Bit Too Late”