Building A Laser Head With High Speed, High Resolution

A test exposure on cyanotype paper shows off the prototype’s resolution, around 100 microns.

Typically, when it comes to scanning a laser, it’s done with galvos or a rotating mirror assembly. However, these methods can be slow and cumbersome, or restricted due to existing patents. [Rick] aimed to find an alternative solution with the Hexastorm project, using a rotating prism to build a high speed, high resolution laser head.

The project currently uses a Beaglebone for the brains, with a polygon motor sourced from a photocopier used to rotate the prism at over 20,000 rpm. The project aims to be a proof of concept for rotating prism technology, which can then be adapted to specific tasks. With the promise of high speed and high resolution, the system could be used in fields as diverse as PCB manufacture, 3D resin printing, and even virtual reality displays. [Rick] explores these potential markets in a pitch deck, comparing to existing solutions in the marketplace.

If you’re interested in high performance optical systems, [Rick]’s work makes compelling reading. It’s not the first time we’ve explored cutting edge laser hacks, either. Video after the break. Continue reading “Building A Laser Head With High Speed, High Resolution”

Another Way To Make PCBs At Home

One of the more popular ways of rolling out your own custom PCB is to simply create the model in your CAD program of choice and send it off to a board manufacturer who will take care of the dirty work for you. This way there is no need to deal with things like chemicals, copper dust, or maintaining expensive tools. A middle ground between the board manufacturer and a home etching system though might be what [igorfonseca83] has been doing: using an inexpensive laser engraver to make PCBs for him.

A laser engraver is basically a low-power laser CNC machine that’s just slightly too weak to cut most things that would typically go in a laser cutter. It turns out that the 10W system is the perfect amount of energy to remove a mask from a standard PCB blank, though. This in effect takes the place of the printer in the old toner transfer method, and the copper still has to be dissolved in a chemical solution, but the results are a lot more robust than trying to modify a printer for this task.

If you aren’t familiar with the days of yore when homebrew PCBs involved a standard desktop printer, many people still use this method, although the results can be mixed based on printer reliability. If you want to skip the middleman, and the need for a chemical bath, a more powerful laser actually can cut the traces for you, too.

Continue reading “Another Way To Make PCBs At Home”

Laser Trip Wire Hides What You’re (Not) Working On

We assume your office policy allows for reading Hackaday during work hours. But what about cruising reddit, or playing Universal Paperclips? There’s a special kind of stress experienced when attempting to keep one eye on your display and the other on the doorway; all the while convinced the boss is about to waltz into the room and be utterly disappointed in you.

But fear not, for [dekuNukem] has found the solution with Daytripper. This wireless laser tripwire communicates back to your computer using NRF24 (2.4 Ghz on the ISM band) and can be used to invisibly cordon off a door or hallway and fire a scripted action on your computer if its beam has been broken. Nominally this is used to send the keyboard command that hides all open windows, but we’re sure the imaginative readers of Hackaday could come up with all sorts of alternate uses for this capability.

The Daytripper transmitter uses a laser time-of-flight sensor, in this case the very small VL53L0X by STMicroelectronics. It’s best situated so the laser will be bounced straight back at it. It has a range of about four feet, which is perfect for covering a door, though a wide hallway could give it some trouble. [dekuNukem] admits that the 5 Hz scan rate means a sufficiently fast moving adversary might slip past the sensor, but if they’re trying that hard to see what’s on your monitor, they probably deserve a peek.

On the receiver side, there’s a small board that plugs into your computer and mimics a USB keyboard. It has a selector switch on the side that allows the user to set what key sequence will be “typed” once the system has been tripped. It has built-in support for minimizing all windows or locking the computer, or you can set it to send ALT + Pause, which you can listen for and act on however you see fit.

If you want to build your own Daytripper, the firmware and hardware are both available on GitHub under an MIT license. For those who prefer instant gratification, [dekuNukem] is doing a small production run and offering them up on Tindie.

Tuning Into Atomic Radio: Quantum Technique Unlocks Laser-Based Radio Reception

The basic technology of radio hasn’t changed much since an Italian marquis first blasted telegraph messages across the Atlantic using a souped-up spark plug and a couple of coils of wire. Then as now, receiving radio waves relies on antennas of just the right shape and size to use the energy in the radio waves to induce a current that can be amplified, filtered, and demodulated, and changed into an audio waveform.

That basic equation may be set to change soon, though, as direct receivers made from an exotic phase of matter are developed and commercialized. Atomic radio, which does not rely on the trappings of traditional radio receivers, is poised to open a new window on the RF spectrum, one that is less subject to interference, takes up less space, and has much broader bandwidth than current receiver technologies. And surprisingly, it relies on just a small cloud of gas and a couple of lasers to work.

Continue reading “Tuning Into Atomic Radio: Quantum Technique Unlocks Laser-Based Radio Reception”

Artificial Intelligence Powers A Wasp-Killing Machine

At the time of publication, Hackaday is of the understanding that there is no pro-wasp lobby active in the United States or abroad. Why? Well, the wasp is an insect that is considered incapable of any viable economic contribution to society, and thus has few to no adherents who would campaign in its favor. In fact, many actively seek to defeat the wasp, and [Tegwyn☠Twmffat] is one of them.

[Tegwyn]’s project is one that seeks to destroy wasps and Asian Hornets in habitats where they are an invasive pest. To achieve this goal without harming other species, the aim is to train a neural network to detect the creatures, before then using a laser to vaporize them.

Initial plans involved a gimballed sentry-gun style setup. However, safety concerns about firing lasers in the open, combined with the difficulty of imaging flying insects, conspired to put this idea to rest. The current system involves instead guiding insects down a small tube at the entrance to a hive. Here, they can be easily imaged at close range and great detail, as well as vaporized by a laser safely contained within the tube, if they are detected as wasps or hornets.

It’s an exciting project that could serve as a good model of how to deal with invasive insect species in the wild. We’ve seen insects grace our pages before, too.  Video after the break. Continue reading “Artificial Intelligence Powers A Wasp-Killing Machine”

Lighting Tech Dives Into The Guts Of Laser Galvanometers

There’s something magical about a laser light show. Watching that intense beam of light flit back and forth to make shapes and patterns, some of them even animated, is pretty neat. It leaves those of us with a technical bent wondering just exactly how the beam is manipulated that fast.

Wonder no more as [Zenodilodon], a working concert laser tech with a deep junk bin, dives into the innards of closed-loop galvanometers, which lie at the heart of laser light shows. Galvos are closely related to moving-coil analog meters, which use the magnetic field of a coil to deflect a needle against spring force to measure current. Laser galvos, on the other hand, are optimized to move a lightweight mirror back and forth, by tiny amounts but very rapidly, to achieve the deflection needed to trace out shapes.

As [Zeno] explains in his teardown of some galvos that have seen better days, this means using a very low-mass permanent magnet armature surrounded by coils. The armature is connected to the mirror on one end, and a sensor on the other to provide positional feedback. We found this part fascinating; it hadn’t occurred to us that laser galvos would benefit from closed-loop control. And the fact that a tiny wiggling vane can modulate light from an IR LED enough to generate a control signal is pretty cool too.

The video below may be a bit long, but it’s an interesting glimpse into the day-to-day life of a lighting tech. It puts a little perspective on some of the laser projection projects we’ve seen, like this giant Asteroids game.

Continue reading “Lighting Tech Dives Into The Guts Of Laser Galvanometers”

The Practical Approach To Keeping Your Laser In Focus

You could be forgiven for thinking that laser cutters and engravers are purely two dimensional affairs. After all, when compared to something like your average desktop 3D printer, most don’t have much in the way of a Z axis: the head moves around at a fixed height over the workpiece. It’s not as if they need a leadscrew to push the photons down to the surface.

But it’s actually a bit more complicated than that. As [Martin Raynsford] explains in a recent post on his blog, getting peak performance out of your laser cutter requires the same sort of careful adjustment of the Z axis that you’d expect with a 3D printer. Unfortunately, the development of automated methods for adjusting this critical variable on lasers hasn’t benefited from the same kind of attention that’s been given to the problem on their three dimensional counterparts.

Ultimately, it’s a matter of focus. The laser is at its most powerful when its energy is concentrated into the smallest dot possible. That means there’s a “sweet spot” in front of the lens where cutting and engraving will be the most efficient; anything closer or farther away than that won’t be as effective. As an example, [Martin] says that distance is exactly 50.3 mm on his machine.

The problem comes when you start cutting materials of different thicknesses. Just a few extra millimeters between the laser and your target material can have a big difference on how well it cuts or engraves. So the trick is maintaining that perfect distance every time you fire up the laser. But how?

One way to automate this process is a touch probe, which works much the same as it does on a 3D printer. The probe is used to find where the top of the material is, and the ideal distance can be calculated from that point. But in his experience, [Martin] has found these systems leave something to be desired. Not only do they add unnecessary weight to the head of the laser, but the smoke residue that collects on the touch probe seems to invariably mar whatever surface you’re working on with its greasy taps.

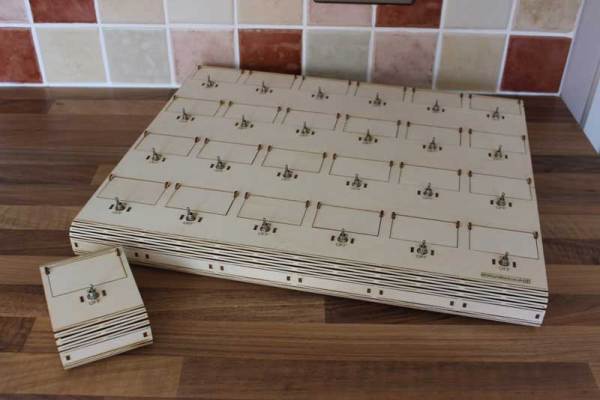
In his experience, [Martin] says the best solution is actually the simplest. Just cut yourself a little height tool that’s precisely as long as your laser’s focal length. Before each job, stick the tool in between the laser head and the target to make sure you’re at the optimal height.

On entry level lasers, adjusting the Z height is likely to involve turning some screws by hand. But you can always add a motorized Z table to speed things up a bit. Of course, you’ll still need to make sure your X and Y alignment is correct. Luckily, [Martin] has some tips for that as well.