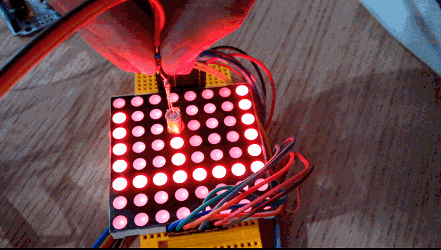
As [Shahriar] points out in the introductory matter to his latest video at The Signal Path, Arduinos are a great way for a beginner to dig into all kinds of electronic excitement, but they do so at the cost of isolating that beginner from the nitty gritty of microcontrollers. Here, [Shahriar] gives a very thorough walkthrough of a 60-neopixel ring starting with the guts and glory of a single RGB LED. He then shows how that ring can easily be programmed using a PIC and some C.
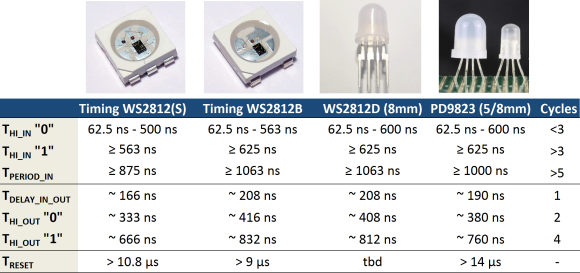
[Shahriar]’s eval board is a simple setup that he’s used for other projects. It’s based on the PIC18F4550 which he’s programming with an ICD-U64. The PIC is powered through USB, but he’s using a separate switching supply to power the ring itself since he would need ~60mA per RGB to make them burn white at full brightness.
He’s written a simple header file that pulls in the 18F4550 library, sets the fuses, and defines some constants specific to the ring size. As he explains in the video, the PIC can create a 48MHz internal clock from a 20Mhz crystal and he sets up this delay in the header as well. The main code deals with waveform generation, and [Shahriar] does a great job explaining how this is handled with a single pin. Before he lights up the ring, he puts his scope on the assigned GPIO pin to show that although the datasheet is wrong about the un-delayed width of the low period for a zero bit, it still works to program the LEDs.
[Shahriar] has the code available on his site. He is also holding a giveaway open to US residents: simply comment on his blog post or on the video at YouTube and you could win either a TPI Scope Plus 440 with probes and a manual or a Tektronix TDS2232 with GPIB. He’ll even pay the shipping.
Continue reading “PIC Up A NeoPixel Ring And C What You Can Do Using This Tutorial”
 If you’re looking to do something awesome with a graphing calculator, [Chris] is the guy to go to. He’s literally written the book on the subject.