Computer Desk… Literally

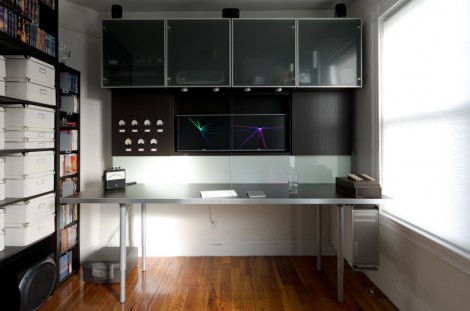
This piece of furniture begs the question, why think of a desk and a computer case as separate things? It combines Ikea furniture with electronic hardware to create the ultimate command center.

First the obvious parts: there’s a nook for the computer case that hangs just below the desktop off to the side, and the twin displays are mounted front and center. The divider between the cabinet pieces was cut away to allow the monitors to be wall-mounted. But things start to get interesting to the left of those monitors. You can see a series of dial displays in the door for that cabinet. Those meters were sourced from the MIT Flea Market and after a bit of alteration they display CPU load information fed to them by  an Arduino board. This also drives some LED strips which are mounted behind the frosted glass panel that we guess could be called a back splash. The heavier the load, the better the light show.

All of the power management is taken care of in the cabinet to the right of the monitors. The top row hides a printer, external hard drive backup system, and several gaming consoles. Heat will be an issue so exhaust fans were added to each of these partitions. They’re switched based on a temperature sensor in each. It’s a lot of work, but the outcome proves it was worth it.

[via Reddit]

Blinky Headgear

This hat has a chasing LED feature thanks to our old friend the 555 timer. [BananaSlug] even built in the option to change the speed at the push of a button.

His design starts out with a costume hat. Each of the 25 LEDs is soldered to a 2×4 hole chunk of protoboard. The LED package is pushed through a slit in the hat, but the protoboard remains on the inside where it can be sewn in place. From there [BananaSlug] soldered one negative bus around the circumference, and an individual positive lead from each module back to the control board. They’re addressed by a set of CD4017 decade counters which are clocked by the 555 timer circuit.

This is a great little analog/logic project and the style is perfect if you’ve got the coat to go along with it.

Revolight Clone

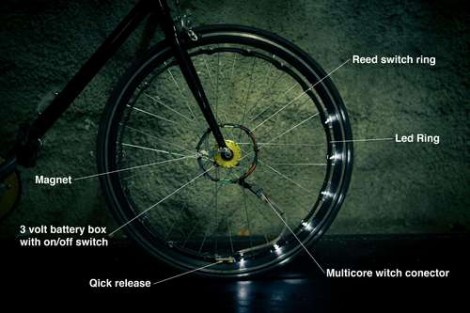
[Fabian.E] wanted to light up the rims on his bike, but didn’t want to shell out a bunch of clams to get it done. He came up with this system which uses magnets and reed switches to light up one arc or each bicycle wheel.

He calls it the lightrider and it’s based on the revolights concept. That design uses a microcontroller which is capable of animating patterns when the wheels aren’t spinning. [Fabian’s] version can’t do that, but the effect while moving is basically the same. The ring of LEDs around the rim is connected to a battery via a set of reed switches. When these switches move past a magnet on the fork it completes the circuit and switches on that segment of LEDs. The clip after the break gives a demonstration of the finished product, and includes a fast-motion video of the fabrication process.

Continue reading “Revolight Clone”

Mini Waterproof LED Lanterns Charge Without Wires

inductive-charge-led-lights

If you’re in search of a flashlight that can stand up to the elements, or simply looking for an easy way to spruce up your pool for those hot summer nights, check out these rechargeable PVC LED lights. Inspired by a post in Make: Magazine featuring Indestructible LED Lanterns, [John Duffy] decided to take the project one step further.

While he liked Make’s iteration of the waterproof lantern, he thought it would be best to permanently seal the lights for maximum durability. Not satisfied with a one-use light, he equipped the PVC lanterns with a single rechargeable AA battery, step-up circuitry to drive the LED, and an inductive charging coil.

His floating, waterproof lights sport a slightly bigger footprint than their predecessors to house the extra electronics, but we think that’s more than a fair trade off considering they can be charged wirelessly.

Place your Digikey/Mouser/Jameco orders now and check out [John’s] how-to video – you just might get some of these built in time for the weekend!

[via HackedGadgets]

Continue reading “Mini Waterproof LED Lanterns Charge Without Wires”

A Game Of Skill For The North Carolina Maker Faire

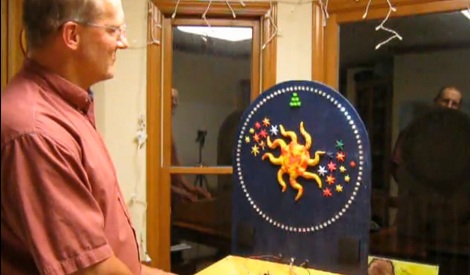
The North Carolina Maker Fare was last weekend, and over the course of the festivities  [Dave] was asked for the documentation for the arcade game he built. It’s a neat build, so we’re very glad he chose to share it with us.

Anyone who has been to an arcade in the last 15 years has seen the game [Dave] was inspired by. The object of the game is to hit a button when the sequentially illuminated lights are in a particular position. [Dave] built his own version out of 90 LEDs and a very tiny FPGA dev board.

The 90 LEDs are controlled by the FPGA using charlieplexing, and are illuminated in sequence when the game starts. A heavy-duty emergency switch button modified into a momentary push button takes a hit whenever the player thinks the LED will land in the ‘jackpot zone.’  If the player wins, a buzzer sounds and much excitement is had by all.

Seeing as how the arcade version of this game is a complete rip off and is impossible to win, we really like [Dave]’s version. You can check out his demo video after the break.

Continue reading “A Game Of Skill For The North Carolina Maker Faire”

Adding The Apple ‘breathing LED’ To A Motorcycle

[spiralbrain] has a beautiful KTM Duke 200 motorcycle, but he’s found the factory configuration is a little bit plain. Wanting to add his own unique touch to his bike, he decided to add a ‘breathing LED’ to the parking light that slowly changes its brightness much like the LED on recent Macs.

From the factory, [spiralbrain]’s bike uses extremely inefficient (and somewhat ugly) T10 lamps for the parking light. This was changed over to a 12 Volt white SMD light bulb, but what really makes this build special is the way [spiralbrain] is controlling this lamp.

[spiralbrain] added a very tiny circuit consisting of an 8-pin microcontroller (a PIC12F683) that slowly dims the new SMD light bulb using the built-in PWM module. When the bike is taken out of neutral, the microcontroller stops at the highest PWM setting so the ‘breathing’ LED function is only engaged when not moving.

It’s an interesting mod that’s sure to draw some attention when [spiralbrain] is showing off his bike. As a bonus, the mod is completely reversible, so the bike’s warranty is still good.

Homemade Silicon Carbide LED

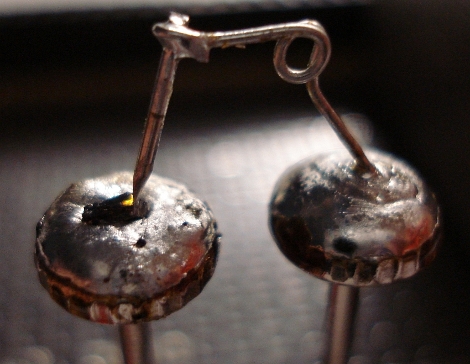
Here’s an LED indicator which was made at home out of a Silicon Carbide (SiC) crystal (Internet Archive Mirror). The concept is simple, but a bit of trial and error goes into getting that tiny amber spot to light up.

The guesswork comes in finding the right piece of crystal. First [KOS] broke it into tiny pieces, then he started poking the chunks with electrified probes to see if he could get some light out of them. Once an active area was found he needed a base for the crystal. The image above shows the two nails which he used. This provides a large mounting area that also acts as a heat sink to make sure the LED won’t burn itself out. There’s a solder blob which he kept molten with his iron until the crystal could be pushed into place. That holds it securely as the pin which serves as the cathode is positioned.

The whole setup is soldered to some protoboard and is ready to use. This is the second time we remember seeing this technique used to fabricate LEDS. The first time was an accident.