Decorative Clock Uses LED Strips To Beautiful Effect

Clocks used to be dowdy old things with mechanical hands and sometimes even little cuckoo birds that would pop out to chime the hour. [David] built something altogether more modern that uses shifting colors on LED strips to tell the time.

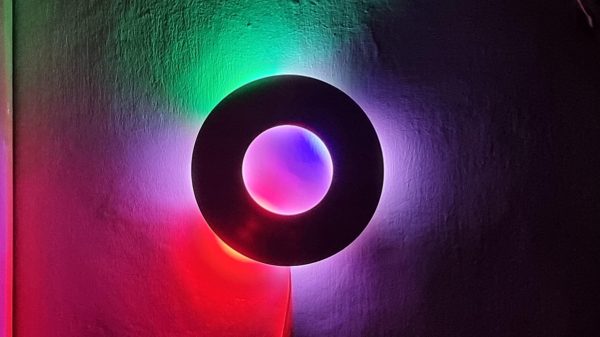
The core of the build is an ESP8266, which queries an NTP time server to keep itself synced up with the current time as accurately as possible. It then controls a WS2812B LED strip to display the time. The strip itself is hidden in a 3D-printed housing behind an opaque wooden ring, with the light from the LEDs diffusing out nicely on to the wall upon which the clock is mounted.

The display shows three “hands” in the colors it projects on the wall. The red second hand is projected inside and outside the ring. The minute hand is green, and projects outside the ring. Meanwhile, the hour hand is blue, and projects inside the ring. Without any numerical markings, you won’t get an exact reading of the time, but you can figure it out closely enough. As a bonus, the clock looks like a stylish light-based wall sculpture and your guests may not even realizes it tells the time.

We’ve featured [David’s] work before too, in the form of the handy ESP8266 breadboard socket. Video after the break.

Continue reading “Decorative Clock Uses LED Strips To Beautiful Effect”
LED Displays May Get Vertical Integration

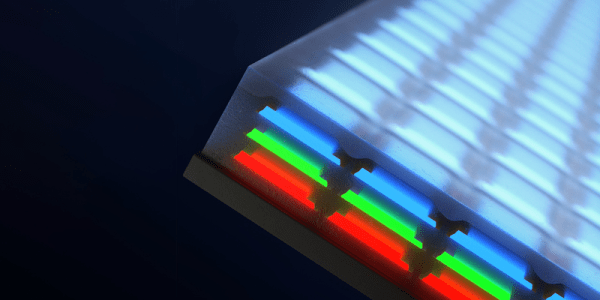
If you zoom into the screen you are reading this on, you’d see an extremely fine pattern of red, green, and blue emitters, probably LEDs of some kind. This somewhat limits the resolution you can obtain since you have to cram three LEDs into each screen pixel. Engineers at MIT, however, want to do it differently. By growing thin LED films and sandwiching them together, they can produce 4-micron-wide LEDs that produce the full range of color, with each color part of a vertical stack of LEDs.

To put things in perspective, a standard TV LED is at least 200 microns across. Mini LEDs measure upwards of 100 microns, and micro LEDs are the smallest of all. A key factor for displays is the pitch — the distance from the center of one pixel to the center of the next. For example, the 44mm version of the Apple Watch has a pitch of around 77 microns. A Samsung Galaxy 10 is just over 46 microns.  This is important because it sets the minimum size for a high-resolution screen, especially if you are building large screens (such as when you build custom video walls (see the video below for more about that).

Continue reading “LED Displays May Get Vertical Integration”

Build A Circuit Sculpture-Style VU Meter For Music

One of the coolest things any sound system can have is some kind of musical visualization. Thumping level meters that pump with the volume are a great example, and were particularly popular in the 1980s. Now, you can build a rainbow set with great response, thanks to this guide from [Invexlab World].

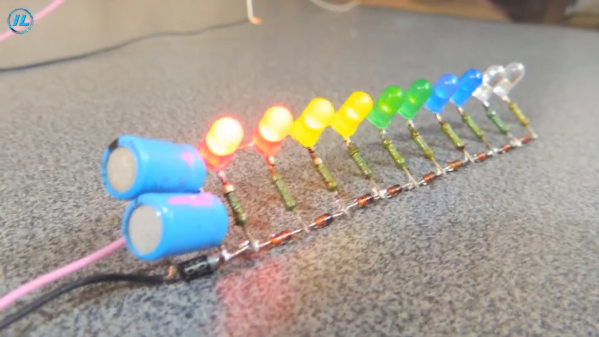
The build relies on a very simple circuit that relies entirely on analog electronics in lieu of the usual digital signal analysis usually employed for the job. It’s a barebones design that’s assembled using a jig to create the attractive circuit sculpture structure. It uses simple colored LEDs, assembled in a line with red at the bottom, stepping through yellow and green, to blue and white at the top. A series of diodes is placed in series, with the sound level having to exceed the voltage drop of successive diodes to light the higher LEDs. It’s intended to be directly connected to a speaker’s audio input, and thus likely does load down the amplifier output slightly.

The result is an attractive rainbow VU meter display that would look great as a part of any old-school stereo setup. We can imagine it would look even better if it was cast in clear resin. Video after the break.

Continue reading “Build A Circuit Sculpture-Style VU Meter For Music”

Surgery On An LED To Preserve Vintage Aesthetics

[Chris Jones] recently found himself in a pickle. An indicator LED off an old piece of stereo equipment had failed. It was a strange rectangular type for which he could source no modern substitute. Using a different LED would ruin the aesthetic. Thus, what else was [Chris] to do, but attempt surgery on an LED!

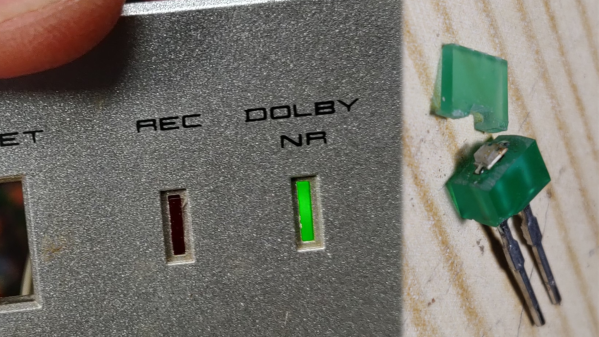
The first attempt was the simplest. [Chris] tried soldering a small SMD LED between the legs of the existing part, which was open circuit. It worked, but the light didn’t really propagate to the top of the LED’s plastic. It was too dim to do the job.

Unperturbed, [Chris] instead elected to cut the LED apart. he soldered the SMD LED to the original LED’s leads, inside its body this time. The top part of the plastic lens was then notched to fit snugly over the new SMD part. A bit of superglue then joined everything back together. The finished product looks a touch messy on the PCB. However, installed back inside the stereo, it’s a perfectly stealth fix that looks great.

Some will consider this fix frivolous and a waste of time. Others will appreciate the way it preserved the attractive retro look of a piece of vintage audio gear. In any case, we can all agree that modern LEDs are often a great replacement for older parts in many cases. If you’ve pulled off your own weird, oddball repair hacks, don’t hesitate to share us with them on the tipsline!

Binary Watch Rocks A Bare PCB With Pride

Most of us learn to read digital clocks first, which display the time in obvious numbers. Analog clocks are often learned later, with the hands taking our young brains a little longer to figure out. Once you’ve grown into a 1337h4XX0r, though, you’re ready to learn how to read a binary watch. Then you can build your own, just like [taifur] did.

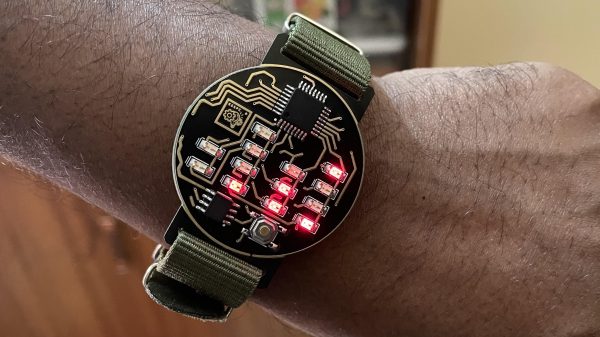
The watch rocks a simplistic, bare bones design with the PCB acting as the body of the device itself. It’s not great for water resistance, or even incidental contact, but it’s a sharp look with the golden traces on display. The heart of the operation is a ATmega328P, as seen in the popular Arduino Uno, and it’s paired with a DS3231M real-time clock module to keep accurate time. 13 SMD LEDs are charged with displaying the time in binary format, with [taifur] choosing to spec a classic red color for the build. The watch is powered via a CR2032 coin cell, which you’re best advised not to swallow. So far, [taifur] has found the watch will last for over a month before the battery is tapped out.

It’s a fun build, and one that looks good when paired with a classic NATO watch strap in green. If, however, you desire a watch that definitely won’t last a month on a single coin cell, you can always build a Nixie watch instead. Video after the break.

Continue reading “Binary Watch Rocks A Bare PCB With Pride”

LED Driver Circuit For Safety Hat Sucks Single AAA Cell Dry

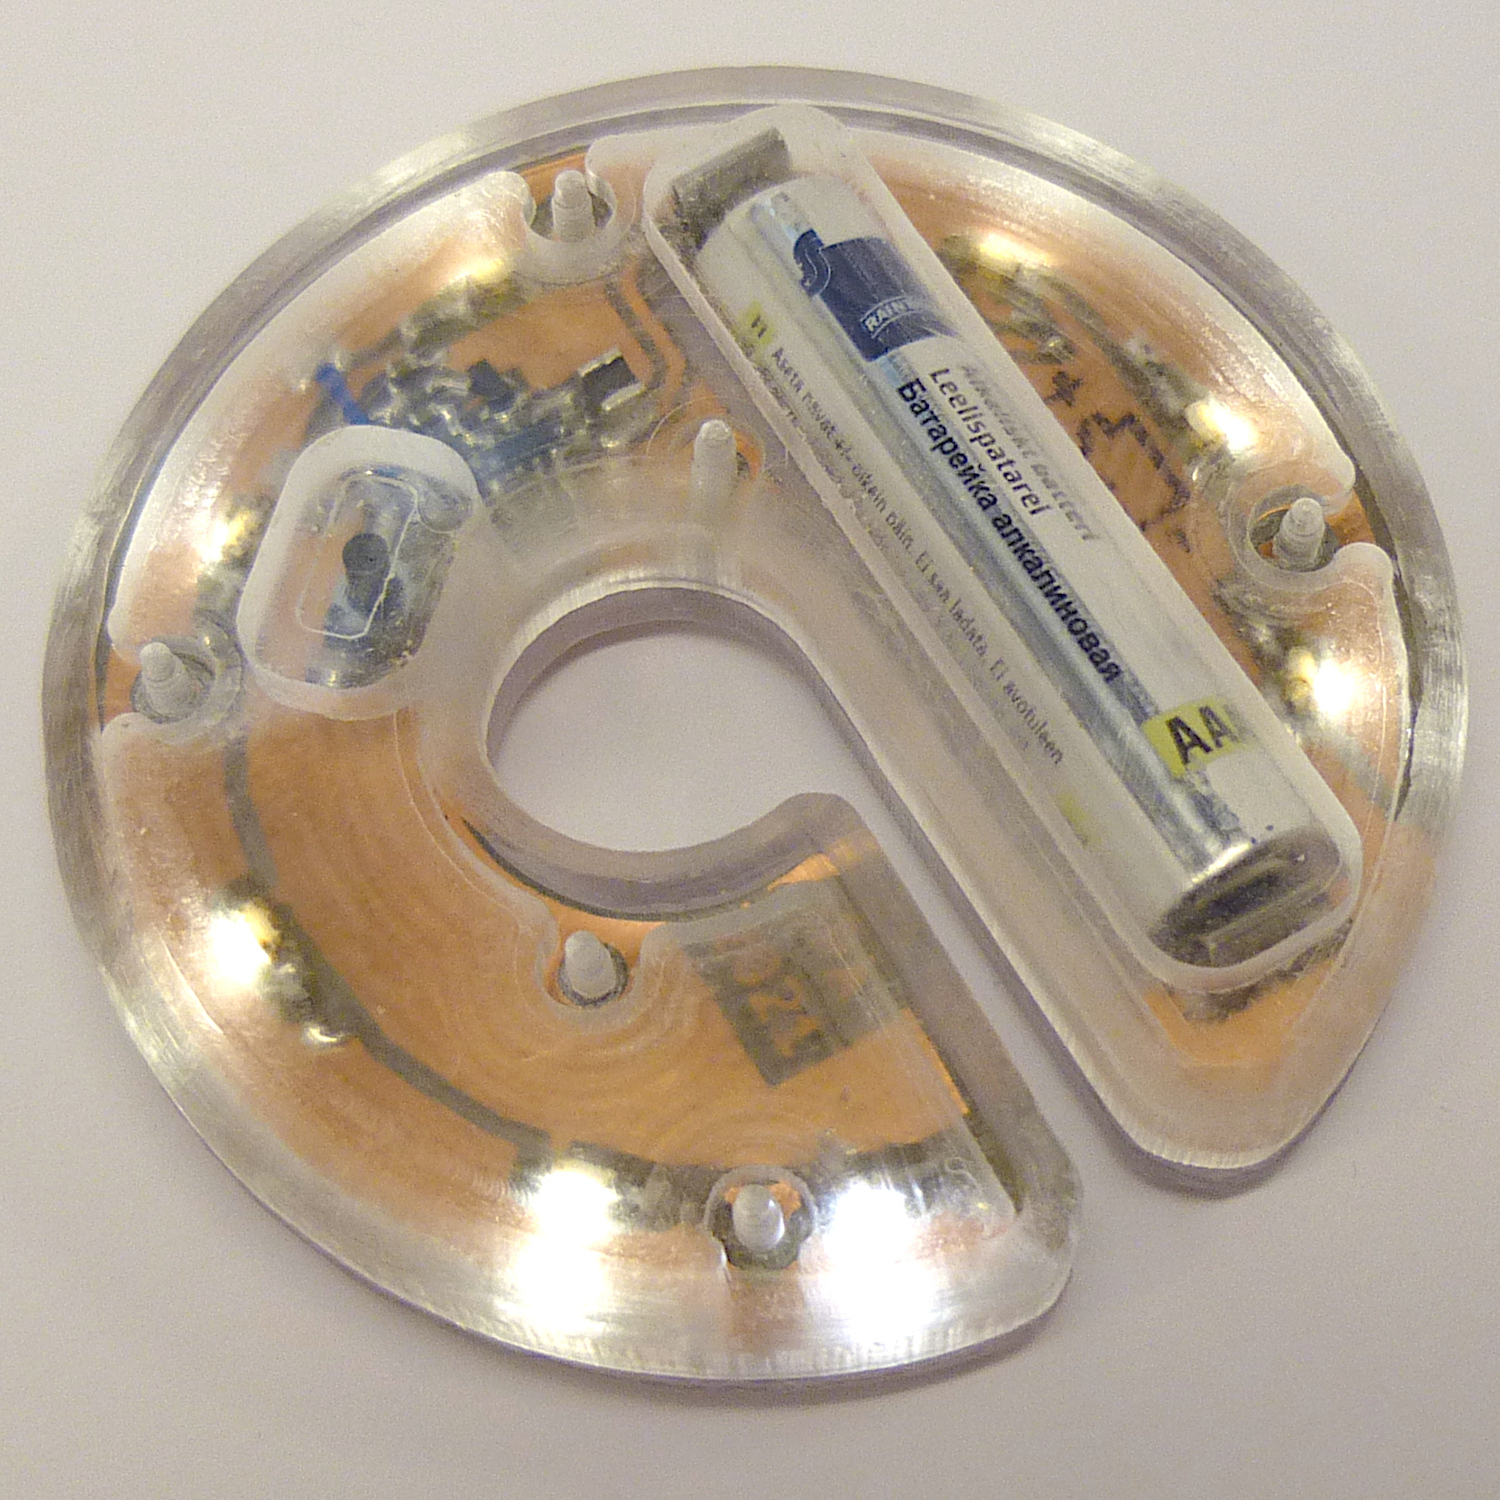
[Petteri Aimonen] created an omnidirectional LED safety light to cling to his child’s winter hat in an effort to increase visibility during the dark winter months, but the design is also great example of how to use the Microchip MCP1640 — a regulated DC-DC step-up power supply that can run the LEDs off a single AAA cell. The chip also provides a few neat tricks, like single-button on/off functionality that fully disconnects the load, consuming only 1 µA in standby.

[Petteri]’s design delivers 3 mA to each of eight surface-mount LEDs (which he says is actually a bit too bright) for a total of about 20 hours from one alkaline AAA cell. The single-layer PCB is encased in a clear acrylic and polycarbonate enclosure to resist moisture. A transistor and a few passives allow a SPST switch to act as an on/off switch: a short press turns the unit on, and a long press of about a second turns it back off.

One side effect is that the “off” functionality will no longer work once the AAA cell drained too badly, but [Petteri] optimistically points out that this could be considered a feature: when the unit can no longer be turned off, it’s time to replace the battery!

The usual way to suck a battery dry is to use a Joule Thief, and while this design also lights LEDs, it offers more features and could be adapted for other uses easily. Interested? [Petteri] offers the schematic, KiCAD file for the PCB, and SVG drawing of the enclosure for download near the bottom of the project page.

Blinky Business Card Plays Snake And Connect Four

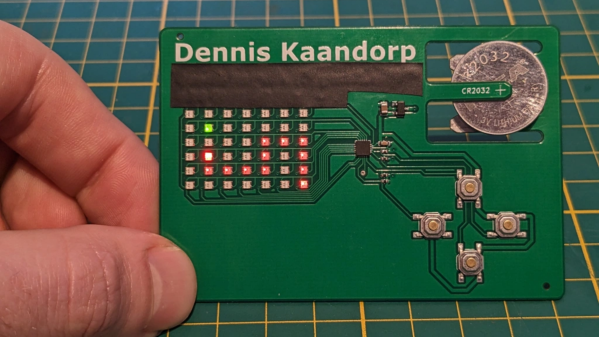
There’s no better way to introduce yourself than handing over a blinky PCB business card and challenging the recipient to a game of Connect Four. And if [Dennis Kaandorp] turns up early for a meeting, he can keep himself busy playing the ever popular game of Snake on his PCB business card.

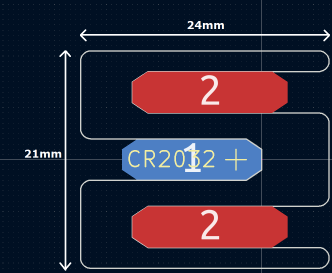
The tabs are 19 mm long and 4 mm wide.

Quite wisely, [Dennis] kept his design simple, and avoided the temptation of feature creep. His requirements were to create a minimalist, credit card sized design, with his contact details printed on the silk legend, and some blinky LED’s.

The tallest component on such a design is usually the battery holder, and he could not find one that was low-profile and cheap. Drawing inspiration from The Art of Blinky Business Cards, he used the 0.8 mm thin PCB itself as the battery holder by means of flexible arms.

Connect-Four is a two player game similar to tic-tac-toe, but played on a grid seven columns across and six rows high. This meant using 42 dual-colour LED’s, which would require a large number of GPIO pins on the micro-controller. Using a clever combination of matrix and charlieplexing techniques, he was able to reduce the GPIO count down to 13 pins, while still managing to keep the track layout simple.

It also took him some extra effort to locate dual colour, red / green LED’s with a sufficiently low forward voltage drop that could work off the reduced output resulting from the use of charlieplexing. At the heart of the business card is an ATtiny1616 micro-controller that offers enough GPIO pins for the LED matrix as well as the four push button switches.

His first batch of prototypes have given him a good insight on the pricing and revealed several deficiencies that he can improve upon the next time around. [Dennis] has shared KiCad schematic and PCB layout files for anyone looking to get inspired to design their own PCB business cards.

Continue reading “Blinky Business Card Plays Snake And Connect Four”