Replacement LED Light Build Uses A Few Tricks

Microscopes have become essential work bench tools for hackers, allowing them to work with tiny SMD parts for PCB assembly and inspection. Couple of years back, mad scientist [smellsofbikes] picked up a stereo microscope from eBay. But its odd-sized, 12 volt Edison-style screw base lamp, connected to a 17 volt AC supply, burned off after a while. He swapped the burnt lamp with the spare, which too blew up after some time. Dumb lamps. Maybe the original spec called for 24 volt lamps, which were unobtanium due to the odd Edison screw base, but those would throw out a pretty yellow-orange glow. Anyhow, for some time, he worked with a jury-rigged goose neck lamp, but frequently moving the microscope and the lamp was becoming a chore. When he got fed up enough about it, he decided to Build a Replacement LED Microscope Light.
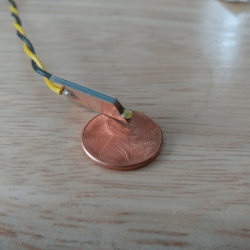
Usually, such builds are plain vanilla and not much to write in about, but [smellsofbikes] has a few tricks worth taking note of. He found a couple of high power, SMD LEDs in his parts bin. They were just slightly wider than 1.6 mm across the terminals. So he took a piece of double sided, copper clad FR4, and edge mounted the LED against one side of the PCB piece, twisting it slightly so he could solder both terminals. This works as a great heat sink for the LED while still having a very narrow profile. This was important as the replacement LED board had to fit the cylinder in which the original lamp was fitted.

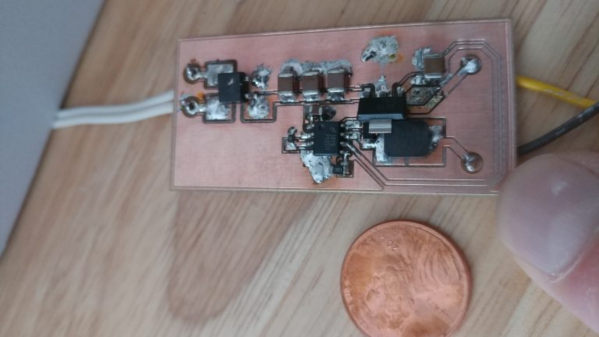
The LED is driven by a constant current buck regulator, powered by the original 17 volt transformer. A bridge rectifier and several filter capacitors result in a low ripple DC supply, for which he used the KiCad spice functionality to work out the values. The LM3414 driver he used is a bit off the beaten track. It can run LEDs up to 60 watts at 1 amps and does not require an external current sense resistor. This was overkill since he planned to run the LED at just 150 mA, which would result in a very robust, long lasting solution. He designed the driver PCB in KiCad, and milled it on his LPKF circuit board plotter. The nice thing with CNC milled PCBs is that you can add custom copper floods and extend footprint pads. This trick lets you solder either a 0805 or a 1206 part to the same footprint – depending on what you can dig up from your parts bin.

Continue reading “Replacement LED Light Build Uses A Few Tricks”
A Wi-Fi Enabled Dog!

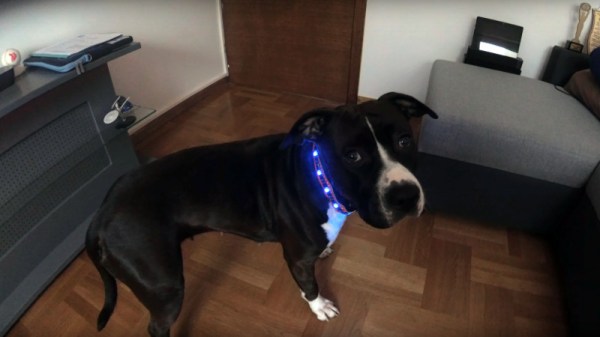
Our canine friends have been at our side for millennia, their prehistoric wolf ancestors evolving alongside us into the breeds we know today. But astoundingly until now no dog has been Wi-Fi enabled, at least according to [Entropy], whose dog [Kaya] now sports a colourful Wi-Fi enabled collar.

Light-up dog collars and harnesses have been with us for a while, and serve the very useful purpose of protecting the animals from accidents by making them visible at night, but [Kaya]’s colar was a particularly disappointing example. Its single light and lacklustre optical fibre coupled with disappointing battery life left much to be desired, so when it broke there was ample excuse to upgrade it. In went a strip of addressable LEDs and an ESP32 module, along with an 18650 lithium-ion cell. We’re a bit unsure whether lights can be controlled from a mobile phone, but perhaps the most significant benefit lies elsewhere. The Wi-Fi hotspot from the ESP32 serves as a beacon to find [Kaya] within a short distance should she wander off, which as any dog owner will tell you can be a boon when they’re investigating some fascinating new smell and ignoring your calls. You can see her modelling the collar in the video below the break.

Canine hacks appear on these pages from time to time. One of our favourites is this not very successful but highly amusing remote controlled dog.

Continue reading “A Wi-Fi Enabled Dog!”

Building A Website-Controlled Christmas Tree

Back in the day, Christmas lights were simple strings of filament bulbs, and if you really splashed out, you could get some that flashed. These days, we expect a lot more capability out of our blinking decorations. [JT] has put together a rather nifty website-controlled setup for his own tree.

The setup is a little different than builds you may be used to. The website runs on a cloud-hosted virtual machine on Digital Ocean, rather than running locally. This allows anyone on the web to visit the site, and use the interface to control the lights on the Christmas tree. An image of the tree is used as the interface, and allows users to set the color of each individual LED on the tree. The LEDs themselves are driven from an NodeMCU ESP8266, which uses its WiFi connection to query the website itself and grab the color data as needed. [JT] has also included a secondary interface, where the chat of the Youtube livestream can be used to control the LEDs, too.

It’s a build that’s a touch more complicated than most typical online LED blinkers, but one that teaches useful skills in interfacing on the web and using virtual machines. We’ve seen other builds in this genre too; even some that are reactive to “Christmas fever” itself. Video after the break.

Continue reading “Building A Website-Controlled Christmas Tree”

DIY 8-Bit Computer Knows All The Tricks

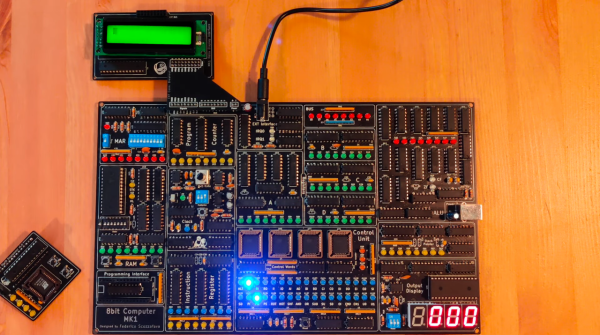
Some projects are a rite of passage within their respected fields. For computer science, building one’s own computer from scratch is certainly among those projects. Of course, we’re not talking about buying components online and snapping together a modern x86 machine. We mean building something closer to a fully-programmable 8-bit computer from the ground up, like this one from [Federico] based on 74LS logic chips.

The computer was designed and built from scratch which is impressive enough, but [Federico] completed this project in about a month as well. It can be programmed manually through DIP switches or via a USB connection to another computer, and also includes an adjustable clock which can perform steps anywhere from 1 Hz to 32 kHz. Complete with a 1024 byte memory, a capable ALU, four seven-segment LEDs and (in the second version of the computer) a 2×16 LCD disply, this 8-bit computer has it all.

Not only is this a capable machine designed by someone who clearly knows his way around a logic chip, but [Federico] has also made the code and schematics available on his GitHub page. It’s worth a read even without building your own, but if you want to go that route without printing an enormous PCB you can always follow the breadboard route.

Thanks to [killergeek] for the tip!

Continue reading “DIY 8-Bit Computer Knows All The Tricks”

LEDs-On-Chips Will Give Us Lower Cost Optoelectronics

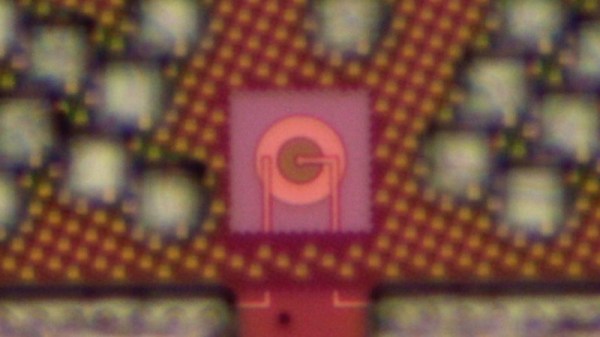
The LED is one of those fundamental building block components in electronics, something that’s been in the parts bin for decades. But while a simple LED costs pennies, that WS2812 or other fancy device is a bit expensive because internally it’s a hybrid of a silicon controller chip and several LEDs made from other semiconductor elements. Incorporating an LED on the same chip as its controller has remained something of a Holy Grail, and now an MIT team appear to have cracked it by demonstrating a CMOS device that integrates a practical silicon LED. It may not yet be ready for market but it already displays some interesting properties such as a very fast switching speed. Perhaps more importantly, further integration of what have traditionally been discrete components would have a huge impact on reducing manufacturing costs.

Anyone who has read up on the early history of LEDs will know that the path from the early-20th-century discoveries of semiconductor luminescence through the early commercial devices of the 1960s and up to the bright multi-hued devices of today has been a long one with many stages of the technology reaching the market. Thus these early experimental silicon LEDs produce light in the infrared spectrum often useful in producing sensors. Whether we’ll see an all-silicon Neopixel any time soon remains to be seen, but we can imagine that some sensors using LEDs could be incorporated on the same die as a microcontroller. It seems there’s plenty of potential for this invention.

This research was presented earlier this month at the IEDM Conference in a talk entitled Low Voltage, High Brightness CMOS LEDs. We were not able to find a published paper, we’d love read deeper so let us know in the comments below if you have info on when this will become available. In the meantime, anyone with any interest in LED technology should read about Oleg Losev, the inventor of the first practical LEDs.

Squeezing Every Bit From An ATMega

While the ATMega328 is “mega” for a microcontroller, it’s still a fairly limited platform. It has plenty of I/O and working memory for most tasks, but this Battleship game that [thorlancaster328] has put together really stretches the capabilities of this tiny chip. Normally a Battleship game wouldn’t be that complicated, but this one has audio, an LED display, and can also play a fine rendition of Nyan Cat to boot, which really puts the Atmel chip through its paces.

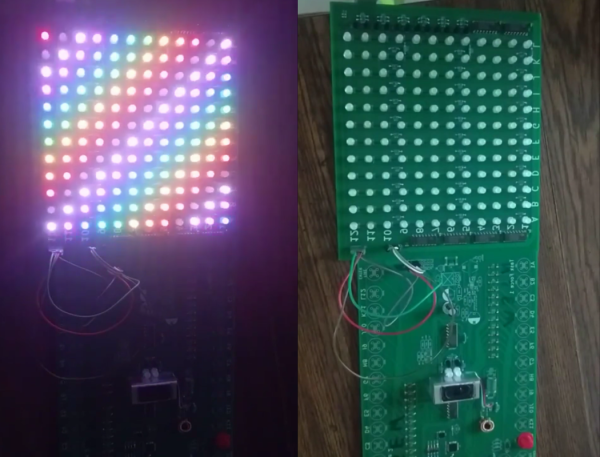
The audio is played through a 512-byte buffer and an interrupt triggers the microcontroller when to fill the buffer while it works on the other processes. The 12×12 LED display is also fed through a shift register triggered by the same interrupt as the audio, and since the build uses so many shift registers the microcontroller can actually output four separate displays (two players, each with a dispaly for shots and one for ships). It will also eventually support a player-vs-computer mode for the battleship game, and also has a mode where it plays Nyan cat just to demonstrate its own capabilities.

We’re pretty impressed with the amount of work this small microcontroller is doing, largely thanks to code optimization from its creator [thorlancaster328]. If there’s enough interest he also says he will provide the source code too. Until then, be sure to check out this other way of pushing a small microcontroller to its limits.

Thanks to [Thinkerer] for the tip!

Discrete LEDs Make A Micro Display

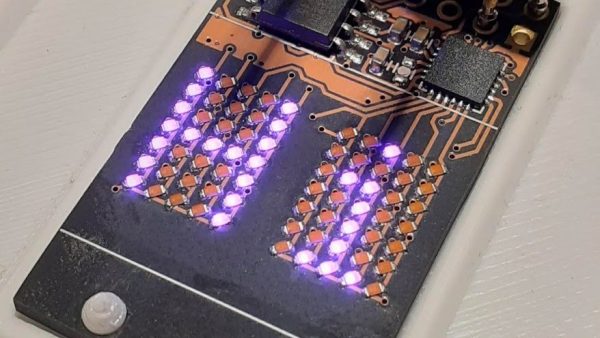
Few things excite a Hackaday staff member more than a glowing LED, so it should be no surprise that combining them together into a matrix really gets us going. Make that matrix tiny, addressable, and chainable and you know it’ll be a hit at the virtual water cooler. We’ve seen [tinyledmatrix]’s work before but he’s back with the COPXIE, a pair of tiny addressable displays on one PCBA.

The sample boards seen at top are a particularly eye catching combination of OSH Park After Dark PCB and mysterious purple SMT LEDs that really explain the entire premise. Each PCBA holds two groups of discrete LEDs each arranged into a 5×7 display. There’s enough density here for a full Latin character set and simple icons and graphics, so there should be enough flexibility for all the NTP-synced desk clocks and train timetables a temporally obsessed hacker could want.

Continue reading “Discrete LEDs Make A Micro Display”