Blinging Buttons For Pick And Place

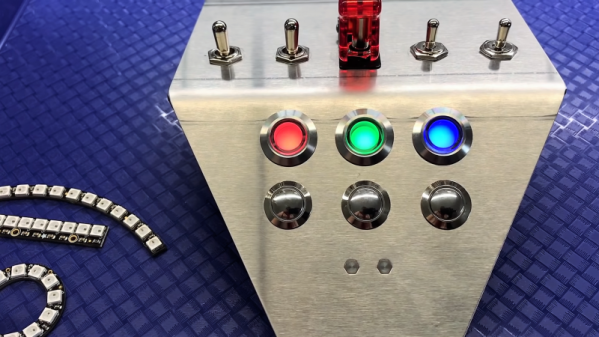
With 3D-printing, cheap CNC machines, and the huge variety of hardware available these days, really slick-looking control panels are getting to be commonplace. We’re especially fond of those nice indicators with the chrome bezels, and the matching pushbuttons with LED backlighting; those can really make a statement on a panel.

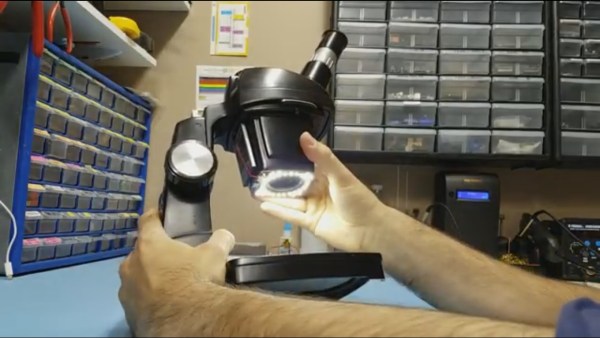
Sadly for [Proto G], though, the LEDs in his indicator of choice were just boring old one-color units, so he swapped them out and made these addressable RGB indicators. The stock lamps are not cheap units, but they do have a certain look, and they’re big enough to allow room for a little modification. The original guts were removed with a Dremel to make way for a Neopixel board. [Proto G] wanted to bring the board’s pads out to screw terminals, so he had to adapt the 3.0-mm pitch blocks he had on hand to the 2.54-mm pitch on Neopixel board, but that actually came out neater than you’d think. With a little hot glue to stick it all back together, he now has fully-addressable indicators that can be daisy-chained together and only take up a single GPIO pin.

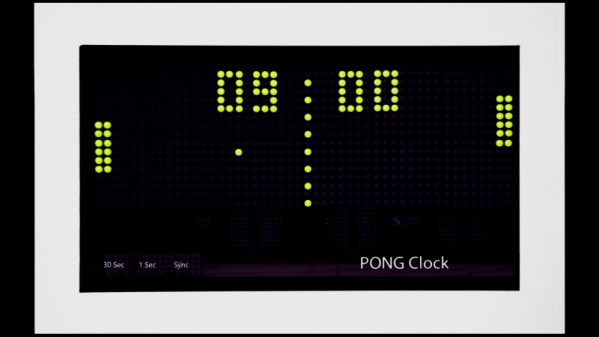
These indicators and the nice looking panel they’re on is part of a delta pick-and-place robot build [Proto G] has been working for a while. He’s had some interesting side projects too, like the clickiest digital clock in the world and easing ESP32 setup for end-users. While we like all his stuff, we can’t wait to write up the finished delta.

Continue reading “Blinging Buttons For Pick And Place”

LEDs Make An “Analog” Wristwatch

If you just came down in the last shower, you’re probably used to living in a world where LEDs are cheap, awesome, and practically everywhere. Spare a thought for those of us who lived before the invention of high brightness LEDs – these things still amaze us! A great example of how far we’ve come is this “analog” watch build by [Kevin], featuring no less than 73 of the critters.

The microcontroller running the watch is an STM32, chosen for its easy programmability. It’s running the LEDs in an emulation of the dial of an analog clock, hence the high part count. Naturally, it’s no simple task to cram 73 LEDs and all the necessary connections into the confines of a watch-sized PCB. [Kevin] goes into great detail about the challenges involved, from routing the traces to a tricky power draw problem caused by some odd blue LEDs.

Watch builds are always fun, and they make great conversation pieces for when you want to amaze strangers with your tales of battles fought in the PCB design suite. Now check out this similar build with an entirely different style. 


Wireless SMD microscope ring light

Wireless Ring Light For SMD Microscope

When [Felix Rusu], maker of the popular Moteino boards which started life as wireless Arduino compatibles, says he’s made a wireless ring light for his SMD microscope, we redirect our keystrokes to have a look. Of course, it’s a bit of wordplay on his part. What he’s done is made a new ring light which uses a battery instead of having annoying wires go to a wall wart. That’s important for someone who spends so much time hunched over the microscope. Oh, and he’s built the ring light on a rather nice looking SMD board.

The board offers a few power configurations. Normally he powers it from a 1650 mAh LiPo battery attached to the rear of his microscope. The battery can be charged using USB or through a DC jack for which there’s a place on the board, though he hasn’t soldered one on yet. In a pinch, he can instead power the light from the USB or the DC jack, but so far he’s getting over 6 hours on a single charge, good enough for an SMD session.

The video below shows his SMD board manufacturing process, from drawing up the board in Eagle, laser cutting holes for a stencil, pasting, populating the board, and doing the reflow, along with all sorts of tips along the way. Check it out, it makes for enjoyable viewing.

Here’s another microscope ring light with selectable lighting patterns for getting rid of those pesky shadows. What features would make your SMD sessions go a little easier?

Continue reading “Wireless Ring Light For SMD Microscope”

Clock Plays A Game Of Pong With Itself To Pass The Time

Would you play a game of Pong where each set lasts exactly one minute and the right player is guaranteed to win 60 times more than the left player? Of course not, but if you were designing a clock that displays the time using a Pong motif, then perhaps it would make sense.

There are some neat design tips in [oliverb]’s Pong Clock that are worth taking a look at. Foremost is the case, which is a retasked jewelry box with a glass lid, procured on the cheap from eBay. It’s a good size for a clock meant to be seen from across the room, and already finished to fit into modern decor. The case holds all the goodies, from the 24×16 green LED matrix display to the Uno that runs the show, as well as an RTC module, a sound chip, a temperature sensor, and a PIR module to turn the display off when the room is unoccupied. To prevent disrupting the sleek lines of the case, all the controls are mounted in a remote panel, itself a clean and modern-looking device thanks to the chrome-plated duplex outlet cover used to house it. The clock has several display modes, from normal time and temperature to a word clock, as well as the Pong mode, where the machine plays itself and the score shows the time. It’s fascinating to watch, and we like everything about it, although we think the tick-tock would drive us nuts pretty quickly.

We recently covered the life and times of [Ted Dabney], one of Pong’s fathers and co-founder of Atari. We tend to think he’d like the design of this clock, both as a nod to his game and for its simple but functional design.

Continue reading “Clock Plays A Game Of Pong With Itself To Pass The Time”

An Artsy And Functional LED Filament Lamp

Some projects end up being more objet d’art than objet d’utile, and we’re fine with that — hacks can be beautiful too. Some hacks manage both, though, like this study in silicon and gallium under glass that serves as a bright and beautiful desk lamp.

There’s no accounting for taste, of course, but we really like the way [commanderkull]’s LED filament lamp turned out, and it’s obvious that a fair amount of work went into it. Five COB filament strips were suspended from a lacy frame made of wire, which also supports the custom boost converter needed to raise the 12-volt input to the 60 volts needed by the filaments. The boost converter is based on the venerable 555 timer chip, which sits in the middle of the frame suspended by its splayed-out legs and support components. The wooden base sports a few big electrolytics and some hand-wound toroidal inductors, as well as the pot for adjusting the lamp’s brightness. The whole thing sits under a glass bell jar, which catches the light from the filaments and plays with it in a most appealing way.

There’s just something about that dead bug building technique that we love. We’ve seen it before — this potentially dangerous single-tube Nixie clock comes to mind — but we’d love to see it done more.

[via r/electronics]

A YouTube Subscriber Counter With A Tetris Twist

When it comes to YouTube subscriber counters, there’s not much wiggle room for creativity. Sure, you can go with Nixies or even more exotic displays, but in the end a counter is just a bunch of numbers.

But [Brian Lough] found a way to jazz things up with this Tetris-playing YouTube sub counter. For those of you not familiar with [Brian]’s channel, it’s really worth a watch. He tends toward long live-stream videos where he works on one project for a marathon session, and there’s a lot to learn from peeking over his virtual shoulder. This project stems from an earlier video, posted after the break, which itself was a condensation of several sessions hacking with the RGB matrix that would form the display for this project. He’s become enamored of the cheap and readily-available 64×32 pixel RGB displays, and borrowing an idea from Mc Lighting author [toblum], he decided that digits being assembled from falling Tetris blocks would be a nice twist. [Brian] had to port the Tetris-ifying code to Arduino before getting the ESP8266 to do the work of getting the subs and updating the display. We think the display looks great, and the fact that the library is open and available means that you too can add Tetris animations to your projects.

None of this is to say that more traditional sub counters can’t be cool too. From a minimalist display to keeping track of all your social media, good designs are everywhere. And adding a solid copper play button is a nice touch too.

Continue reading “A YouTube Subscriber Counter With A Tetris Twist”

Buttery Smooth Fades With The Power Of HSV

In firmware-land we usually refer to colors using RGB. This is intuitively pleasing with a little background on color theory and an understanding of how multicolor LEDs work. Most of the colorful LEDs we are use not actually a single diode. They are red, green, and blue diodes shoved together in tight quarters. (Though interestingly very high end LEDs use even more colors than that, but that’s a topic for another article.) When all three light up at once the emitted light munges together into a single color which your brain perceives. Appropriately the schematic symbol for an RGB LED without an onboard controller typically depicts three discrete LEDs all together. So it’s clear why representing an RGB LED in code as three individual values {R, G, B} makes sense. But binding our representation of color in firmware to the physical system we accidentally limit ourselves.

The inside of an RGB LED

Last time we talked about color spaces, we learned about different ways to represent color spatially. The key insight was that these models called color spaces could be used to represent the same colors using different groups of values. And in fact that the grouped values themselves could be used to describe multidimensional spacial coordinates. But that post was missing the punchline. “So what if you can represent colors in a cylinder!” I hear you cry. “Why do I care?” Well, it turns out that using colorspace can make some common firmware tasks easier. Follow on to learn how!

Continue reading “Buttery Smooth Fades With The Power Of HSV”