Spice Up Your Bench With 3D Printed Dancing Springs

Not all projects are made equal. Some are designed to solve a problem while others are just for fun. Entering the ranks of the most useless machines is a project by [Vladimir Mariano] who created the 3D Printed Dancing Springs. It is a step up from 3D printing a custom slinky and will make a fine edition to any maker bench.

The project uses 3D printed coils made of transparent material that is mounted atop geared platforms and attached to a fixed frame. The gears are driven by a servo motor. The motor rotates the gears and the result is a distortion in the spring. This distortion is what the dancing is all about. To add to the effect, [Vladimir Mariano] uses RGB LEDs controlled by an ATmega32u4.

You can’t dance without music. So [Vladimir] added a MEMs microphone to pick up noise levels which are used to control the servo and lights. The code, STL files and build instructions are available on the website for you to follow along. If lights and sound are your things, you must check out the LED Illuminated Isomorphic Keyboard from the past. Continue reading “Spice Up Your Bench With 3D Printed Dancing Springs”

Edge-lit Pendants Show Two Layers Are Better Than One

Engraved acrylic lights up nicely with LED lighting. Simply engrave clear acrylic with a laser engraver, then edge-light the acrylic and watch the engraving light up. This badge made by [Solarbotics] shows how they used this principle when creating some pendants for an event that performed particularly well in the dark.

The pendants they created have two engraved acrylic panels each, and that’s about it. Two LEDs and a CR2032 battery nestle into pre-cut holes, and the engraved sides are placed face-to-face, so the outer surfaces of the pendant are smooth. By using some color-cycling RGB LEDs on one panel and blue LEDs on the other panel, the effect is that of an edge-lit outer design with a central element that slowly changes color separately from the rest of the pendant.

The design stacks the LED leads and coin cells in such a way that a simple wrap of tape not only secures things physically, but also takes care of making a good electrical connection. No soldering or connectors of any kind required. [Solarbotics] found that CR2032 cells would last anywhere between a couple of days to a week, depending on the supplier.

This design is great for using a minimum of materials, but if that’s not a priority it’s possible to go much further with the concept. Multiple layers of edge-lit acrylic were used to make numeric 0-9 display modules as well as a full-color image.


No-Solder Breadboarding For SMD LEDs

Breadboarding is a great way to get started with electronics, and with the wide availability of those little wire jumpers, it’s never been easier – until you hit roadblocks due to poor connections and parasitic capacitance futzing with your signals. However, in today’s current climate, the latest and greatest modules are too often available only in SMD packages, and while breakout boards can help, it’s probably overcomplicating things a bit when it comes to SMD LEDs. It’s all good, though – [Simon Merrett] has a workaround, as part of his Yapolamp project.

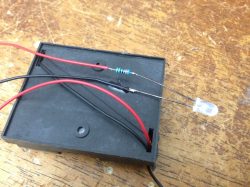
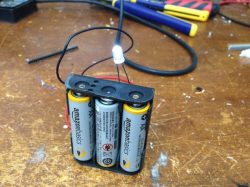
[Simon] first took a flat strip of steel, and placed two neodymium magnets on top. The assembly was then wrapped in electrical tape for insulation, and two contacts were created with copper tape. The LEDs were then placed across the two contacts and wires were attached to join them to the breadboard. The 5630 LEDs [Simon] must contain some sort of ferrous material, because they were attracted to the magnets and sat neatly in place.

It’s a neat hack that would be particularly useful if you needed to quickly swap out LEDs, and saves them from damage by soldering. Meanwhile, check out this SMD LED matrix from 2009. 

Graduation Cap Shows Us What It’s Got!

A high school graduation ceremony is well due the pomp and circumstance for making it through one of life’s many milestones. To commemorate the event with their own flair, redditor [PM_(cough)_FOR_KITTENS] hid a 32 x 32 GIF-playing LED matrix in their graduation cap!

The board is controlled by a Teensy hosting a SmartMatrix shield. With the shield’s assistance, the matrix enables scrolling text and GIFs to play across the LEDs, as well as an SD card slot to load up your favourites. Currently, it’s set to a 50-50 chance of playing a gif — one of sixty — or one of the twenty scrolling text lines loaded onto the SD card. [PM_(ahem)_FOR_KITTENS] co-opted his friend’s expertise to write the code — available here — while he designed the circuit and handled the assembly.

Carefully unwrapping his cap, [PM_(yep)_FOR_KITTENS] reinforced it with thinner and stronger cardboard, cutting slots into it, allowing the boards and wires to — barely — fit inside. A hole in the side of the cap is enough for a barely noticeable USB cable to run down his neck to a 2000 mAh battery which can power the cap for over five hours at 5V and 2A. Check out a demo video after the break!

Continue reading “Graduation Cap Shows Us What It’s Got!”

New Take On The Binary Clock

By now it might seem like there’s no new way to build a binary clock. It’s one of the first projects many build to try out their first soldering irons, so it’s a well-traveled path. Every now and then, however, there’s a binary clock that takes a different approach, much like [Stephen]’s latest project which he calls the byte clock.

The clock works by dividing the 24-hour day into half and using an LED to represent this division, which coincidentally works out to representing AM or PM. The day is divided in half over and over again, with each division getting its own LED. In order to use this method to get one-second resolution it would need 16 LEDs, but since that much resolution isn’t too important for a general-use clock, [Stephen] reduced this to eight.

Additionally, since we’re in the Internet age, the clock has built-in WiFi courtesy of a small version of Python called WiPy which runs on its own microcontroller. A real-time clock rounds out the build and makes sure the clock is as accurate as possible. Of course an RTC might not have the accuracy as some other clocks, but for this application it certainly gets the job done.

540 PCBs Make A Giant LED Cube

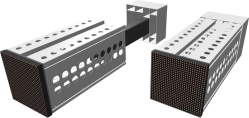
Just about anyone can make a simple LED cube. But what if you want to make a 1-meter cube using 512 LEDs? [Hari] wanted to do it, so he created two different kinds of LED boards using EasyEDA. There are 270  of each type of board, for a total of 540 (there are only 512 LEDs, so we guess he got some spares due to how the small boards panelized). The goal is to combine these boards to form a cube measuring over three feet on each side.

To simplify wiring, the boards are made to daisy chain like a cordwood module. However, to get things to line up, each column of LED boards have to rotate 90 degrees. You can see several videos about the project below.

Continue reading “540 PCBs Make A Giant LED Cube”

Featured Image

Ever Hear Of The Ford Cylon?

OK, we haven’t heard of a Ford Cylon either. However, there is now a Mustang Cobra out there that has been given a famous Cylon characteristic. [Monta Elkins] picked himself up an aftermarket third brake light assembly, hacked it, and installed it on said Mustang.

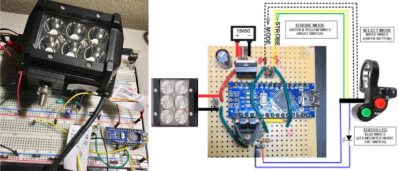
The brake light assembly contains 12 LEDs, which unfortunately, are not individually addressable. Additionally, by the looks of it, the brake light housing was not meant to be opened up. That didn’t get [Monta] down though. There’s more than one way to skin a cat, but he chose to use a hot knife to open the assembly, which worked quite well. A rotary cutter tool was used to cut the traces between the LEDs allowing them to be individually controlled with an Arduino. A Bluetooth module allows him to control the new brake light from his smartphone. There are different modes (including a special mode that he shows off at the end of the video) that can be selected via a Bluetooth Terminal app.

There is no schematic or code link in the video itself or the description, but [Monta] did hit the high points. Therefore, it shouldn’t be too hard to replicate.

This isn’t the first brake light hack we’ve featured. This one goes way beyond just animated lightsThis one requires no programming. Rather wear your brake light? We’ve got your back(pack).