Build Your Own… Whatever

You can read all about making, say, a bookshelf or bowling, but unless you’ve actually done it, you don’t really know how it works. That’s the idea behind [codecrafters-io] Build-Your-Own-X GitHub repository. It is a collection of software projects from around the Web that offer “step-by-step guides for recreating our favorite technologies from scratch.”

What can you find there? Well, how about writing your own version of Git itself? Or maybe you’d like to dive into a physics engine, blockchain code, or a text editor. Then there’s our favorite: an operating system.

Continue reading “Build Your Own… Whatever”

Network Time Protocol On The ESP32

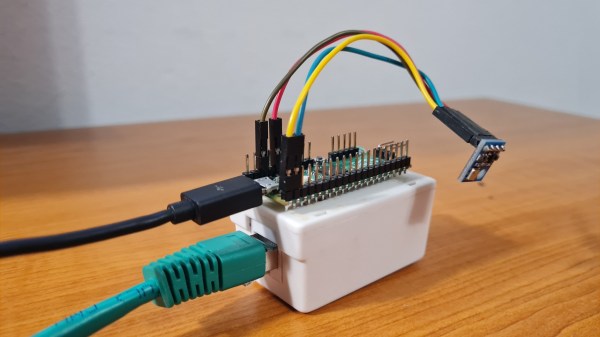
Network Time Protocol (NTP) is one of the best ways to keep networked computers synchronized to the same time. It’s simple, lightweight, and not only allows computers to maintain a time standard together, but it also allows some computer manufacturers to save some money on hardware costs. The Raspberry Pi is perhaps the most well-known example of a low-cost computer without the extra expense of a real-time clock (RTC). While the Pi sets up NTP essentially automatically, other microcontrollers like the ESP32 don’t, but it is possible to configure them to use this time standard with some work.

For this project the MicroPython implementation for the ESP32 is required. MicroPython is a way of running Python code on microcontrollers or other embedded systems without all of the overhead that Python would normally require. Luckily enough, the NTP libraries are built right in so once MicroPython is running on the ESP32 it’s nearly as easy as calling the library. Of course you will have to make sure there is an internet connection, and then grab the time, sync it to the machine, and then set the timezone.

For a bonus exercise, the project’s creator [Bhavesh] suggests attempting to configure Daylight Savings Time, although this can be a surprisingly difficult problem to solve. In the meantime, there are a few other ways of installing a clock on a microcontroller like this one. An RTC module is an obvious choice, but you can also get incredibly accurate time by using a GPS module as well.

Mindblowing Graphics From An ATtiny85

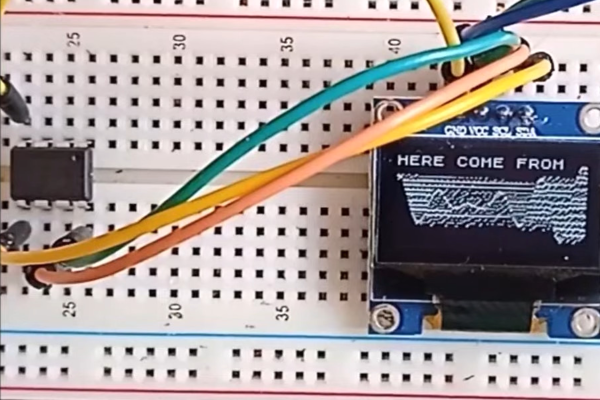
[Görg Pflug] wrote in with his really nice graphics library. It’s got multiple layers, two text consoles, greyscale, internal halftoning, and sprites. It can pull off a number of classic graphics tricks and demos. Oh yeah, and did we mention it runs on a freaking ATtiny85 and an I2C OLED screen?!

This is an amazing piece of work — if you’d asked us if this was possible, we would have probably said “no”. And now it’s yours to use in your own projects. The GitHub repo is full of demos showing off everything from switching between multiple layers, extremely rapid text scrolls, animations, boing balls, and even a Wolfenstein-style raycaster. On an ATtiny85.

There’s a demo video, embedded below, that shows it all off, but honestly you have to think about what’s going to to be suitably wowed. The first demo just seems to have a graphic wave over static text, for instance. No big deal? It’s blending the greyscale layers together and dithering them out to black and white for the OLED in real time! On an ATtiny85.

While the library is written in straight C++, there are even a couple examples of how you’d integrate this with Arduino’s Wire library if you so wished. We don’t know about you, but this makes us want to whip together an ATtiny85 and SSD1306 OLED demo board just to start playing around. This isn’t just an amazing hack, but it would also be a useful way to add graphics and a nice console to any project you’re working on.

Did we mention it’s all done on an ATtiny85?  Over I2C? Kudos!

Continue reading “Mindblowing Graphics From An ATtiny85”

Flashing TI Chips With An ESP

Texas Instruments is best known to the general public for building obsolete calculators and selling them at extraordinary prices to students, but they also build some interesting (and reasonably-priced) microcontrollers as well. While not as ubiquitous as Atmel and the Arduino platform, they can still be found in plenty of consumer electronics and reprogrammed, and [Aaron] aka [atc1441] demonstrates how to modify them with an ESP32 as an intermediary.

Specifically, the TI chips in this build revolve around the 8051-core  microcontrollers, which [Aaron] has found in small e-paper price tags and other RF hardware. He’s using an ESP32 to reprogram the TI chips, and leveraging a web server on the ESP in order to be able to re-flash them over WiFi. Some of the e-paper displays have built-in header pins which makes connecting them to the ESP fairly easy, and once that’s out of the way [Aaron] also provides an entire software library for interacting with these microcontrollers through the browser interface.

Right now the project supports the CC2430, CC2510 and CC1110 variants, but [Aaron] plans to add support for more in the future. It’s a fairly comprehensive build, and much better than buying the proprietary TI programmer, so if you have some of these e-paper displays laying around the barrier to entry has been dramatically lowered. If you don’t have this specific type of display laying around, we’ve seen similar teardowns and repurposing of other e-paper devices in the past as well.

Continue reading “Flashing TI Chips With An ESP”

Micropython On Microcontrollers

There are plenty of small microcontrollers available for all kinds of tasks, each one with its unique set of features and capabilities. However, not all of us want to spend time mucking about in C or assembly to learn the intricacies of each different chip. If you prefer the higher planes of Python instead, it’s not impossible to import Python on even the smallest of microcontrollers thanks to MicroPython, which [Rob] shows us in this project based on the ESP32.

[Rob] has been working on a small robot called Marty which uses an ESP32 as its brain, so the small microcontroller is already tasked with WiFi/Bluetooth communications and driving the motors in the robot. Part of the problem of getting Python to run on a platform like this is that MicroPython is designed to be essentially the only thing running on the device at any one point, but since the ESP32 is more powerful than the minimum requirements for MicroPython he wanted to see if he could run more than just Python code. He eventually settled on a “bottum-up” approach to build a library for the platform, rather than implementing MicroPython directly as a firmware image for the ESP32.

The blog post is an interesting take on running Python code on a small platform, and goes into some details with the shortcomings of MicroPython itself which [Rob] ended up working around for this project. He’s also released the source code for his work on his GitHub page. Of course, for a different approach to running Python and C on the same small processor, there are some libraries that accomplish that as well.

PyGame Celebrates 20 Years By Releasing PyGame 2.0

Python is an absolutely fantastic language for tossing bits of data around and gluing different software components together. But eventually you may find yourself looking to make a program with an output a bit more advanced than the print() statement. Once you’ve crossed into the land of graphical Python programming, you’ll quickly find that the PyGame library is often recommended as a great way to start pushing pixels even if you’re not strictly making a game.

Today, the project is celebrating an incredible milestone: 20 years of helping Python developers turn their ideas into reality. Started by [Pete Shinners] in 2000 as a way to interface with Simple DirectMedia Layer (SDL), the project was quickly picked up by the community and morphed into a portable 2D/3D graphics library that lets developers deploy their code on everything from Android phones to desktop computers.

Things haven’t always gone smoothly for the open source library, and for awhile development had stalled out. But the current team has been making great progress, and decided today’s anniversary was the perfect time to officially roll out PyGame 2.0. With more than 3,300 changes committed since the team started working on their 2.0 branch in July of 2018, it’s a bit tough to summarize what’s new. Suffice to say, the library is more capable than ever and is ready to tackle everything from simple 2D art up to 4K GPU-accelerated applications.

Rip and tear in PyGame 2.0

If you haven’t given PyGame a try in awhile, don’t worry. The team has put special effort into making the library as backwards compatible as possible, so if you’ve got an old project kicking around that you haven’t touched in a decade, it should still run against the latest and greatest version. If you’ve never used it before, the team says they’ll soon be releasing new tutorials that show you how to get the most out of this new release.

Whether you’re putting together your own implementation of Conway’s “Game of Life” or creating the graphical front-end for your own Linux distribution, PyGame is a powerful tool to have in your collection. Our sincere congratulations to all PyGame developers, past and present, for making it to this auspicious occasion. We can’t wait to see what the next decade will bring.

[Thanks to deshipu for the tip.]

Mini Library For Kids Gets Blinky Lights And Solar Upgrade

Reading is big in Québec, and [pepelepoisson]’s young children have access to a free mini library nook that had seen better days and was in dire need of maintenance and refurbishing. In the process of repairing and repainting the little outdoor book nook, he took the opportunity to install a few experimental upgrades (link in French, English translation here.)

The mini library pods are called Croque-Livres, part of a program of free little book nooks for children across Québec (the name is a bit tricky to translate into English, but think of it as “snack shack, but for books” because books are things to be happily devoured.)

After sanding and repairs and a few coats of new paint, the Croque-Livres was enhanced with a strip of WS2812B LEDs, rechargeable battery with solar panel, magnet and reed switch as door sensor, and a 3.3 V Arduino to drive it all. [pepelepoisson]’s GitHub repository for the project contains the code and CAD files for the 3D printed pieces.

The WS2812B LED strip technically requires 5 V, but as [pepelepoisson] found in his earlier project Stecchino, the LED strip works fine when driven directly from a 3.7 V lithium-polymer cell. It’s not until around 3 V that it starts to get unreliable, so a single 3.7 V cell powers everything nicely.

When the door is opened, the LED strip lights up with a brief animation, then displays the battery voltage as a bar graph. After that, the number of times the door as been opened is shown on the LED strip in binary. It’s highly visual, interactive, and there’s even a small cheat sheet explaining how binary works for anyone interested in translating the light pattern into a number. How well does it all hold up? So far so good, but it’s an experiment that doesn’t interfere at all with the operation of the little box, so it’s all good fun.