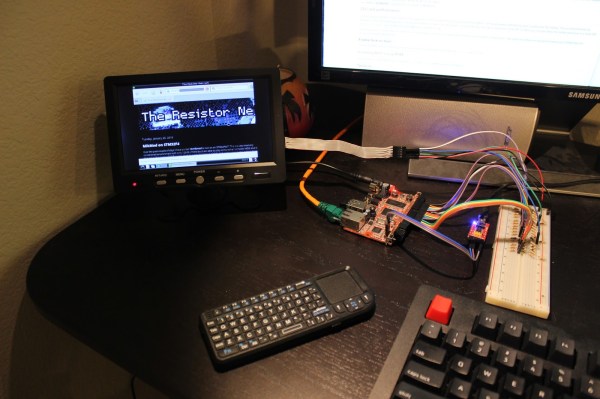
Even though VGA is an outdated and becoming somewhat deprecated, getting this video output running on non-standard hardware is a rite of passage for some hackers. [Andrew] is the latest to take up the challenge. He got VGA output on a Freescale i.MX233 and also got some experience diving into the Linux kernel while he was at it.
The Freescale i.MX233 is a single-board computer that is well-documented and easy to wire up to other things without specialized hardware. It has video output in the form of PAL/NTSC but this wasn’t quite enough for [Andrew]. After obtaining the kernel sources, all that’s needed is to patch the kernel, build the kernel, and build a custom DAC to interface the GPIO pins to the VGA connector.
The first thing that [Andrew] did was load up the Hackaday home page, which he notes took quite a while since the i.MX233 only runs at 454 MHz with just 64 MB of RAM. While our retro page may have loaded a little faster, this is still an impressive build and a great first step to exploring more of the Linux kernel. The Freescale i.MX233 is a popular chip for diving into Linux on single-board computers, and there’s a lot going on in that community. There are some extreme VGA hacks out there as well if that’s more your style.


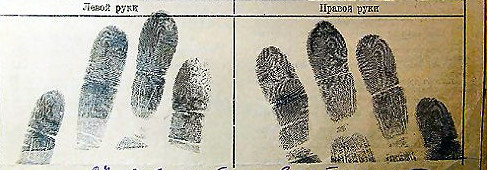
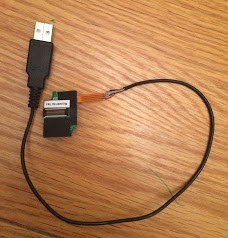 He found a cheap replacement fingerprint scanner on hacker’s heaven, also known as eBay. It had four wires attached to a 16 pin connector. Investigation on the scanner end showed the outer pair were power and ground which made [Serge] suspect it was a USB device. Wiring up a USB connector and trying it the device was recognized but with a lot of errors. He swapped the signal lines and everything was perfect. He had sudo at his finger tip.