Clacker Hacker: Hot Rod Switch Mods

Whether you’re a programmer, gamer, writer, or data entry specialist, the keyboard is an extension of your nervous system. It’s not so much a tool as it is a medium for flow — for being in the zone. So I think it’s only natural that you should care deeply about your keyboard — how it looks, how it sounds, and above all, how it feels to finger-punch those helmeted little switches all the live-long day. That’s my excuse, anyway.

It might surprise you that mechanical keyboard switches can be modified in a number of ways. Depending on what you want from your keyboarding experience, you can make switches feel lighter or less scratchy, quiet them down, or tighten up any wobble in the housing. Why would you want to do this? Because customization is fun. Because electromechanical things are awesome, and because it’s fun to take switches apart and put them back together again. Because it’s literally hacking and this is Hackaday.

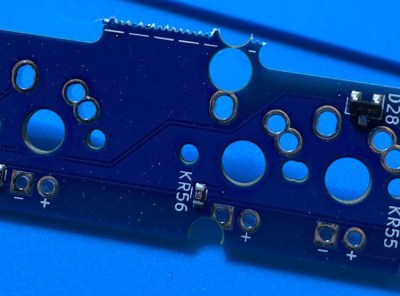
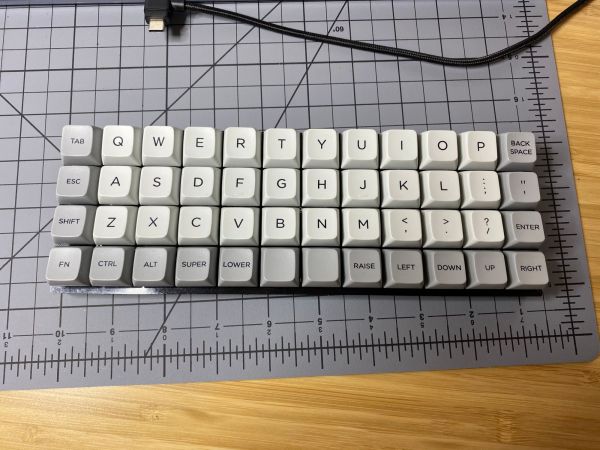
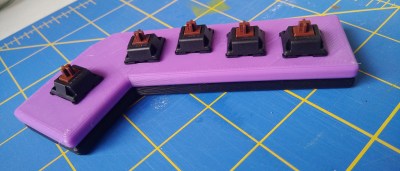
This is a pair of plates from a macro keeb I’m making that will sit directly in front of my trackball.

I got into switch modding because I wanted to put Cherry clears in my dactyl, but worried that they would take too much force to actuate and wear my fingers out. So I bought some really light (39g) springs and was really looking forward to swapping them into the clears, but they just don’t work. Like, physically. Slider goes down, slider gets stuck. It will come back up, but only if I hit it again and smear my finger to the side a bit at the same time. Those springs must be too weak to return clear sliders.

I took this as a sign that I should suck it up and use browns instead. After all, no one else has to know what my sliders look like. While I was opening switches, I tried out one of these super-light springs in a brown, thinking maybe they wouldn’t have to go to waste. Not only did the lighter spring work in the brown, it felt pretty nice. It’s hard to imagine how a whole keeb would feel based on a single switch, but if you can gather a handful and snap them into a plate to riffle your fingers over them, well, it’s probably close enough to a full keyboard to get a good feel for whatever mod you’re doing.

Continue reading “Clacker Hacker: Hot Rod Switch Mods”

3D Printing A Macro Pad, Switches And All

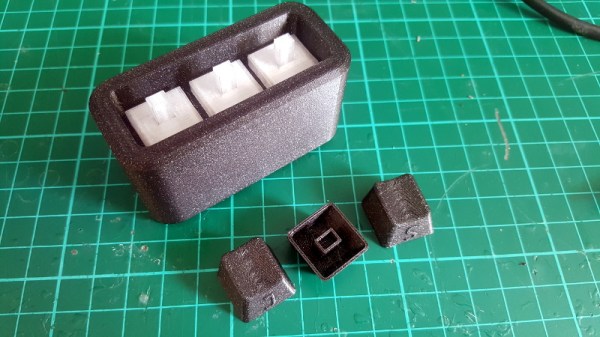
Building a macro pad inside of a 3D printed enclosure is hardly news these days. Neither is adding 3D printed keycaps to the mix. But if you go as far as [James Stanley] has, and actually print the switches themselves, we’ve got to admit that’s another story entirely.

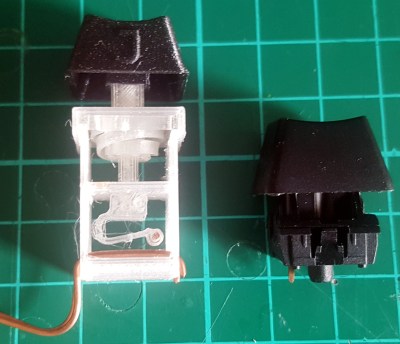
Now you might be wondering how [James] managed to print a mechanical keyboard switch that’s the size of your garden variety Cherry. Well, the simple answer is that he didn’t. While his printed switches have the same footprint as traditional switches, they are twice as tall.

The switches could probably made much smaller if it wasn’t for the printed spring, but using a “real” one would defeat the purpose. Though we do wonder if the mechanical design could be simplified by making it an optical switch.

But can printed switches really stand up to daily use? [James] wondered the same thing, so he built a testing rig that would hit the switches and count how many iterations before they stopped working. This testing seems to indicate that the keys will either fail quickly due to some mechanical defect, or last for hundreds of thousands of presses. So assuming you weed out the duds early, you should be in pretty good shape.

Naturally, there are a few bits of copper inside each printed switch to act as the actual contacts. But beyond that, all you need to build one of these printable pads yourself is a USB-HID capable microcontroller like the Arduino Pro Micro. If you used the ESP32, you could even make it Bluetooth.

Continue reading “3D Printing A Macro Pad, Switches And All”

Inputs Of Interest: X-Bows Ergo-Mechanical Keyboard

Okay, let’s just get this out of the way up front, shall we? This ergonomic mechanical keyboard was a free sample offered to me by X-Bows. They contacted me after I expressed interest in trying one in the comments of my post about the Kinesis Advantage. I had my doubts about this keyboard as far as my own personal ergonomic needs go, which are admittedly on the extreme side. TL;DR: I won’t be abandoning my curvy girls anytime soon. But I will say that I’m definitely impressed by the X-Bows.

X-Bows was founded by a doctor who saw a lot of RSI issues in programmers and writers and decided to take matters into his own hands. The keyboard was born on Kickstarter in 2017 and now comes in three models. They sent me the mid-range model called The Knight, which retails for $249, but seems to be on permanent sale for $199. The top-of-the-line Knight Plus has a magnetic, detachable 10-key that can attach to either side. Continue reading “Inputs Of Interest: X-Bows Ergo-Mechanical Keyboard”

Burning Chrome

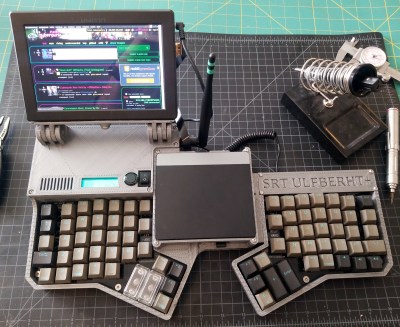
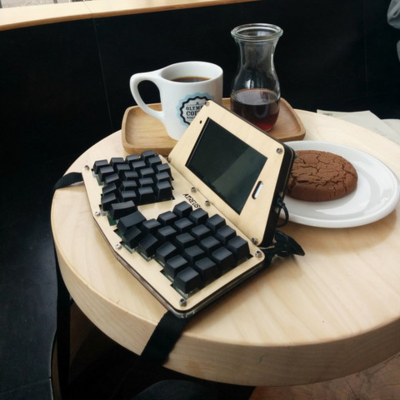
You want a good project that combines multiple disciplines, gives you something useful in the end, and will certainly wow the muggles? Or do you simply need a custom rig with which to “jack in” to “cyberspace”? How about building your own luggable, portable, computer with some style — your own cyberdeck?

Coming to you from the fertile world that William Gibson created in “Neuromancer”, “Count Zero”, and “Mona Lisa Overdrive”, cyberdecks were the portable computers that the heroes and anti-heroes roaming the Sprawl would use to connect to what was essentially the Internet. Since we’re already living in the era where large portions of the world are controlled by vast corporations, we spend our entire lives online, and machine intelligence is poised to become sentient, you might as well get building.

We’ve seen a number of great examples of cyberdeck builds, and they’re all special in their own way, but there are common features uniting them all. First, you’ll need a screen, a portable computer brain, some batteries, and a nice keyboard. The good news is that all of the above have become eminently available, even inexpensive, in the last few years.

Discipline #1 is that of the case modder. You’re designing your ideal portable computer, after all. It’s got to look good, and we don’t mean that black, boxy ThinkPad look. If you’ve got a 3D printer, and maybe a willingness to spray paint, the world is your oyster here.

Discipline #2 is that of the keyboard builder. You’re not going to want to enter the Matrix with anything less than a pleasant typing interface. Again, 3D printing, laser-cutting, or CNC milling your own keyplate and building yourself a keyboard from scratch is a viable option, but there are tons of Bluetooth and USB keyboard options if you want to cut corners, or find one you really like.

Discipline #3 is the software hacker. Putting together exactly the right set of software, setting up the system to do what you want, and getting that sweet background screen just right are the last steps to making yourself at home in Cyberspace.

With so much latitude to introduce your own design ideas into your bespoke luggable, no two will be alike. Mine’s going to have programming ports for every microcontroller I frequently use, a decent speaker, maybe a variable power supply, and probably some reasonable amount of LED bling. What’s going to be on yours?

This article is part of the Hackaday.com newsletter, delivered every seven days for each of the last 200+ weeks. It also includes our favorite articles from the last seven days that you can see on the web version of the newsletter.

Want this type of article to hit your inbox every Friday morning? You should sign up!

A Dual Screen Luggable With Integrated RTL-SDR

It’s been fascinating to watch the development of bespoke mobile computers go from a few sheets of foam board and a Raspberry Pi into hardware that looks like it’s actually been transported here from an alternate reality. Granted a Raspberry Pi is more often than not still onboard, but the overall design and construction techniques of these very personal computers has improved by leaps and bounds.

The latest of these cyberdecks, a dual screen “luggable” reminiscent of classic computers like the Compaq Portable or Kaypro, comes our way from [dapperrogue]. Powered by the Raspberry Pi 4 and featuring a scratch-built mechanical keyboard to perfectly fit the machines’s specific dimensions, this is easily one of the more practical builds we’ve seen. As visually striking as they may be, few would argue that the small offset display that seems characteristic of most decks are ideal from a usability standpoint.

While the keyboard plate was milled out on a CNC, [dapperrogue] says the design of the HDPE body panels and rear polycarbonate viewing window were simple enough they could be done by hand on a band saw. The PETG internal frame uses a Voronoi pattern that not only reduces the amount of time and material required to print it, but maximizes airflow. The fact that it looks like some kind of alien biological life form only helps the retro-futuristic aesthetics.

There’s still plenty of room inside the enclosure, which is good, as [dapperrogue] says there’s more goodies to come. Adding internal battery power is a logical next step, and now that the Pi 4 can boot to external drives, and SSD is also on the list of future upgrades.

For readers who might be getting a sense of déjà vu from this project, [dapperrogue] notes this design was inspired by the phenomenal Reviiser that [Dave Estes] released earlier this year.

CircuitPython Macro Pad Is One Build That Won’t Bite

Have you built a macro keypad yet? This is one of those projects where the need can materialize after the build is complete, because these things are made of wishes and upsides. A totally customized, fun build that streamlines processes for both work and play? Yes please. The only downside is that you actually have to like, know how to build them.

Suffer no more, because [Andy Warburton] can show you exactly how to put a macro pad together without worrying about wiring up a key switch matrix correctly. [Andy]’s keypad uses the very affordable Seeeduino Xiao, a tiny board that natively runs Arduino code. Since it has a SAMD21 processor, [Andy] chose to run CircuitPython on it instead. And lucky for you, he wrote a separate guide for that.

Practicalities aside, the next best thing about macro keyboards is that they can take nearly any shape or form. Print a case from Thingiverse as [Andy] did, or build it into anything you have lying around that’s sturdy enough to stand up to key presses and won’t slide around on your desk.

No room left on the desk? Build a macro foot stool and put those feet to work.

Via r/circuitpython

The ABCs Of Adding QMK To A WASD Keyboard

[Oleg] is a software engineer who appreciates a good keyboard, especially since coming over to the dark side of mechanical keebs. It’s true what they say — once you go clack, you never go back.

Anyway, before going full nerd with an ortholinear split ergo keyboard, [Oleg] had a nice little WASD with many upsides. Because the ErgoDox is oh so customizable, his use of the WASD had fallen by the wayside.

That’s because the ErgoDox can run QMK firmware, which allows the user to customize every key they see and add layers of functionality. Many people have converted all kinds of old keebs over to QMK by swapping out the native controller for a Teensy, and [Oleg] was sure it would work for the WASD.

[Oleg] got under the hood and found that the controller sits on a little removable board around the arrow keys and talks to the main PCB through two sets of double-row header pins. After some careful probing with a ‘scope, the controller board revealed its secrets and [Oleg] was able to set up a testing scheme to reverse engineer the keyboard matrix by connecting each row to an LED, and all the columns to ground. With next to no room for the Teensy, [Oleg] ended up strapping it to the back of the switch PCB and wiring it quite beautifully to the header pins.

With Teensy and QMK, it’s easy to make a keyboard any way you want, even if you’re all thumbs.