Micro:bit Makes Cardboard Pinball More Legit

What have you been doing to ward off the winter blues? [TechnoChic] decided to lean in to winter and make a really fun-looking game out of it by combining the awesome PinBox 3000 cardboard pinball sandbox with a couple of Micro:bits to handle and display the player’s score. Check it out the build and gameplay in the video after the break.

The story of Planet Winter is a bittersweet tale: basically, a bunch of penguins got tired of climate change and left Earth en masse for a penguin paradise where it’s a winter wonderland all year round. There’s a party igloo with disco lights and everything.

[TechnoChic] used a Micro:bit plugged into a Brown Dog Gadgets board to keep track of scoring, control the servo that kicks the ball back out of the igloo, and run the blinkenlights. It sends score updates over Bluetooth to a second Micro:bit and a Pimoroni Scrollbit display that sit opposite the pinball launcher. She went through a few switch iterations before settling on conductive maker tape and isolating the ball so it only contacts the tape tracks.

There are two ways to score on Planet Winter — the blizzard at the end of the ball launcher path nets you ten points, and getting the ball in the party igloo is good for thirty. Be careful on the icy lake in the middle of the playfield, because if the ball falls through the ice, it’s gone for good, along with your points. It’s okay, though, because both the party igloo and the ice hole trigger an avalanche which releases another ball.

Seriously, these PinBox 3000 kits are probably the most fun you can have with cardboard, even fresh out of the box. They are super fun even if you only build the kit and make a bunch of temporary targets to test gameplay, but never settle on a theme (ask us how we know). Not convinced? Hackaday Editor-in-Chief [Mike Szczys] explored them in depth at Maker Faire in 2018.

Continue reading “Micro:bit Makes Cardboard Pinball More Legit”

Micro:bit Put On Plant Minding Duty

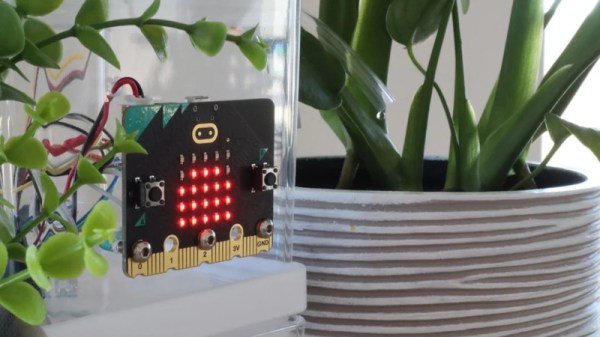
The BBC has a long history of supporting technology education in schools. The BBC Micro introduced a whole generation of students to computers, and more recently the Micro:bit is teaching today’s children about embedded systems. [Michael Klements] happens to be a grown adult, but has whipped up a project using the little board to build an automatic plant watering system.

Rather than a simple timer-based system, [Michael’s] build measures soil moisture using a capacitive sensor. This has the benefit of not needing to be in direct contact with the soil as resistive sensors do, and thus the sensor can be built in a fashion that minimises corrosion. The Micro:bit reads this sensor using an analog input, and displays the moisture level using its inbuilt LED matrix as a graph. Once levels dip below a set threshold, a pump is activated to deliver water to the plant until the soil is suitably moist again.

It’s a simple project, but one that would be a great way to teach students about interfacing with pumps and sensors, as well as the basics of control systems. [Michael] also notes that further work could involve interfacing multiple Micro:bits using their onboard wireless hardware. We’ve thus far seen the Micro:bit used for everything from handheld gaming to gumball delivery. Video after the break.

Continue reading “Micro:bit Put On Plant Minding Duty”

A Whimsical Touch-Free Gumball Machine For These Trying Times

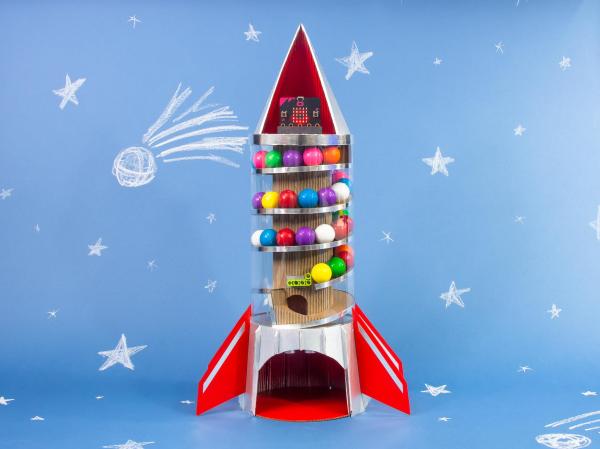
It sucks that certain stuff in public is off-limits right now, like drinking fountains and coin-operated candy and gum machines — especially the fun kind where you get to watch your gumball take a twisting trip down the tower and into the collection bin. Hopefully there will be commercial contact-free machines one of these days that take NFC payments. Until then, we’ll have to make them ourselves out of cardboard and whimsy and Micro:bits.

[Brown Dog Gadgets] also used one of their Crazy Circuits Bit Boards, which is a Micro:bit-to-LEGO interface module for building circuits with conductive tape. There’s a distance sensor in the rocket’s base, and a servo to dispense the gumballs. This entire build is fantastic, but we particularly like the clever use of a LEGO Technic beam to both catch the gumball and prevent the next one from going anywhere. You can see it in action after the break.

Wave hand, receive gumball is about as simple as it gets for the end user. The three robots approach takes much more work.

Continue reading “A Whimsical Touch-Free Gumball Machine For These Trying Times”

New BBC Micro:bit Adds Microphone And Speaker

There’s an old tale that TV companies only need to make a few years of kids’ TV shows, because their audience constantly grows out of their offerings and is replaced by a new set with no prior knowledge of the old shows. Whether it’s true or not is up for debate, but does the same apply to single board computers aimed at kids? The original BBC micro:bit was first announced back in 2015 and must be interesting its second generation of kids by now, but that hasn’t stopped them bringing out a second version of the little educational computer. How do you update such a simple device? Time to take a look.

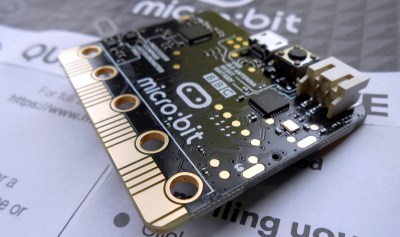
Edge connector shown on the original micro:bit design

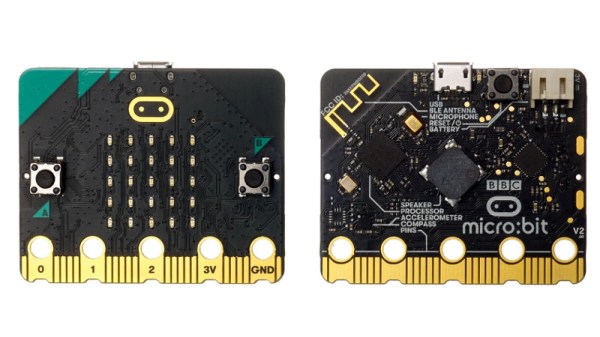
The form factor of the new board is substantially the same as its predecessor, with the same edge connector and large connection pads, and the familiar LED matrix display. The most obvious additions are a small speaker and MEMS microphone allowing kids to interact with audio in their code, but less obvious is a new touch button in the micro:bit logo. The original had it in the silk screen layer, while the new one has it as copper for a capacitive sensor.

The silicon has an upgrade too, now sporting a Nordic Semiconductor nRF52833 running at 64 MHz and sporting 512k of ROM and 128k of RAM with built-in Bluetooth Low Energy. Binaries are incompatible with the original, however all the development environments can recompile code for a new universal binary format capable of running the appropriate software for either version.

The micro:bit has been more of a hit in schools than it has in our community, perhaps because it has the misfortune to have arrived alongside so many strong competitors. However it remains a powerful contender whose easy programming alongside the power of more traditional toolchains make it a good choice for kids and grown-ups alike.  We took a look at the original back in 2016, if you are interested.

Mechanical Seven-Segment Display Mixes Art With Hacking

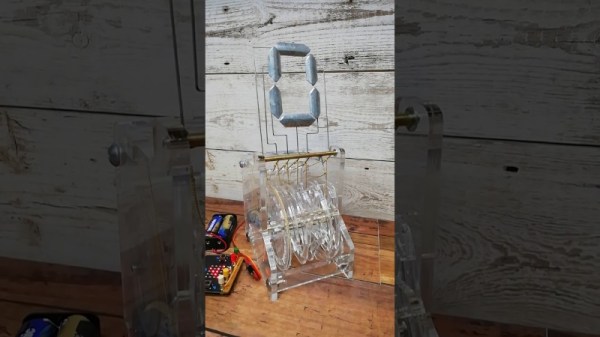
We’re not sure what to call this one. Is it a circuit sculpture? Sort of, but it moves, so perhaps it’s a kinetic circuit sculpture. Creator [Tomohiro Tsuchita] calls it “something beautiful but totally useless,” which we find a tad harsh. But whatever you call it, we think this mechanical seven-segment display is really, really cool.

Before anyone gets to thinking that this is something like the other mechanical seven-segment displays we’ve seen lately, think again. This one is not addressable; it simply goes through the ten digits in order. So you won’t be building a clock from it, although we suppose the mechanism could be modified to allow that. Then again, looking at that drive train of laser-cut acrylic cams, maybe not. Each segment has its own cam with lobes or valleys for each segment. A cam follower lowers and raises the segments as the cams rotate on a common shaft. A full-rotation servo powers the display under the control of a Micro:bit; the microcontroller is overkill for now but will be used in version two, which will allow the speed to change in response to sensors.

Watching this display change at its stately pace is strangely soothing. We love the look of this, but then again, we’re partial to objets d’art-circuit. After all, we ran a circuit sculpture contest earlier in the year, and just wrapped up a Hack Chat dedicated to the subject.

Continue reading “Mechanical Seven-Segment Display Mixes Art With Hacking”

RGB Lamp With Micro:Bit Powered Gesture Control

The Micro:bit is a very neat piece of hardware that, frankly, we don’t see enough of. Which made us all the more interested when [Manoj Nathwani] wrote in to tell us about the gorgeous 3D printed RGB LED lamp he created that uses the BBC-endorsed microcontroller to perform basic gesture detection. Purists will likely point out that an Arduino Pro Mini is tagging along to handle interfacing with the LEDs, but it’s still a good example of how quick you can get a project up and running with MicroPython on the Micro:bit.

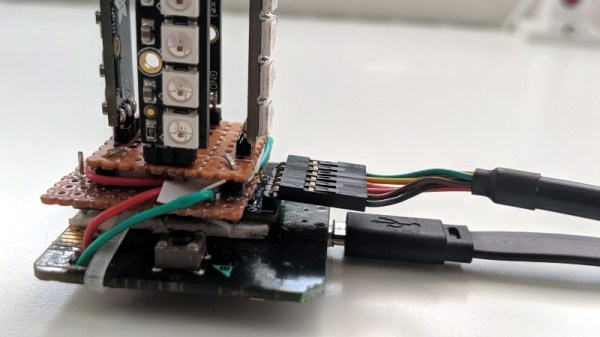
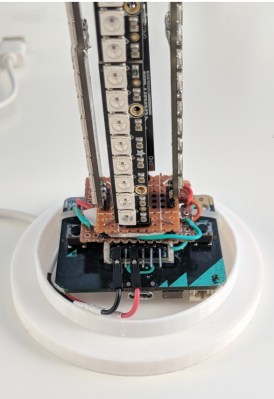
[Manoj] used eight NeoPixel Sticks, a NeoPixel Ring, and a few scraps of perfboard to construct a three dimensional “bulb” to fill the void inside the printed diffuser. They’re chained together so all the elements appear as a single addressable strip, which made the rest of the project a bit easier to implement. It might not be pretty, but it gets the job done and it’s not like you’ll ever see it again once installed in the lamp anyway.

The Micro:bit and Arduino co-pilot live in the base of the lamp, and the single USB cable to provide power (and the ability to update the device’s firmware) is run out the bottom to give the whole thing a clean and professional look. For those wondering why the Arduino has tagged along, [Manoj] says he couldn’t get the NeoPixel libraries to play nicely with the Micro:bit so he’s using the Arduino essentially as a mediator.

Right now the only gesture that’s detected on the Micro:bit is a simple shake, which tells the Arduino to toggle the light show on and off. But in the future, [Manoj] plans to implement more complex gestures which will trigger different animations. As he explains in the blog post, gesture recognition with the Micro:bit is incredibly simple, so it should be easy to come up with a bunch of unique ways to interface with the lamp.

Color changing LED lamps are a favorite project of hackers, and we’ve seen examples built with everything from glass and copper to laser-cut pieces of wood and veneer. While you might prefer to skip the gesture control for an ESP8266 and UDP, we think this project is another strong entry into this popular genre.

A 3D Printed Micro:Bit Nunchuk

As [Paul Bardini] explains on the Thingiverse page for his “Micro:Bit Hand Controller”, the Bluetooth radio baked into the BBC’s educational microcontroller makes it an ideal choice for remotely controlling things. You just need to give it a nice enclosure, a joystick, a couple of buttons, and away you go. You can even use the integrated accelerometer as another axis of control. This is starting to sound a bit familiar, especially to gamers.

While it might not come with the Official Nintendo Seal of Quality, the 3D printable enclosure [Paul] has come up with for the Micro:Bit certainly takes more than a little inspiration from the iconic Wii “Nunchuck” controller. He’s jostled around the positions of the joystick and momentary buttons a bit, but it still has that iconic one-handed ergonomic styling.

In a particularly nice touch, [Paul] has built his controller around a Micro:Bit breakout board from SparkFun that allows you to plug the microcontroller in via its edge connector. This means you can pull the board out and still use it in other projects. The only other connection to the controller leads to the battery, which uses a two pin JST-PH plug that can easily be removed.

Thanks to this breakout board, the internal wiring is exceptionally simple. The joystick (the type used in a PS2 controller) and the buttons are simply soldered directly to pins on the breakout board. No passives required, just a few short lengths of flexible wiring to snake through the printed enclosure.

The Thingiverse page only has the STLs for the two halves of the controller, and no source code for the Micro:Bit itself. But it shouldn’t be terribly hard to piece together the basic functionality with example code that’s floating around out there. Especially since you can run Python on them now. Of course, you could also add Bluetooth to the original Wii version if you’re not looking to reinvent the wheel nunchuck.