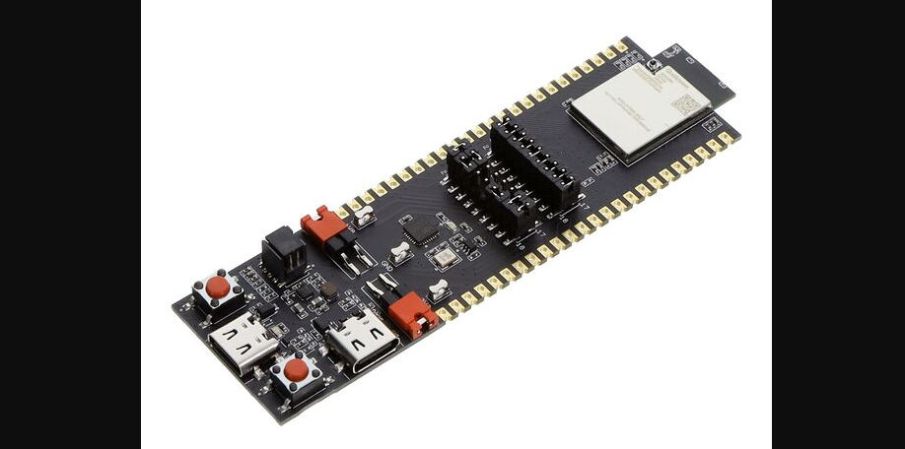
Qualcomm’s New QCC74x Appears To Target The ESP32 MCUs

These days wireless microcontrollers featuring built-in WiFi and Bluetooth are all the rage, with Espressif’s range of ESP32 MCUs being the default option for commercial and hobbyist projects alike. This makes Qualcomm’s recently released QCC74x MCU rather interesting, as specification-wise it would seem to be placed firmly in ESP32 territory.

On the radio side you get 1×1 WiFi 6, Bluetooth 5.4, and IEEE 802.15.4 (e.g. Thread and Zigbee), coupled with a single-core 352 MHz RISC-V CPU with FPU and DSP features and 484 kB of SRAM. The SDK for this MCU is hosted on Codelinaro, featuring the typical FreeRTOS-based stack, though confusingly Bluetooth and Zigbee support are currently marked as ‘not supported’. This might still be in progress.

Where the competition with Espressif feels clear is in the pricing, with the highest-performance evaluation board (QCC748M EVK, pictured above) listed for $13 (before taxes/tariffs). This gets you 8 MB of PSRAM built-in with unspecified link speed, but likely the same QSPI as used for the NOR Flash. USB support is available on this higher-end tier, while absent on the QCC743. Development documentation is also available, and looks fairly complete based on first glance.

Overall the QCC74x looks to be an upgrade to the older and significantly less powerful QCC730 MCU. Depending on software support and final pricing it could make for an interesting competitor to some of Espressif’s modules like its ESP32-C series or ESP32-S2, though the upcoming ESP32-S31 would seem to have it matched or beat on all metrics.
Salvaged VFDs In Nixie-Like Clock

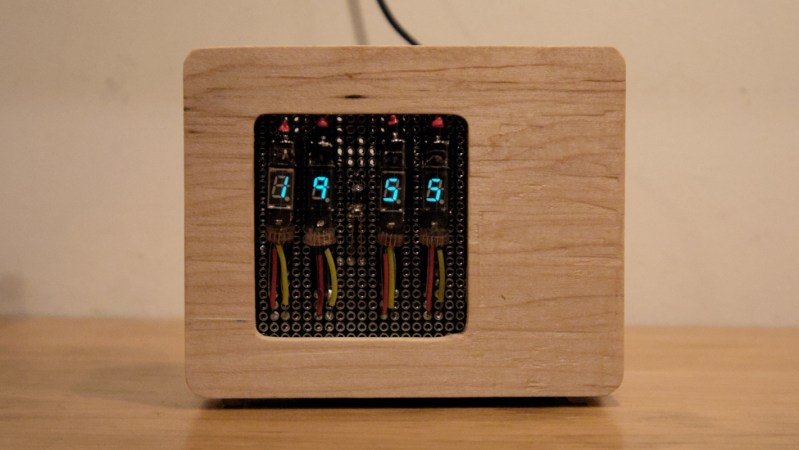
In between the Nixie tube era of the 50s and 60s and the advent of multi-digit vacuum fluorescent displays (VFDs) common in 80s and 90s consumer technology, there was a brief time in the early 70s where single-digit VFDs were commonplace. Superficially these devices look like Nixie tubes, but have a number of advantages to them including lower voltage, lower power requirements, and lower cost. [maurycyz] recently found a number of these salvaged from old calculators and used them to build a retro-themed clock.

[maurycyz] was not able to find datasheets for this display, but was able to reverse-engineer each of the digits. Similar to vacuum tubes there is a heater which has a few ohms of resistance, and from there each of the segments of the digit can be deduced by probing the 13 signal wires. These are analog devices in some respects, so a lot of experimentation had to go into driving the displays to find their optimal conditions. A quartz crystal was used for timekeeping with an AVR128DA28 microcontroller chosen to provide control for the digits, using seven pins as segment drivers and four as grid drivers. Each digit uses around 0.14 watts, so with all four digits on it can consume a little over half a watt. A simple wood enclosure rounds out the build.

As Nixie supply wears thin, VFDs like this can be an excellent stopgap or replacement while still building retro-themed displays like this clock or this calculator which uses similar VFDs for each digit.

Adding Capabilities To Inexpensive Solar Modules

Solar power has gotten cheap enough that putting up panels is among the cheapest ways of providing energy. This isn’t just the case for bulk electricity on a power grid, either; even small devices are easier and cheaper to power with solar than ever before. For example, landscape lighting which once relied on 12V or 24V DC wires all over one’s yard with a transformer and power supply hidden somewhere have partially been converted to simpler individual solar-powered lights now. These small devices can also be given additional capabilities as [Mauro] demonstrates.

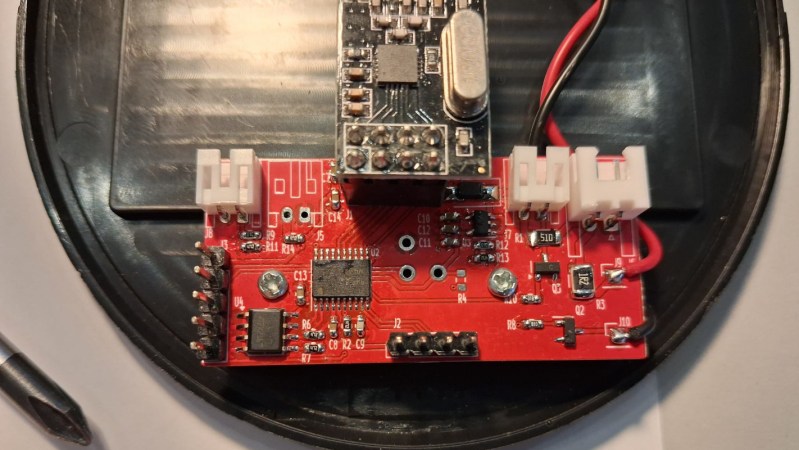
In this case, [Mauro]’s goal was to add on-demand lighting to a solar-powered light which was otherwise motion-activated only. To do this, they added a NRF24L01+ radio inside the light’s housing paired with an STM32 microcontroller. This secondary system is largely separated from the existing control circuitry with the exception of being able to switch the lights and receiving its power from the same solar panel. [Mauro] also created a small library to help with communicating with these new modules, whether that’s using a home automation system like Home Assistant or some other method.

Although adding in a few capabilities to inexpensive solar lighting might seem simple on the surface, a project like this is a gateway to adding in all kinds of interesting features to things with built-in solar panels and lots of free space in their cases. The best example here is the addition of a Meshtastic node to one of these lights, making it convenient and stealthy, but we could also see adding in other remote hardware to a landscape lighting module like a gate sensor or a plant health monitoring system.

Rust Helps Make A $1 Handheld Console

These days, even an old Game Boy will set you back $100 or more, and a new handheld console will be many multiples of that. However, you can build a really cheap handheld gaming toy if you follow [Chris Dell’s] example.

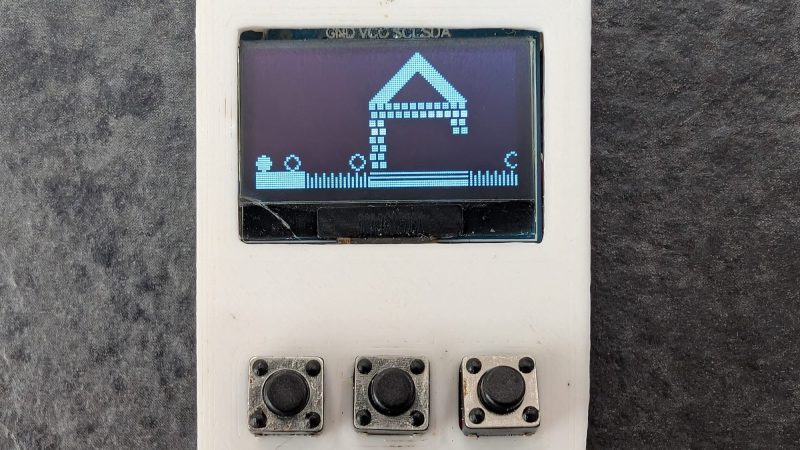
In [Chris]’s own words, he used Rust to build a $1 handheld gaming console. How is that possible? Well, it all comes down to the CH32V003—a microcontroller cheaper than just about anything else out there. It sells for just 9 cents in bulk, and it’s no slouch either. The RISC-V device is a fully-fledged 32-bit chip running at 48 MHz, though with only 2 KB of RAM and 16 KB of flash. Still, that’s more than enough to make some little games. To this end, [Chris] paired the CH32V003 with an SSD1306 OLED display, and three tactile pushbuttons. He then whipped up some code in Rust with the aid of the ch32-hal project, implementing a neat platform game that ran at a healthy 25 fps.

The CH32V003 probably won’t be starring in a new handheld gaming revolution anytime soon. Still, it’s always interesting to see just what can be achieved with one of the cheapest microcontrollers on the market.

[Thanks to Kian Ryan for the tip!]

A Better Jogging Stroller

Although the jogging stroller is a fixture of suburban life, allowing parents the opportunity to get some exercise while letting their young children a chance for some fresh air, it would seem like the designers of these strollers have never actually gone for a jog. Requiring a runner to hold their hands at fixed positions can be incredibly uncomfortable and disrupts most people’s strides and cadence — so [John] attempted to solve the problem after finding one of these strollers on the secondhand market.

While there are some purpose-built strollers that attempt to address these issues, they can be pricey. Rather than shell out for a top-dollar model, [John] got to work with his 3D printer and created a prototype device that allows him to attach the stroller at his waist while leaving his hands free. There were a few problems to overcome here, the first of which would cause the device to buckle under certain loading situations. This was solved with some small pieces of rope which act as flexible bump stops, keeping the hinge mechanism from binding up. Another needed to be solved with practice, which was that it took some time to be able to steer the stroller without using one’s hands.

As an added bonus, [John] also included a system that tracks the distance the stroller has traveled. Using a hall effect sensor and a magnet attached to the wheel, a small microcontroller is able to quickly calculate distance and display it on a tiny screen mounted near the handlebars. Although smartphones are handy, their GPS systems can be surprisingly inaccurate, so a system like this can be a better indicator since it’s being directly measured. All in all, not a bad few upgrades to a secondhand stroller.

Continue reading “A Better Jogging Stroller” →

Analog Video From An 8-Bit Microcontroller

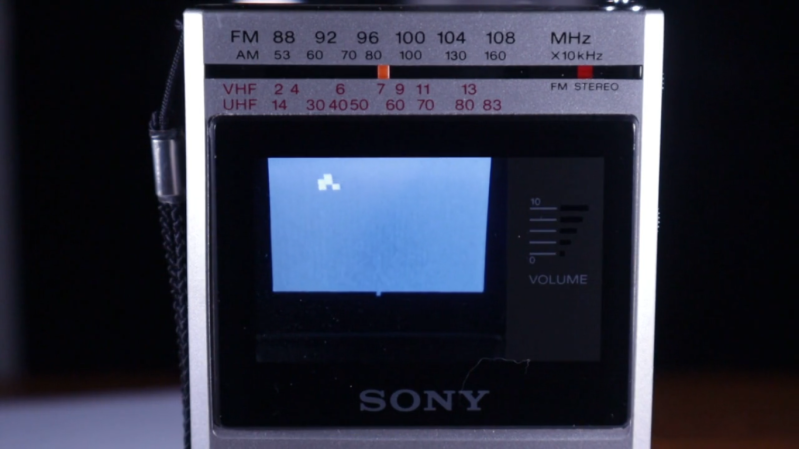
Although the CRT has largely disappeared from our everyday lives, there was a decades-long timeframe when this was effectively the only display available. It’s an analog display for an analog world, and now that almost everything electronic is digital, these amazing pieces of technology are largely relegated to retro gaming and a few other niche uses. [Maurycy] has a unique CRT that’s small enough to fit in a handheld television, but since there aren’t analog TV stations anymore, he decided to build his own with nothing but an 8-bit microcontroller and a few other small parts.

Continue reading “Analog Video From An 8-Bit Microcontroller” →

Driving A DAC Real Fast With A Microcontroller

Normally, if you want to blast out samples to a DAC in a hurry, you’d rely on an FPGA, what with their penchant for doing things very quicky and in parallel. However, [Anabit] figured out a way to do the same thing with a microcontroller, thanks to the magic of the Raspberry Pi Pico 2.

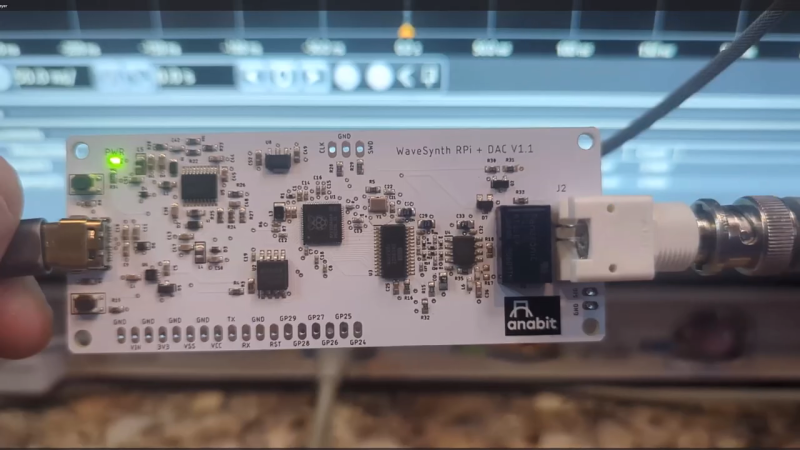
The design in question is referred to as the PiWave 150 MS/s Bipolar DAC, and as the name suggests, it’s capable of delivering a full 150 million samples per second with 10, 12, or 14 bits of resolution. Achieving that with a microcontroller would normally be pretty difficult. In regular linear operation, it’s hard to clock bits out to GPIO pins at that sort of speed. However, the Raspberry Pi Pico 2 serves as a special case in this regard, thanks to its Programmable I/O (PIO) subsystem. It’s a state machine, able to be programmed to handle certain tasks entirely independently from the microcontroller’s main core itself, and can do simple parallel tasks very quickly. Since it can grab data from RAM and truck it out to a bank of GPIO pins in a single clock cycle, it’s perfect for trucking out data to a DAC in parallel at great speed. The Pi Pico 2’s clock rate tops out at 150 MHz, which delivers the impressive 150 MS/s sample rate.

The explainer video is a great primer on how this commodity microcontroller is set up to perform this feat in detail. If you’re trying for accuracy over speed, we’ve explored solutions for that as well. Video after the break.

Continue reading “Driving A DAC Real Fast With A Microcontroller” →