How To Mash Up BLE, NodeJS, And MQTT To Get Internet Of Things

We’re living in the world of connected devices. It has never been easier to roll your own and implement the functionality you actually want, rather than live with the lowest common denominator that the manufacture chose.

In a previous article I walked though a small python script to talk to a BLE light and used it to cycle through some colors. Now I want to delve deeper into the world of Internet Connected BLE devices and how to set up a simple Internet-Of-Things light. With this example in hand the sky’s the limit on what you can build and what it will be able to do.

Join me after the break as I demonstrate how to use NodeJS to bridge the digital world with the physical world.

Continue reading “How To Mash Up BLE, NodeJS, And MQTT To Get Internet Of Things”

WiFi Pool Controller Only Cost $20

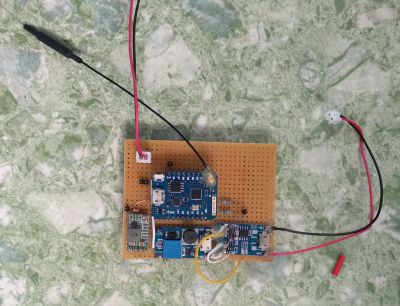
Pools have come a long way. It used to be you had a pump and if you were lucky it had a mechanical timer switch on it. That was it. Now you have digital controllers and spa jets and heaters. You can even get them that connect to your home automation system. If your pool isn’t new enough to do that already, you can get a range of add-on accessories. For a price. [Rob] paid $500 to get a remote for his pool. It wasn’t even WiFi, just a simple RF remote. In 3 years, the transmitter had burned out ($300 to replace) and he decided he had enough. For $20, [Rob] added MQTT control and monitoring to his pool using an ESP8266. You can see the video description of the project below.

Naturally, the instructions are a bit specific to the Pentair system he has. However, it isn’t as specialized as you might think. The project relies on the connection for a wired “spa-side remote” that most modern pool systems support. The electrical connections for these aren’t quite standard, but they are all very similar, so you have a good chance of reproducing this for your setup assuming you have a connection for one of these wired remotes.

Continue reading “WiFi Pool Controller Only Cost $20”

Boozer Tells The Internet How Much You Drink (If You Want It To)

Over the past few years, Reddit user [callingyougoulet] has created Boozer, a DIY beer dispenser that keeps track of how much of your brew you have left in your kegs. Installed in a Keezer (a freezer that contains beer kegs and faucets) [callingyougoulet]’s dispenser uses a Raspberry Pi to keep track of things. A series of flow sensors determine how much liquid has passed through them and, when the drink is poured, can calculate how much you poured and how much you have left.

Starting with a chest freezer, [callingyougoulet] built a nice wooden surround as well as installed a tower on top to hold the faucets. The top of the freezer has nice granite tiles covering it, and some LED accent lighting adds to the end product. However, taking the granite off in order to get at the kegs inside takes some time (about 20 minutes.)

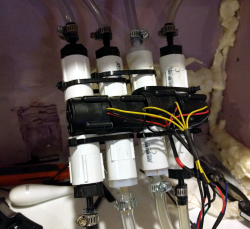
Inside the freezer is the Raspberry Pi and four flow sensors, each one connected to a GPIO port on the Pi. After some calibration, the Python code running on the Pi can calculate a pretty close estimate of the amount of liquid poured. There’s also a temperature sensor in the freezer, so that you can tell how cool your beer is.

If the build had stopped there, it would have been a great project as-is, but [callingyougoulet] added twitter, Slack and MQTT outputs as options, so that a home automation system (or the entire internet) can tell how much and when you’ve been drinking and, more importantly, you can know how much is left in your kegs! There are some very cool keg cooling builds on the site, such as, a kegerator built from the ground up, and a very elegant kegerator built on the cheap check them out for ideas!

Via Reddit.

Talking To Laptop Batteries With The ESP8266

It’s not something you often give a lot of thought to, but the modern consumer laptop battery is a pretty advanced piece of technology. Not only does it pack several dozen watt-hours of energy into a relatively small and lightweight package, but it features integrated diagnostic capability to make sure all those temperamental lithium cells are kept in check. Widely available and extremely cheap thanks to the economies of scale (unless you try to get them from the OEM, anyway), they’re a very compelling option for powering your projects.

Of course, it also helps if, like [teliot] you have a bunch of the things lying around. For reasons we won’t get into, he’s got a whole mess of Acer AL12x32 battery packs which he wanted to use for something other than collecting dust. He had the idea of hooking one up to a solar panel and using it as a power supply for some ESP8266 projects but wanted to be able to talk to the battery for status and diagnostic information. After studying the Smart Battery System (SBS) protocol the batteries use, he was able to come up with some code that lets him pull 37 separate fields of information from the pack’s onboard electronics using his ESP8266.

Battery consumption over time

It took some fiddling with a multimeter to figure out which pin did what on the eight pin interface of the battery. Two of the pins need to be shorted to enable the dual 12 VDC pins to kick in. Technically that’s all you really need to do if you want to utilize the battery in a low-tech sort of way. But to actually get some information from the battery, [teliot] had to identify the two pins which are for the System Management Bus (SMBus) interface where the SBS data lives.

Once he knew which pins to talk to the battery on, the rest was fairly easy. SBS is well documented, and the SMBus interface is very similar to I2C. Like all the cool kids are doing these days, his code publishes the battery info to MQTT where he can plot it and get finely grained info on the performance of his solar power system.

This isn’t the first time we’ve seen a hacker wrangle laptop batteries through SMBus, but it’s always nice to get multiple perspectives on a topic. If you plan on making this kind of thing part of your standard bag of tricks, you might even want to take the time to build a dedicated SMBus scanner.

[via /r/esp8266]

Internet Of Laundry — Let The ESP8266 Watch Your Dirty Drawers Get Clean

When you think of world-changing devices, you usually don’t think of the washing machine. However, making laundry manageable changed not only how we dress but how much time people spent getting their clothes clean. So complaining about how laborious our laundry is today would make someone from the 1800s laugh. Still, we all hate the laundry and [Andrew Dupont], in particular, hates having to check on the machine to see if it is done. So he made Laundry Spy.

How do you sense when the machine — either a washer or a dryer — is done? [Andrew] thought about sensing current but didn’t want to mess with house current. His machines don’t have LED indicators, so using a light sensor wasn’t going to work either. However, an accelerometer can detect vibrations in the machine and most washers and dryers vibrate plenty while they are running.

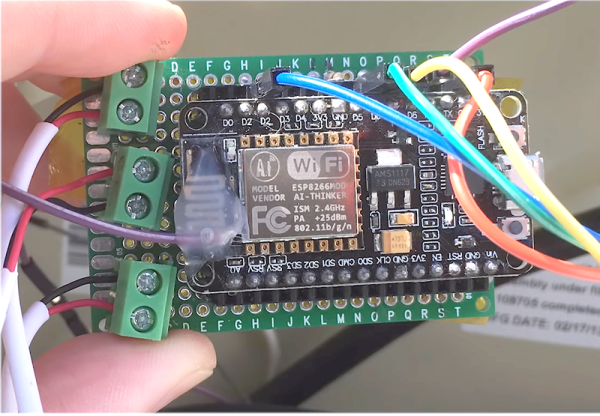
The four-part build log shows how he took an ESP8266 and made it sense when the washer and dryer were done so it could text his cell phone. He’d already done a similar project with an Adafruit HUZZAH. But he wanted to build in some new ideas and currently likes working with NodeMCU. While he was at it he upgraded the motion sensor to an LIS3DH which was cheaper than the original sensor.

[Andrew] already runs Node – RED on a Raspberry Pi, so incorporating this project with his system was a snap. Of course, you could adapt the approach to lots of other things, as well. The device produces MQTT messages and Node – RED subscribes to them. The Pushover handles the text messaging. Node – RED has a graphical workflow that makes integrating all the pieces very intuitive. Here’s the high-level workflow:

You might wonder why he didn’t just have the ESP8266 talk directly to Pushover. That is possible, of course, but in part 2, [Andrew] enumerates some good reasons for his design. He wants to decouple components in the system for easier future upgrades. And MQTT is simple to publish on the sensor side of things compared to API calls which are handled by the Raspberry Pi for now.

Laundry monitoring isn’t a unique idea and everyone has a slightly different take on it, even some Hackaday authors. If phone notification is too subtle for you, you can always go bigger.

Welcome To The Internet Of Hamsters

It was only a matter of time. Everything else is getting its data logged and reported to the Internet for detailed analysis, so why should our rodents be any different? The cover story is that [Nicole Horward] hooked her pet hamster Harold up to the web because she wanted to see if he was getting as much exercise as he should. The real reason is, of course, that Harold wanted to show off to his “friends” on Hamsterbook.

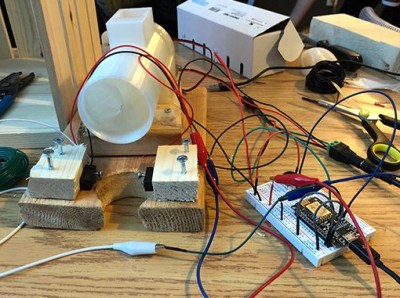
The hardware side of this hack is very simple, a magnetic door sensor (like the kind used in alarm systems) is used to detect each time the wheel makes a complete rotation. The sensor is hooked up to the GPIO pins of a Raspberry Pi, where it’s read by a Python script. A small LCD screen was added to give some visual feedback on Harold’s daily activity, and the whole thing was boxed up in a laser cut enclosure.

That gave [Nicole] a cute little display next to Harold’s cage, but it didn’t do much for analyzing his activity. For that, a script is used to upload the data every minute to a ThingSpeak channel via MQTT. This automatically generates attractive graphs from the raw data, making it much easier to visualize what’s happening over the long term.

Now might be a good time to brush up on your MQTT knowledge, so that your pet could be the next to join the IoT revolution.

Continue reading “Welcome To The Internet Of Hamsters”

Friday Hack Chat: Talking MQTT With The Community

The Internet of Things is just around the corner, and somehow or another, all these bits of intelligent dust and juice bag squeezers will have to talk to one another. One of the better ways to get IoT bits talking to each other is MQTT, Message Queuing Telemetry Transport, a protocol designed for small code footprints and limited network bandwidth. It gets a lot of IoT hype, but it’s a great alternative to HTTP for your own small projects, so that’s what we’re talking about during this week’s Hack Chat.

MQTT is a machine-to-machine connectivity protocol, very useful in remote locations, where a small code footprint is required, where bandwidth is at a premium, or for turning a lamp on and off from your phone, while sitting in the same room. It’s ideal for mobile applications, and in the twenty or so years since its creation, MQTT has made inroads into all those ‘smart’ devices around your house.

MQTT is based on a very simple publish and subscribe model with ‘topics’ that allow you to configure where messages should be sent. It is an extremely simple protocol, but with MQTT, you can set up a complete home automation system that opens the garage door, turns on a lamp, or pings a few weather sensors.

For this week’s Hack Chat, we’re going to be discussing MQTT with the entire Hackaday.io community. There are dozens of people who have built MQTT-based projects that frequent the Hack Chat, and hundreds more that want to learn. Want to get in on the ground floor of the Internet of Things? This is the Hack Chat you want to check out. It’s a community pow-wow around connected devices.

join-hack-chat

Our Hack Chats are live community events on the Hackaday.io Hack Chat group messaging. This week the crew is going to sit down around the campfire around noon, Pacific time, Friday, April 13th (oooh, spooky). Want to know what time this is happening in your neck of the woods? Have a countdown timer!

Click that speech bubble to the right, and you’ll be taken directly to the Hack Chat group on Hackaday.io.

You don’t have to wait until Friday; join whenever you want and you can see what the community is talking about.