An Arduino Nano Clone In A DIP-Sized Footprint

Nobody doubts the utility of the Arduino Nano and its many clones, and chances are good you’ve got at least one or two of the tiny dev boards within arm’s reach right now. But as small as it is, the board still takes up a fair amount of real estate, especially on solderless breadboards during the prototyping phase of a project. Wouldn’t it be nice to shrink down the Nano just a bit and regain a couple of rows for plugging in components and jumpers?

It looks like [Albert van Dalen] thought so, and he managed to get a Nano’s functionality — and then some — onto a DIP-26 footprint. The aptly named “Nano DIP,” which at 33 mm x 10 mm — about the same size as the ATmega328 on the Arduino Uno — will tickle the miniaturization fans out there. The board is built around an ATtiny3217 and has almost all of the Nano’s features, like a USB port, reset button, built-in LEDs, 5 V regulator, and preloaded bootloader. Its big extra feature is the 350-kilosamples-per-second 8-bit DAC, while sacrificing external crystal pins and a 3.3 V regulator.

To make the board cheap enough to manufacture, [Albert] elected a minimum component size of 0402, which made squeezing all the parts onto the board challenging. The MCU barely fits between the header pin pads, and the Micro USB jack had to be a vertical-mount type. It does the business, though, so if you’re looking to free up a little breadboard space, check it out.

Pocket Computer Reminds Us Of PDAs

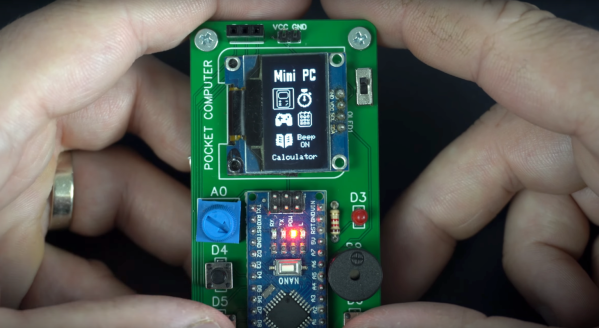
Before smartphones exploded on the scene in the late 00s, there was still a reasonable demand for pocket-sized computers that could do relatively simple computing tasks. Palm Pilots and other PDAs (Personal Digital Assistants) were all the rage in the ’90s and early ’00s, although for cutting-edge tech from that era plenty of these devices had astronomical price tags. This Arduino-based PDA hearkens back to that era, albeit with a much more accessible parts list.

The build is based around an Arudino Nano with an OLED screen and has the five necessary functions for a PDA: calculator, stopwatch, games, phonebook, and a calendar. With all of these components on such a small microcontroller, memory quickly became an issue when using the default libraries. [Danko] uses his own custom libraries in order to make the best use of memory which are all available on the project’s GitHub page. The build also includes a custom PCB to keep the entire pocket computer pocket-sized.

There are some other features packed into this tiny build as well, like the breakout game that can be played with a potentiometer. It’s an impressive build that makes as much use of the microcontroller’s capabilities as is possible, and if you enjoy projects where a microcontroller is used as if it is a PC take a look at this Arduino build with its own command-line interface.

Continue reading “Pocket Computer Reminds Us Of PDAs”

Turn signal monitor

Annoy Yourself Into Better Driving With This Turn Signal Monitor

Something like 99% of the people on the road at any given moment will consider themselves an above-average driver, something that’s as statistically impossible as it is easily disproven by casual observation. Drivers make all kinds of mistakes, but perhaps none as annoying and avoidable as failure to use their turn signal. This turn signal monitor aims to fix that, through the judicious use of negative feedback.

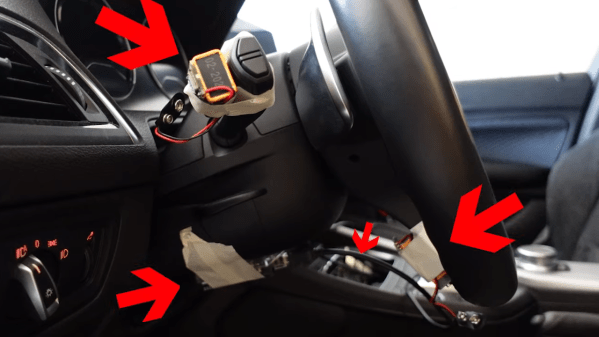
Apparently, [Mark Radinovic] feels that he has a predisposition against using his turn signal due to the fact that he drives a BMW. To break him of that habit, one that cost him his first BMW, he attached Arduino Nano 33 BLEs to the steering wheel and the turn signal stalk. The IMUs sense the position of each and send that over Bluetooth to an Arduino Uno WiFi. That in turn talks over USB to a Raspberry Pi, which connects to the car’s stereo via Bluetooth to blare an alarm when the steering wheel is turned but the turn signal remains untouched. The video below shows it in use; while it clearly works, there are a lot of situations where it triggers even though a turn signal isn’t really called for — going around a roundabout, for example, or navigating a sinuous approach to a drive-through window.

While [Mark] clearly built this tongue firmly planted in cheek, we can’t help but think there’s a better way — sniffing the car’s CANbus to determine steering angle and turn signal status comes to mind. This great workshop on CANbus sniffing from last year’s Remoticon would be a great place to start if you’d like a more streamlined solution than [Mark]’s.

Continue reading “Annoy Yourself Into Better Driving With This Turn Signal Monitor”

Detect Lightning Strikes With An Arduino

Lightning is a powerful and seemingly mysterious force of nature, capable of releasing huge amounts of energy over relatively short times and striking almost at random. Lightning obeys the laws of physics just like anything else, though, and with a little bit of technology some of its mysteries can be unraveled. For one, it only takes a small radio receiver to detect lightning strikes, and [mircemk] shows us exactly how to do that.

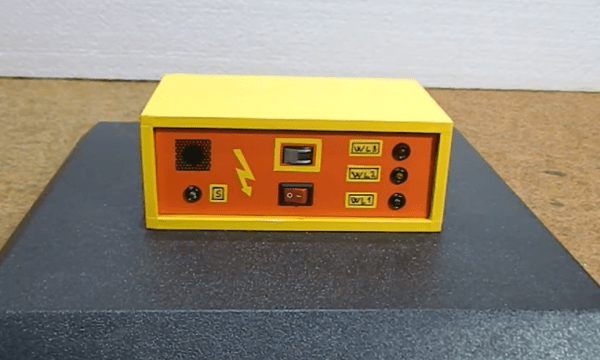
When lightning flashes, it also lights up an incredibly wide spectrum of radio spectrum as well. This build uses an AM radio built into a small integrated circuit to detect some of those radio waves. An Arduino Nano receives the signal from the TA7642 IC and lights up a series of LEDs as it detects strikes in closer and closer proximity to the detector. A white LED flashes when a strike is detected, and some analog circuitry supports an analog galvanometer which moves during lightning strikes as well.

While this project isn’t the first lightning detector we’ve ever seen, it does have significantly more sensitivity than most other homemade offerings. Something like this would be a helpful tool to have for lifeguards at a pool or for a work crew that is often outside, but we also think it’s pretty cool just to have around for its own sake, and three of them networked together would make triangulation of strikes possible too.

Continue reading “Detect Lightning Strikes With An Arduino”

Arduino Finds Treasure

A beach is always a relaxing summer vacation destination, a great place to hang out with a drink and a book or take a swim in the ocean. For those who need a more active beach-going activity with an electronics twist, though, metal detecting is always a popular choice too. And, of course, with an Arduino and some know-how it’s possible to build a metal detector that has every feature you could want from even a commercial offering.

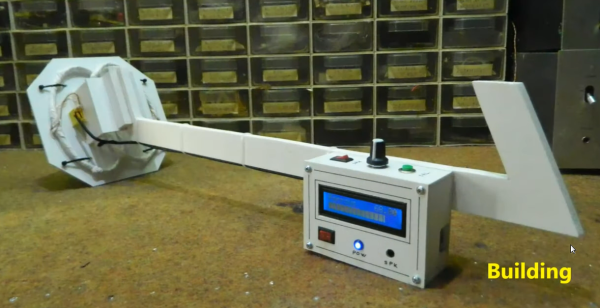
This build comes to us from [mircemk] who built this metal detector around an Arduino Nano and uses a method called induction balance detection to find metal. Similar to how radar works, one coil sends out a signal and the other listens for reflections back from metal objects underground. Building the coils and determining their resonant frequency is the most important part of this build, and once that is figured out the rest of the system can be refined and hidden treasure can easily be unearthed.

One of the more interesting features of this build is its ability to discriminate between ferrous and non-ferrous metals, and it can detect large metal objects at distances of more than 50 cm. There are improvements to come as well, since [mircemk] plans to increase power to the transmission coil which would improve the range of the device. For some of [mircemk]’s other metal detectors, be sure to check out this one which uses a smartphone to help in the metal detection process.

Continue reading “Arduino Finds Treasure”

Homebrew ROM Reader Saves Data From A Vintage Minicomputer

Have you ever heard of a Centurion minicomputer? If not, don’t feel bad — we hadn’t either, until [David Lovett] stumbled upon a semi-complete version of the 1980-ish mini in all its wood-trimmed, dust-encased glory. And what does a hacker do with such an acquisition but attempt to get it going again?

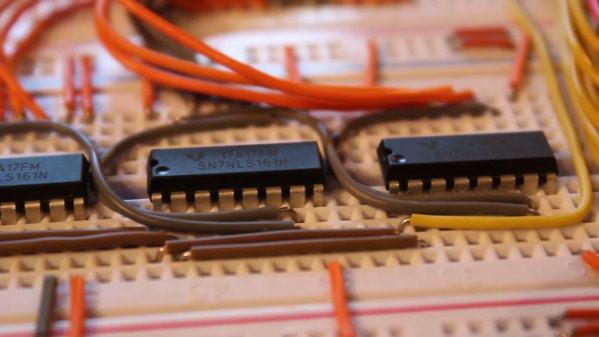
Of course, getting a machine from the Reagan administration running is not without its risks, including the chance of losing whatever is on the machine’s many ROM chips forever. When finding a commercial ROM reader supporting the various chips proved difficult, [David] decided to build his own. The work was eased considerably by the fact that he had managed to read one chip in a commercial reader, giving him a baseline to compare his circuit against. The hardware is straightforward — a 12-bit counter built from a trio of cascaded 74LS161s to step through addresses, plus an Arduino Nano to provide clock pulses and to read the data out to the serial port.

The circuit gave the same results as the known good read, meaning results would be valid for the rest of the chips. The breadboard setup made supporting multiple ROM pinouts easy, even for the chips that take -9 volts. What exactly the data on the ROMs mean, if anything, remains a mystery, but at least it’s backed up now.

Before anyone notes the obvious, yes, [David] could have used a 555 to clock the reader — perhaps even this one. We’d actually have loved that, but we get it — sometimes you just need to throw an Arduino at a job and be done with it.

Continue reading “Homebrew ROM Reader Saves Data From A Vintage Minicomputer”

Hamster Trades Crypto Better Than You

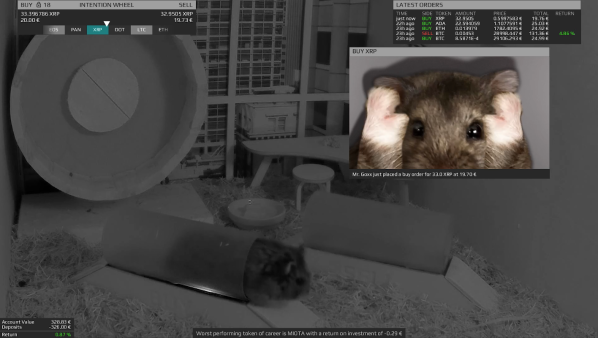
The inner machinations of the mind of cryptocurrency markets are an enigma. Even traditional stock markets often seem to behave at random, to the point that several economists seriously suggest that various non-human animals might outperform one market or another just by random chance alone. The classic example is a monkey picking stocks at random, but in the modern world the hamster [Mr Goxx] actively trades crypto from inside his hamster cage.

[Mr Goxx]’s home comprises a normal apartment and a separate office where he can make his trades. The office contains an “intention wheel” where he can run in order to select a currency to trade, and two tunnels that [Mr Goxx] can use to declare his intention to buy or sell the currency he selected with the wheel. The wheel is connected to an Arduino Nano with an optical encoder, and the Nano also detects the hamster’s presence in the “buy” or “sell” tunnel and lights up status LEDs when he wants to execute a trade. The Nano also communicates with an intricate Java program which overlays information on the live video feed and also executes the trades in real life with real money.

Live updates are sent directly both on Twitter and Reddit, besides the live Twitch stream of [Mr Goxx] we linked above. The stream only shows his office and not his apartment, and he’s mostly active at night (Berlin time). But we can’t wait for his random walks to yield long-term results which can be analyzed for years to come. In the meantime we’ll see if others have been able to make any profits in crypto with any less-random methods.