Join us on Wednesday, July 7 at noon Pacific for the Microfluidics for Biohacking Hack Chat with Krishna Sanka!
“Microfluidics” sounds like a weird and wonderful field, but one that doesn’t touch regular life too much. But consider that each time you fire up an ink-jet printer, you’re putting microfluidics to work, as nanoliter-sized droplets of ink are spewed across space to impact your paper at exactly the right spot.
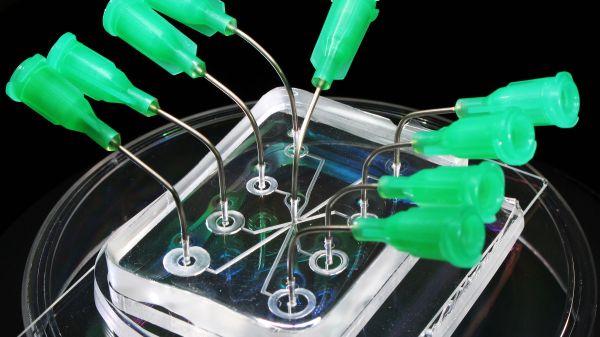
Ink-jets may be mundane, but the principles behind them are anything but. Microfluidic mechanisms have found their way into all sorts of products and processes, with perhaps the most interesting uses being leveraged to explore and exploit the microscopic realms of life. Microfluidics can be used to recreate some of the nanoscale biochemical reactions that go on in cells, and offer not only new ways to observe the biological world, but often to manipulate it. Microfluidics devices range from “DNA chips” that can rapidly screen drug candidates against thousands of targets, to devices that can rapidly screen clinical samples for exposure to toxins or pathogens.
There are a host of applications of microfluidics in biohacking, and Krishna Sanka is actively working to integrate the two fields. As an engineering graduate student, his focus is open-source, DIY microfluidics that can help biohackers up their game, and he’ll stop by the Hack Chat to run us through the basics. Come with your questions about how — and why — to build your own microfluidics devices, and find out how modern biohackers are learning to “go with the flow.”
 Our Hack Chats are live community events in the Hackaday.io Hack Chat group messaging. This week we’ll be sitting down on Wednesday, July 7 at 12:00 PM Pacific time. If time zones have you tied up, we have a handy time zone converter.
[Featured image: Cooksey/NIST]