A Word Clock, The Hard Way

We’ve all seen word clocks, and they’re great, but there are only so many ways to show the time in words. This word clock with 114 servos is the hard way to do it.

We’re not sure what [Moritz v. Sivers] was aiming for with this projection clock, but he certainly got it right. The basic idea is to project the characters needed to compose the time messages onto a translucent PVC screen, which could certainly have been accomplished with just a simple character mask and some LEDs. But for extra effect, [Moritz] mounted each character to a letterbox mounted over a Neopixel. The letterboxes are attached to a rack and pinion driven by a micro servo. The closer they get to the screen, the sharper the focus and the smaller the size of the character. Add in a little color changing and the time appears to float out from a jumbled, unfocused background. It’s quite eye-catching, and worth the 200+ hours of printing time it took to make all the parts. Complete build instructions are available, and a demo video is after the break.

We like pretty much any word clock – big, small, or even widescreen. This one really pushes all our buttons, though.

Continue reading “A Word Clock, The Hard Way”

Painting With Light And A Little G-Code

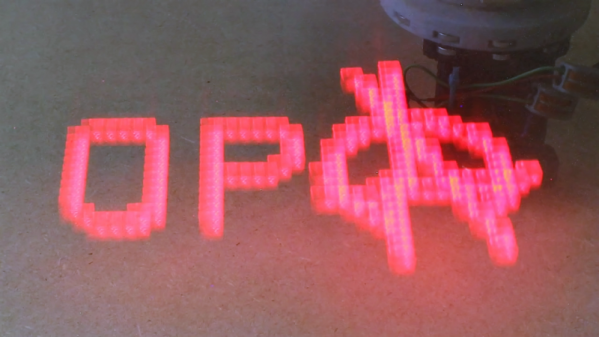
Most photographs are made in the fraction of a second that the camera’s shutter is gathering reflected light from the scene. But there’s fun to be had by leaving the shutter open and directing light into the camera. Called light painting, it can be as simple as a camera on a tripod in a dark room and a penlight spelling out dirty words – not like we’d know – or as complicated as this CNC dot-matrix light printer.

The first idea that [Jeremy S. Cook] had for this build didn’t go so well. He fitted an LED to the gantry of his 3D-printer, intending to send it G-code representing bitmaps. The idea would be to set it up in a dark place, open the shutter, and let the machine build up the image by rastering through the X- and Y- axes while blinking the LED on and off at the right time. But since the gantry only moves in one axis, he abandoned the printer in favor of his CNC router. He printed a collar to fit the dust collector shroud we previously featured, added a battery-powered LED, and affixed a pushbutton switch to the let the Z-axis turn on the light. It took some tweaking such as adding a translucent PLA diffuser, to get decent images, but in the end it worked. We like the soft look of the floating voxels, which were really helped by the later addition of a Nano and a Neopixel. Check out the build in the video below.

One thing we’d suggest is better reflection control. [Jeremy] used a black platen as a background, but it wasn’t quite enough. We suggest going none more black next time.

Continue reading “Painting With Light And A Little G-Code”

Custom Jig Makes Short Work Of Product Testing

When you build one-off projects for yourself, if it doesn’t work right the first time, it’s a nuisance. You go back to the bench, rework it, and move on with life. The equation changes considerably when you’re building things to sell to someone. Once you take money for your thing, you have to support it, and anything that goes out the door busted is money out of your pocket.

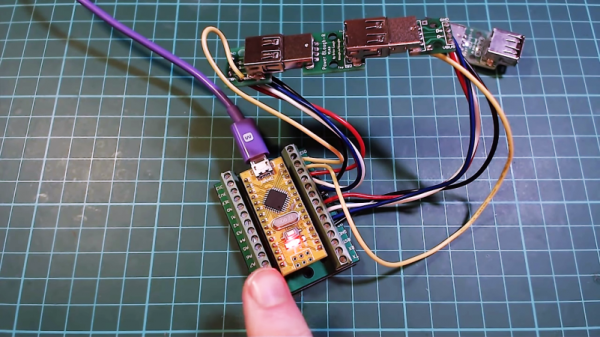
[Brian Lough] ran into this fact of life recently when the widget he sells on Tindie became popular enough that he landed an order for 100 units. Not willing to cut corners on testing but also not interested in spending days on the task, he built this automated test jig to handle the job for him. The widget in question is the “Power BLough-R”, a USB pass-through device that strips the 5-volt from the line while letting the data come through; it’s useful for preventing 3D-printers from being backfed when connected to Octoprint. The tester is very much a tactical build, with a Nano in a breakout board wired to a couple of USB connectors. When the widget is connected to the tester, a complete series of checks make sure that there are no wiring errors, and the results are logged to the serial console. [Brian] now has complete confidence that each unit works before going out the door, and what’s more, the tester shaved almost a minute off each manual test. Check in out in action in the video below.

We’ve featured quite a few of [Brian]’s projects before. You may remember his Tetris-themed YouTube subscriber counter, or his seven-segment shoelace display.

Continue reading “Custom Jig Makes Short Work Of Product Testing”

Follow The Bouncing Needles Of This Analog Meter Clock

Our community never seems to tire of clock builds. There are seemingly infinite ways to mark the passage of time, and finding unique ways to display it is endlessly fascinating.

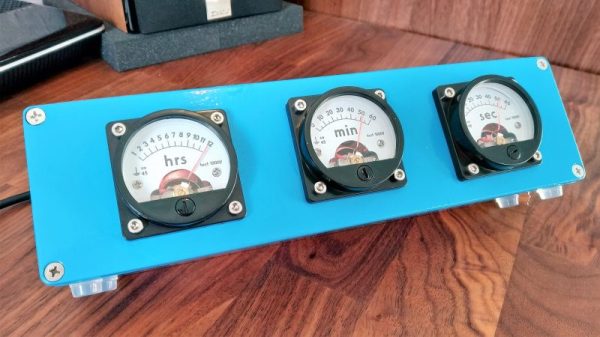
There’s something about this analog voltmeter clock that really seems to have caught on with the Redditors who commented on the r/DIY thread where we first spotted this. [ElegantAlchemist]’s design is very simple – just a trio of moving coil meters with nice industrial-looking bezels. The meters were wired for 300 volts AC, so the rectifier and smoothing cap were removed and the series resistance was substituted for one more appropriate for the 0-5VDC range needed for the project. New dial faces showing hours, minutes and seconds were whipped up in Corel Draw, and everything was put into a sturdy and colorful aluminum “stomp box” normally used for effects pedals. An Arduino Nano and an RTC drive the meters with a nice, bouncy action. Simple, cheap to build, and a real crowd pleaser.

The observant reader will note a similarity to a clock we covered a while back. That one chose 3D-printed cases for an airplane instrument cluster look. We like the spare case design in [ElegantAlchemist]’s build, but wonder how this clock would look in a fine wood case.

Ground-Effect Lighting For Your Bed.

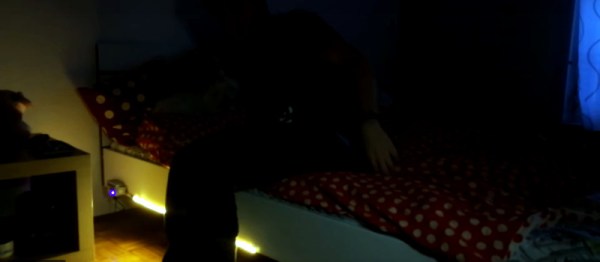
If you’ve ever disturbed your partner by getting up during the night and flicking on the bathroom light — or tripping over something and startling them awake completely in the ensuing catastrophe — [Kristjan Berce]’s idea to install motion-activated ground-effect lighting on his girlfriend’s bed might hold your attention.

[Berce] is using an Arduino Nano for the project’s brain, a PIR sensor from Adafruit, and an L7805 voltage regulator to handle load spikes.  He doesn’t specify the type of LED strip he’s using, but Neopixels might be a safe bet here. Soldering issues over with, he mounted his protoboard in a 3D printed project box. Instead of reinventing the LED, [Berce] copied the code from Adafruit’s PIR tutorial before sticking the project to the side of the bed with adhesive strips so the on/off switch within handy reach to flick before meeting Mr. Sandman. Check out the build video after the break!

Continue reading “Ground-Effect Lighting For Your Bed.”

Not Your Typical POV Clock

Persistence of vision displays are fun, and a natural for clocks, but they’re getting a little Nixie-ish, aren’t they? There are only so many ways to rotate LEDs and light them up, after all. But here’s something a little different: a POP, or “persistence of phosphorescence” clock.

[Chris Mitchell] turned the POV model around for this clock and made the LEDs stationary, built into the tower that holds the slowly rotated display disk. Printed from glow-in-the-dark PLA, the disk gets charged by the strip of UV LEDs as it spins, leaving behind a ghostly dot matrix impression of the time. The disk rotates on a stepper, and the clock runs on a Nano with an RTC. The characters almost completely fade out by the time they get back to the “write head” again, making an interesting visual effect. Check it out in the video after the break.

Our only quibble is the choice to print the disk rather than cut it from sheet stock. Seems like there has to be commercially available phosphorescent plastic, or even the glow-in-the-dark paper used for this faux LED scrolling sign. But if you’ve got glowy PLA, why not use it?

Continue reading “Not Your Typical POV Clock”

Optical Tach Addresses The Need For Spindle Speed Control

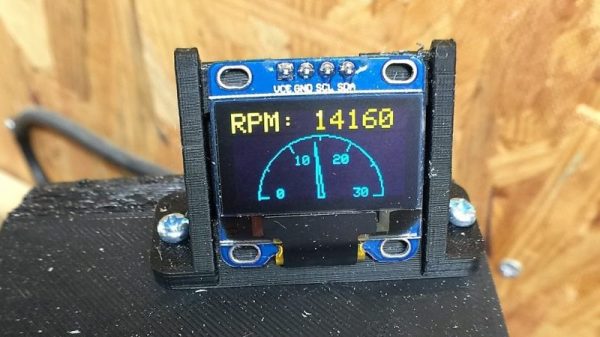
With CNC machines, getting the best results depends on knowing how fast your tool is moving relative to the workpiece. But entry-level CNC routers don’t often include a spindle tachometer, forcing the operator to basically guess at the speed. This DIY optical spindle tach aims to fix that, and has a few nice construction tips to boot.

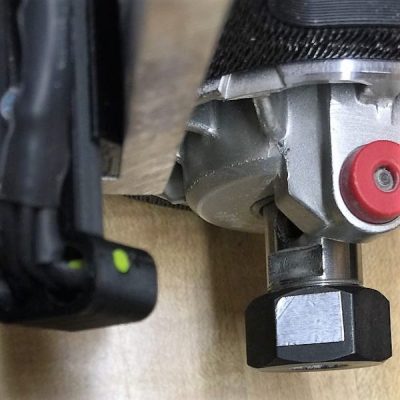
The CNC router in question is the popular Sienci, and the 3D-printed brackets for the photodiode and LED are somewhat specific for that machine. But [tmbarbour] has included STL files in his exhaustively detailed write-up, so modifying them to fit another machine should be easy. The sensor hangs down just far enough to watch a reflector on one of the flats of the collet nut; we’d worry about the reflector surviving tool changes, but it’s just a piece of shiny tape that’s easily replaced.  The sensor feeds into a DIO pin on a Nano, and a small OLED display shows a digital readout along with an analog gauge. The display update speed is decent — not too laggy. Impressive build overall, and we like the idea of using a piece of PLA filament as a rivet to hold the diodes into the sensor arm.

Want to measure machine speed but don’t have a 3D printer? No worries — a 2D-printed color-shifting tach can work too.

Continue reading “Optical Tach Addresses The Need For Spindle Speed Control”