A Classy USB Knob For The Discerning Computerist

The keyboard and mouse are great, we’re big fans. But for some tasks, such as seeking around in audio and video files, a rotary encoder is a more intuitive way to get the job done. [VincentMakes] liked the idea of having a knob he could turn to adjust his system volume or move forward and backwards through a stream in VLC, but he also wanted to be able to repeatedly enter keyboard commands with it; something commercial offerings apparently weren’t able to do.
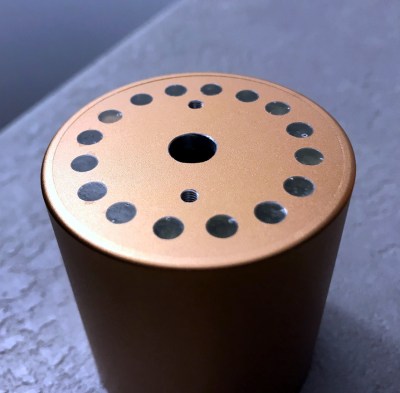
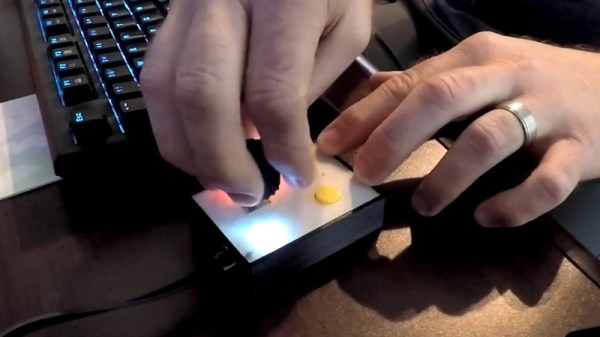
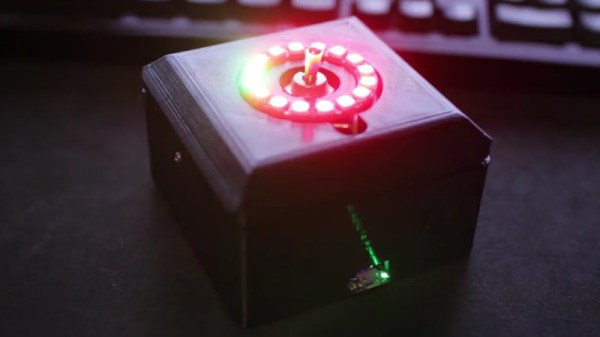
So he decided to build his own USB knob that not only looks fantastic, but offers the features he couldn’t find anywhere else. It’s another project which proves that DIY projects don’t have to look DIY. In fact, they can often give their commercial counterparts a run for their money. But this “Infinity USB Knob” isn’t just a pretty face, it allows the user to do some very interesting things such as quickly undo and redo changes to see how they compare.

As you might imagine, the electronics for this project aren’t terribly complex. The main components are the Adafruit Trinket M0 microcontroller and the EC11 rotary encoder itself. To provide nice visual feedback he added in a NeoPixel ring, but that’s not strictly necessary if you’re trying to rig this up yourself. Though we have to say the lighting effects are a big part of what makes this build look so good.

Though certainly not the only part. The aluminum enclosure, combined with the home theater style knob on the encoder, really give the finished product a professional look. We especially like his method of drilling out the top of the case and filling in the holes with epoxy to create easy and durable LED diffusers. Something to keep in mind for your next control panel build, perhaps.

[VincentMakes] has done an excellent job of documenting the hardware and software sides of this build on Hackaday.io, and gives the reader enough information that replicating this project should be pretty straightforward for anyone who’s interested. While we’ve seen several rotary encoder peripherals for the computer in the past, we have to admit this is one of the most compelling yet from a visual and usability standpoint. If this build doesn’t make you consider adding a USB knob to your arsenal, nothing will.

Continue reading “A Classy USB Knob For The Discerning Computerist”

Every Computer Deserves A Rotary Encoder

In the era of touch screens and capacitive buttons, we’d be lying if we said we didn’t have the occasional pang of nostalgia for the good old days when interfacing with devices had a bit more heft to it. The physical clunk and snap of switches never seems to get old, and while you can always pick up a mechanical keyboard for your computer if you want to hear that beautiful staccato sound while firing off your angry Tweets, there’s a definite dearth of mechanical interface devices otherwise.

[Jeremy Cook] decided to take matters into his own hands (literally and figuratively) by designing his own multipurpose USB rotary input device. It’s not a replacement for the mouse or keyboard, but a third pillar of the desktop which offers a unique way of controlling software. It’s naturally suited to controlling things like volume or any other variable which would benefit from some fine tuning, but as demonstrated in the video after the break even has some gaming applications. No doubt the good readers of Hackaday could think of even more potential applications for a gadget like this.

The device is built around the diminutive Arduino-compatible PICO board by MellBell, which features a ATmega32u4 and native USB. This allowed him to very rapidly spin up a USB Human Interface Device (HID) with minimal headaches, all he had to do was hang his buttons and rotary encoder on the PICO’s digital pins. To that end, he [Jeremy] used the fantastic I2C rotary encoder designed by [fattore.saimon], which readers may remember as a finalist in the Open Hardware Design Challenge phase of the 2018 Hackaday Prize. He also added a NeoPixel ring around the encoder to use for some visual feedback and because, well, it just looks cool.

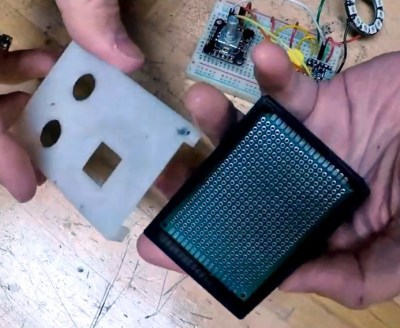
Since all of the core components are digital, there’s not a whole lot required in the way of wiring or passive components. This let [Jeremy] put the whole thing together on a piece of perfboard, freeing him up to spend time designing the 3D printed enclosure complete with translucent lid so he can see the NeoPixel blinkenlights. He got the tolerances tight enough that the whole device can be neatly press-fit together, and even thought to add holes in the bottom of the case so he could push the perfboard back out if he needed to down the line.

[Jeremy] spends a good chunk of the video going over the software setup and development of the firmware, and details some of the nuances he had to wrap his head around when working with the I2C encoder. He also explains the math involved in getting his encoder to emulate a mouse cursor moving in a circle, which he thinks could be useful when emulating games that originally used an encoder such as Tempest or Pong.

We’ve seen similar USB “knobs” in the past for controlling volume, but the additional inputs that [Jeremy] built into his version definitely makes it a bit more practical. Of course we’re suckers for interesting USB input devices to begin with.

Continue reading “Every Computer Deserves A Rotary Encoder”

Definitely-Not-Neopixel Rings, From Scratch!

The WS2812 addressable LED is a marvellous component. Any colour light you want, all under the control of your favourite microcontroller, and daisy-chainable to your heart’s content. Unsurprisingly they have become extremely popular, and can be found in a significant number of the project s you might read about in these pages.

A host of products have appeared containing WS2812s, among which Adafruit’s Neopixel rings are one of the more memorable. But they aren’t quite as cheap as [Hyperlon] would like, so the ever-resourceful hacker has created an alternative for the constructor of more limited means. It takes the form of a circular PCB that apes the Adafruit original, and it claims to deliver a Bill of Materials cost that is 85% cheaper.

In reality the Instructables tutorial linked above is as much about how to create a PCB and surface-mount solder as it is specific to the pixel ring, and many readers will already be familiar with those procedures. But we won’t rest until everyone out there has tried their hands at spinning their own PCB project, and this certainly proves that such an endeavour is not out of reach. Whether or not you pay for the convenience of the original or follow this lead is your own choice.

The real thing has been in so many projects it’s difficult to pick just one to link to. This Christmas tree is rather nice.

NeoPixel Game Rewards Button Mashing

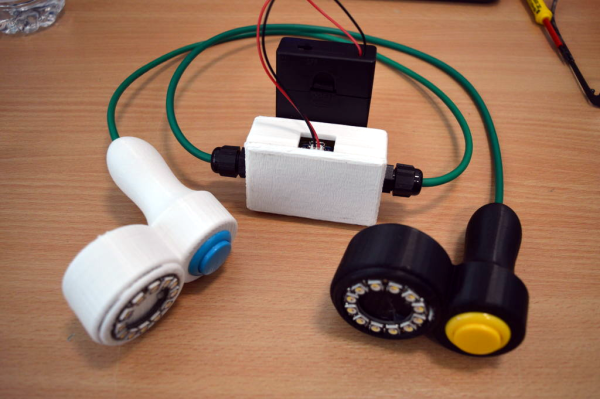
Who has the fastest thumbs at Maker Faire UK? That’s the question [wellsey1972] sought to answer when he created this simple game using little more than two NeoPixel rings, two chunky arcade buttons, and a Trinket.

The idea is simple: each button push lights up one NeoPixel. The first one to fill up their ring is the winner, and is treated to a ring of flashing green lights. The loser, of course, gets flashing red. Both controllers are hard-wired to a box containing a Trinket, a custom PCB with pull-up resistors, and two sets of solderless terminals. [wellsey1972] smartly re-purposed a cat 5 cable for sleeker wiring.

He has a few ideas for the future, like going wireless, printing smaller controllers, and making winning more difficult via potentiometer. We humbly suggest that the loser be taunted by the cry of a sad tuba. Mash past the break for a brief demo.

If you like lights and simplicity but find this build less than challenging, try building a minimal secret maze game.

Continue reading “NeoPixel Game Rewards Button Mashing”

Geocache Locator Is The Gift That Keeps On Giving

Depending on how you look at things, the holidays could be seen as either an excuse to spend money or an excuse to get creative. We imagine many Hackaday readers would rather head to their workbench than the mall when it comes time for gift giving, and [Sean Hodgins] is no different. He came up with the idea of hiding geocaches around his nephew’s neighborhood and building him a locator device to find them. The locator itself is intended to grow with his nephew, allowing him to reprogram it or use its parts for something completely different down the road.

The main components tucked inside of the 3D printed case of the locator are an Adafruit Trinket, a GPS receiver, and a compass module. The Adafruit NeoPixel Ring is of course front and center, serving as the device’s display. To power the device there’s an old battery, a LiPo charger circuit, and a 5V converter.

One of the goals for the project was that it could be constructed out of things [Sean] already had laying around, so some concessions had to be made. The Trinket ended up having too few pins, the compass lacks an accelerometer, and the switches and buttons are a bit clunky for the build. But in the end it comes together well enough to get the job done, and at least he was able to clear some stuff out of his parts bins.

To allow its owner to disassemble and potentially rebuild it into something else later, no soldered joints were used in the construction of the locator. Everything is done with jumper wires, which lead to some interesting problem solving such as using a strip of pin header as a bus bar of sorts. A bit of heat shrink over the bundle holds everything together and prevents shorts.

Location-aware gadgets happen to be an extremely popular gift choice among the hacker crowd. We’ve covered everything from devices cobbled together from trash to hardware which could pass for a commercial product.

Continue reading “Geocache Locator Is The Gift That Keeps On Giving”

Another Desktop LED Xmas Tree!

We love it when someone takes inspiration from one of our posts and comes up with their own twist on it. [Matthew] liked one builds he saw on Hackaday so much, he built his own LED desktop Xmas tree!

[Matthew] was inspired by [designer2k2]’s DIY desktop Xmas tree that was posted in October. To get started, he found a set of concentric WS2812 rings over on Ali Express. The five rings total 93 LEDs, plus a single WS2812 for the top of the tree. He also got a laser cut tree model from Thingiverse and had it cut, combining the LED rings with the tree in the final product

The whole thing running on a Digispark USB Development Board from DigiStump, the same as the original project. There aren’t many details in the video, but [Matthew] has put links to where he got the rings and the tree, the laser cutting service, a link to the DigiStump website as well as a link to [designer2k2]’s original tree project. There’s no source code yet, but [Matthew] says a link to it is coming along with some more pictures.

Continue reading “Another Desktop LED Xmas Tree!”

7 Segment Display Using Neopixel Rings

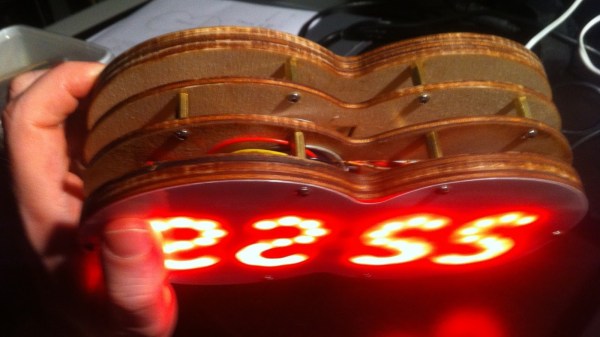
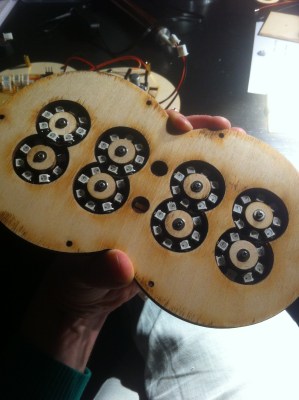
There’s something about clocks — sooner or later, every hacker wants to build one. And we end up seeing all kinds of display techniques being used to show time. For the simplest of builds, 7-segment display modules usually get dug up from the parts bin. If you have a bunch of “smart” LED’s (WS2812’s, APA102’s), then building your own custom 7-segment modules isn’t too difficult either. [rhoalt] had neither, but he did have several 8 LED Neopixel rings lying around. So he thought of experimenting with those, and built a ‘Binoctular’ LED clock which uses the Neopixel rings as 7 segment displays.

figure-eight-segment-displaysEach digit is made using one pair of Neopixel rings, stacked to form a figure of eight. All the digits are composed of arcs, so readability isn’t the best but it’s not hard either. [rhoalt] does mention that the display is easier to read via blurred camera images rather than visually, which isn’t surprising. We’re long used to seeing numbers composed of straight line segments, so arc segmented digits do look weird. But we wouldn’t have known this if [rhoalt] hadn’t shown us, right ? Maybe a thicker diffuser with separator baffles may improve the readability.

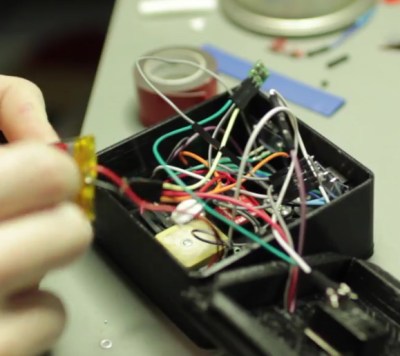
The rest of the build is pretty plain vanilla — an Arduino Nano clone, a DS3231 RTC, a Lithium battery, and some buttons, all housed together in a laser cut enclosure which follows the figure of eight design brief. And as usual, once you’ve built one, it’s time to improve and make a better version.