Just In Time For Christmas! A DIY Desktop LED Tree

Okay, we haven’t even hit Halloween yet, but if you’re planning some kind of holiday project, now’s a good time to start ordering your parts, especially if you’re designing your own PCB. While there’s no PCB involved, [designer2k2] built a desktop “hollow” Christmas tree using some WS2812 RGB LEDs controlled by a microcontroller and powered by USB.

The board running [designer2k2]’s project is a Digispark, a USB powered board by Digistump which contains an ATtiny85. The LEDs, four different sized NeoPixel rings, plus a single pixel for the top, are connected together using some solid wire which makes for a very cool look. The code that runs on the ATtiny is the part that really makes this tree. The code cycles through colors and some light chaser effects, as well as a mode that shows a green tree with some white lights. The whole project is topped off by a routine that spells “XMAS” as you look at the tree from the top down.

We’ve seen some other Christmas tree hacks over the years controlled by various things, but this one is a fairly simple, cool design. [Designer2k2] also released the code for the tree and I’m sure a lot of us could come up with some more light designs.

Check out the video after the break:

Continue reading “Just In Time For Christmas! A DIY Desktop LED Tree”

Upgrading An Old Lantern

[Shockwaver] stumbled across some old kerosene lanterns, and decided he also stumbled across his next project. He decided to leave the kerosene out, and in its place used some RGB LEDs to bring the lanterns back to life. This is quite an upgrade. Considering the burning kerosene will only put out a few colors of light, the astute reader will have realized the RGB array has the ability put out over 16 million colors.

After some initial testing, he settled on a 24 LED circle array powered by an ATtiny85. The FastLED library helped him keep the code within the tight memory requirements. [Shockwaver] was not used to working with the such a small amount of memory, but after some fiddling he was able to make it work in the end, using 8,126 bytes.

The source can be found on his github page. Be sure to check out the video below to see the RGB lantern in action.

Continue reading “Upgrading An Old Lantern”

Mood Lighting With LEDs And An Arduino

Regular candles can be awfully boring at times. They can only produce one color and the flicker is so… predictable. They can’t even be controlled by an infrared remote control, not to mention the obvious fire hazard. Now, however, [Jose] has come up with an LED candle that solves all of these problems. (Original link to the project in Spanish.)

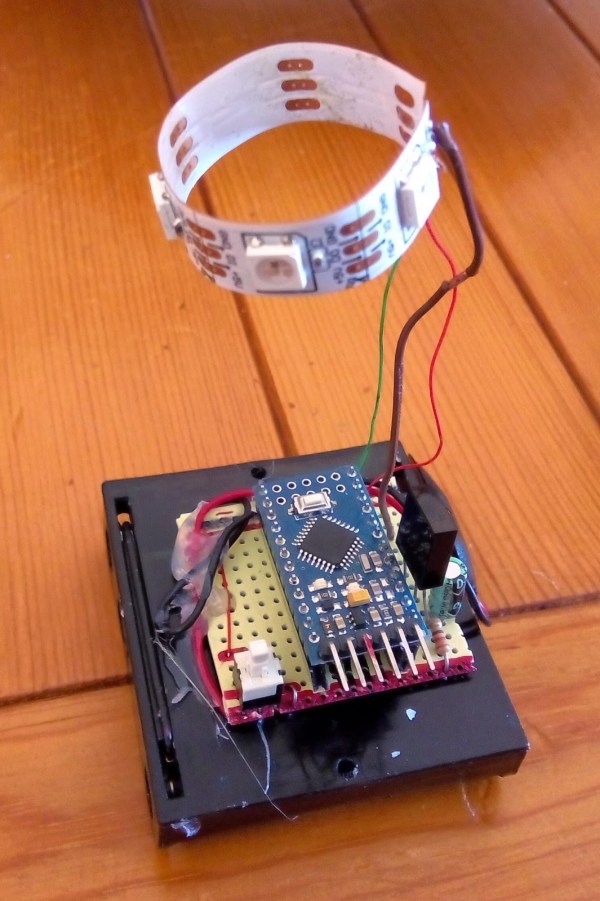
The heart of the project is an Arduino Pro Mini, which is especially suited for this project because of its size. [Jose] put the small form-factor microcontroller in the base of a homemade wax enclosure and wired it to a Neopixel WS2812b LED strip. The strip can produce any color, and has some programmed patterns including flicker, fade, rainbow, and fire.

The artificial candle is controlled with an infrared remote control, and all of the code for the project is available on the project site if you want to build your own. [Jose] has been featured here before for his innovative Arduino-driven RGB lighting projects, and this is another great project which builds on that theme!


Arduino-based LED Wedding Lights

Light (1 of 3)Light (2 of 3)

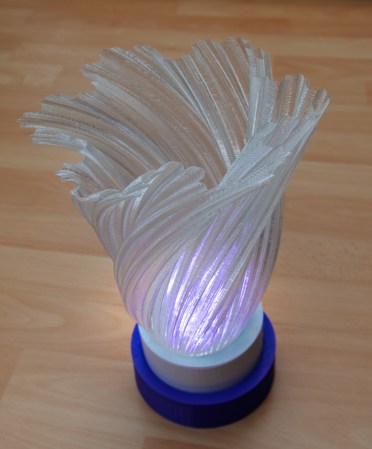
[Rob] created these amazing Bluetooth controlled LED lights for his daughter’s wedding adding a colorful ambient glow to the ceremony. Each item held a Neopixel ring and an Arduino microprocessor with a wireless module that could be individually addressed over a ‘mini-network.’ The main master station would receive commands from a Windows Phone. Usually we see Arduino-based projects being run with Android apps, so it’s nice to see that Microsoft is still present in the maker community.

The enclosures and translucent vases that sit atop the devices were 3D printed. All eight of the matrimonial units synchronized with each other, and the colors could be changed by sliding the settings bar on the app.  [Rob] says that it was a lot of fun to build, and jokingly stated that it kept him “out of all the less important aspects of the ceremony. (food choice, decor, venue, who to marry etc etc).” The outcome was a beautiful arrangement of tabletop lighting for the wedding. A demo of [Rob]’s setup can be seen in the video below.

Continue reading “Arduino-based LED Wedding Lights”

Hypno-Jellyfish Is Great For Kids (and Kids At Heart)

hjf3_blue

LED’s are fun. They are easily seen, not to hard to hook up, and produce a nice glow that can be gazed at for hours. Kids love them, so when [Jens] daughter was born, he knew that he wanted to create a device that would alternate colors depending on the object’s movement.

He utilized a mpu6050 accelerometer to detect changes in position, and wired together an Arduino Nano, a 9V battery, and a 12 LED neopixel ring from adafruit. Design requirements were jotted down beforehand ensuring that any child playing with the Hypno-Jellyfish would not be injured in any way. For example, anything that fits in a child’s mouth, will go in that child’s mouth; meaning that any materials used must be non-toxic, big enough not to be swallowed, and drool proof/water proof. The kids will pull, and throw, and drop the toy as well, so everything has to be of sturdy quality too. Epilepsy is also a concern when dealing with LED’s. But, [Jens] project hit the mark, making something that is kid-friendly while at the same time enjoyable for anyone else who likes color-changing lights.

Continue reading “Hypno-Jellyfish Is Great For Kids (and Kids At Heart)”

The RC White House Robot

IMG_20140726_124812_164

This remote controlled, Arduino-based robot was created by a young student named [Quin] who likes to teach electronics classes at hackerspaces. It is an adaptation of this awesome, fast, fully autonomous mini Roomba that has since driven its way into the Presidential building during the 1st ever White House Maker Faire.

The quick, little device uses a robot chassis kit with an XBee wireless module so that the controller and the robot can be connected together. An NFC Shield was hacked and split in half so that the wires could be soldered in place.

[Quin]’s goal was to develop a fun game that records the number of times the robot drives over NFC tags laid across a flat surface. Points are shown in the form of blinking lights that illuminate when the device goes over the sensors, keeping track of the score.

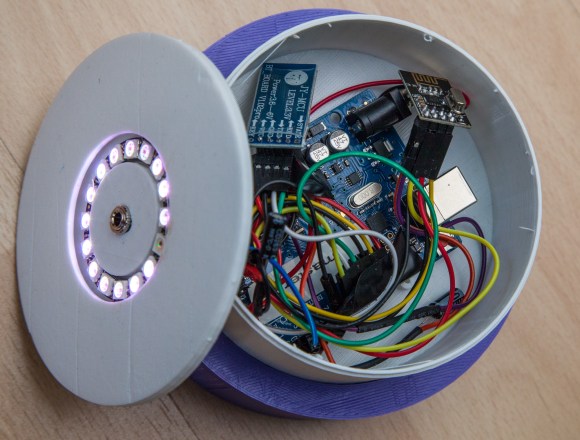
The controller container was made with an open source 3D printer called a Bukobot. The enclosure holds an Arduino and another XBee shield along with a joystick and a neopixel ring, giving it a nice polished look complete with a circle of beautiful, flashing LED’s.

Continue reading “The RC White House Robot”

PIC Up A NeoPixel Ring And C What You Can Do Using This Tutorial

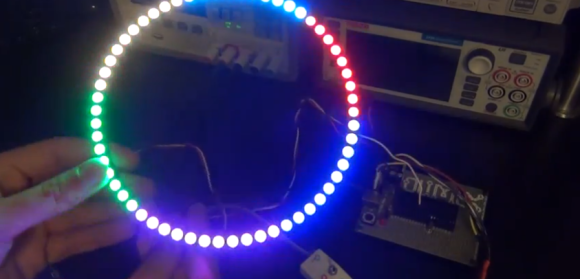
lit ringAs [Shahriar] points out in the introductory matter to his latest video at The Signal Path, Arduinos are a great way for a beginner to dig into all kinds of electronic excitement, but they do so at the cost of isolating that beginner from the nitty gritty of microcontrollers. Here, [Shahriar] gives a very thorough walkthrough of a 60-neopixel ring starting with the guts and glory of a single RGB LED. He then shows how that ring can easily be programmed using a PIC and some C.

[Shahriar]’s eval board is a simple setup that he’s used for other projects. It’s based on the PIC18F4550 which he’s programming with an ICD-U64. The PIC is powered through USB, but he’s using a separate switching supply to power the ring itself since he would need ~60mA per RGB to make them burn white at full brightness.

He’s written a simple header file that pulls in the 18F4550 library, sets the fuses, and defines some constants specific to the ring size. As he explains in the video, the PIC can create a 48MHz internal clock from a 20Mhz crystal and he sets up this delay in the header as well. The main code deals with waveform generation, and [Shahriar] does a great job explaining how this is handled with a single pin. Before he lights up the ring, he puts his scope on the assigned GPIO pin to show that although the datasheet is wrong about the un-delayed width of the low period for a zero bit, it still works to program the LEDs.

[Shahriar] has the code available on his site. He is also holding a giveaway open to US residents: simply comment on his blog post or on the video at YouTube and you could win either a TPI Scope Plus 440 with probes and a manual or a Tektronix TDS2232 with GPIB. He’ll even pay the shipping.

Continue reading “PIC Up A NeoPixel Ring And C What You Can Do Using This Tutorial”