Triangle Tiles Form Blinky Networks Using Clever Interconnects

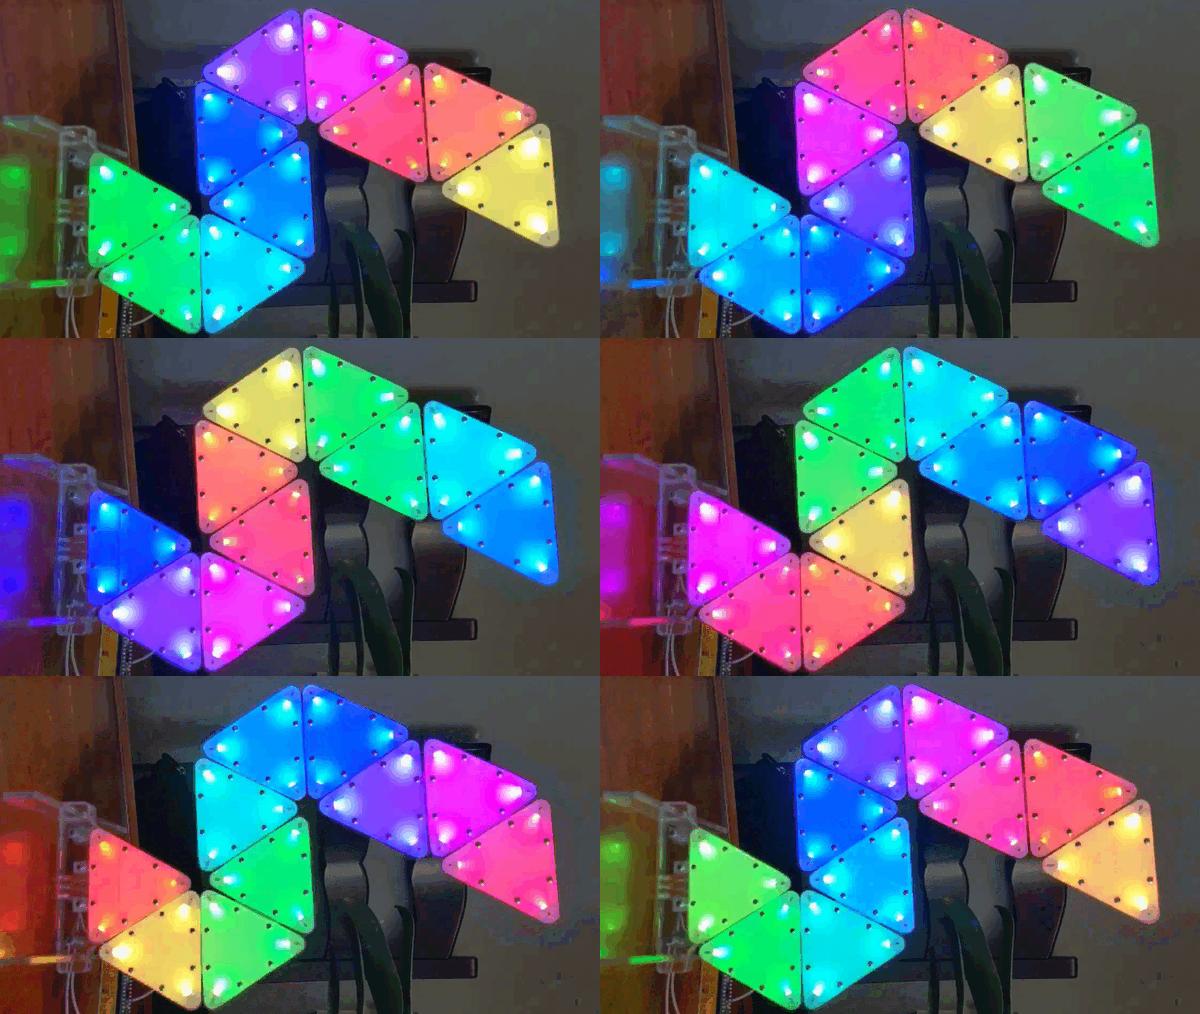
We love to see LEDs combined in all shapes and sizes, so we were especially ticked when we caught a glimpse of [Debra Ansell]’s (also known as [GeekMomProjects]) interlocking triangular TriangleLightPanel system glowing on our screen. This unusually shaped array seemed to be self supporting and brightly glowing, so we had to know more.

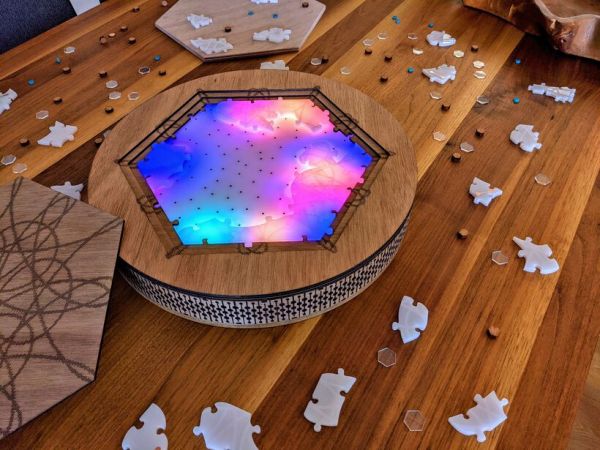
The TriangleLightPanel is a single, triangular, light panel (refreshing when everything is in the name, isn’t it?).  Each panel consists of a single white PCBA holding three side-firing SK6812 LEDs aimed inward, covered by transparent acrylic. When the LEDs are doing their thing, the three-position arrangement and reflective PCB surface does diffuses the light sufficiently to illuminate each pane — if not perfectly evenly — very effectively. Given the simple construction it’s difficult to imagine how they could be significantly improved.

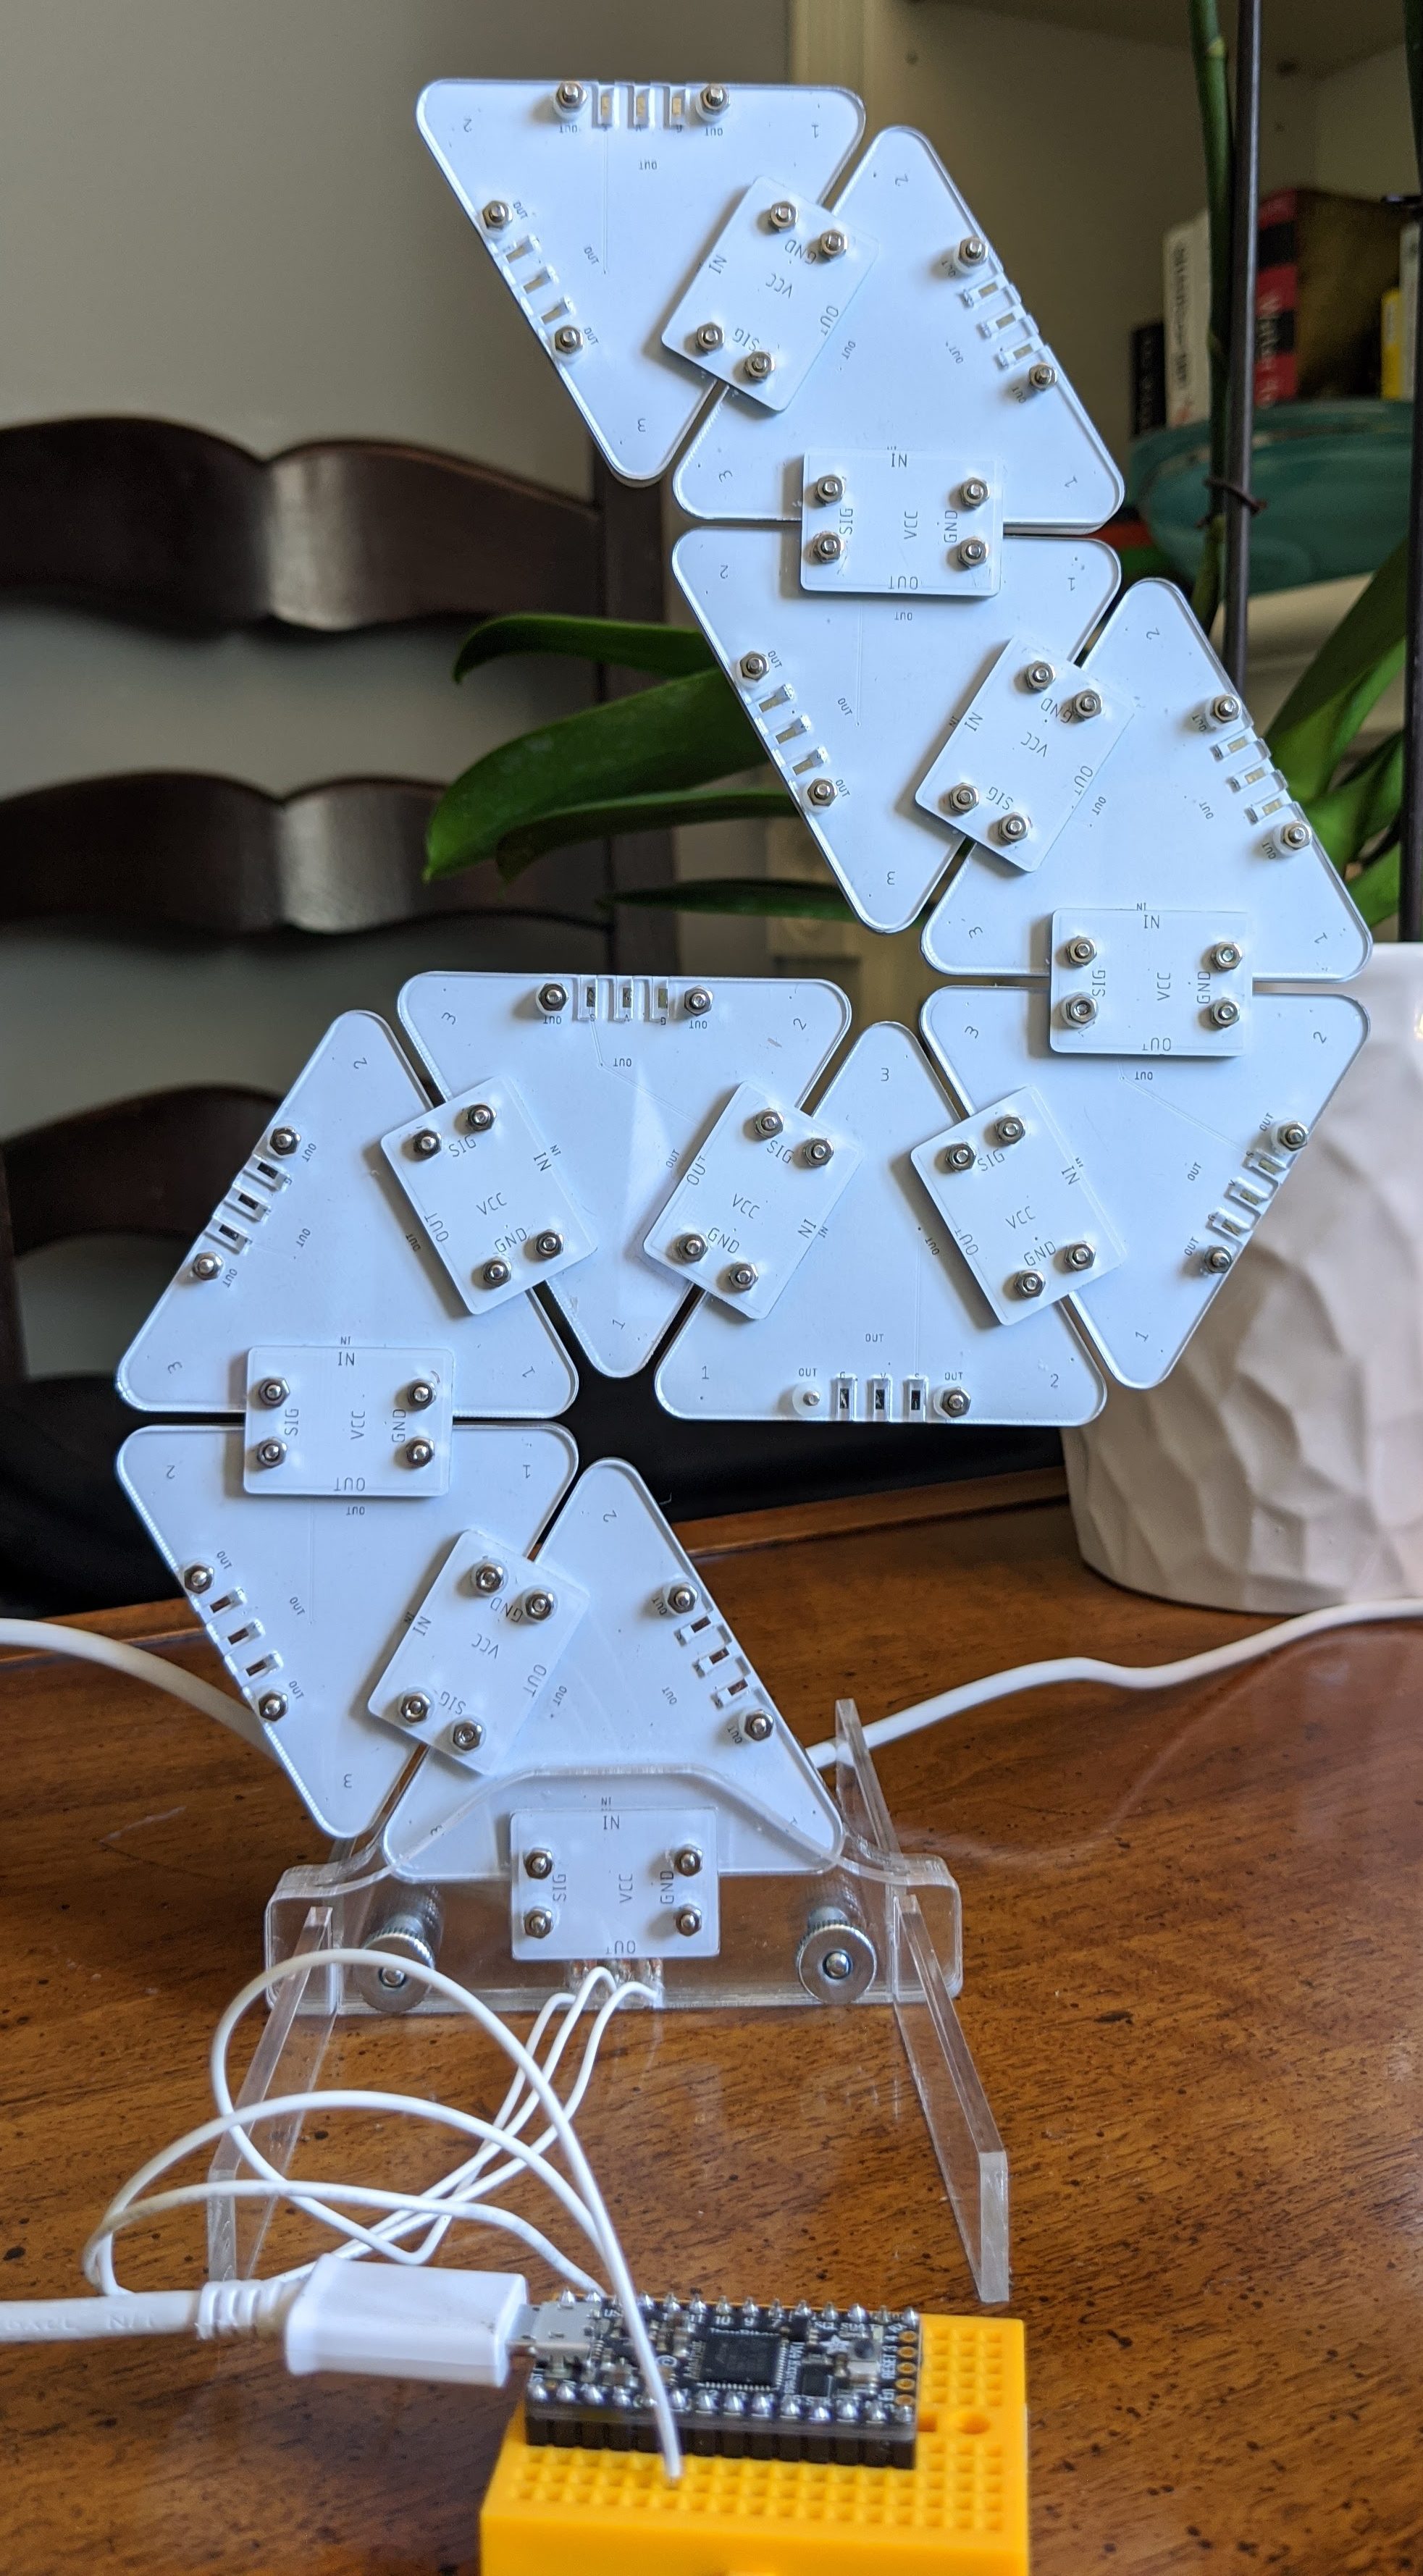
The real trick is the mechanical arrangement. Instead of being connected with classic Dupont jumper wires and 0.1″ headers or some sort of edge connector, [Debra] used spring contacts. But if you’re confused by the lack of edge-plated fingers think again; the connectors are simple plated strips on the back. There is a second PCBA which effectively acts as wires and a surface to mount the spring contacts on, which is bolted onto the back of the connected leaves to bridge between each node. The tiles need to be mechanically connected in any case, so it’s a brilliantly simple way to integrate the electrical connection with the necessary mechanical one.

All the requisite source files are available on the project’s GitHub page and the original Tweets announcing the project are here for reference. We can’t wait to see what this would look like with another 30 or 40 nodes! Enterprising hackers are already building their own setup; see [arturo182]’s 24 tile array glowing after the break.

Continue reading “Triangle Tiles Form Blinky Networks Using Clever Interconnects”

NeoPill Is The NeoPixel Emulator You’ve Always Wanted

NeoPixels and other addressable LED strings are a technology that have made vibrant, glowing LED projects accessible to all. Of course, it’s nice to be able to simulate your new glowy project in software before you actually set up your LED strings in practice. [Randy Elwin]’s NeoPill simulator can help with that!

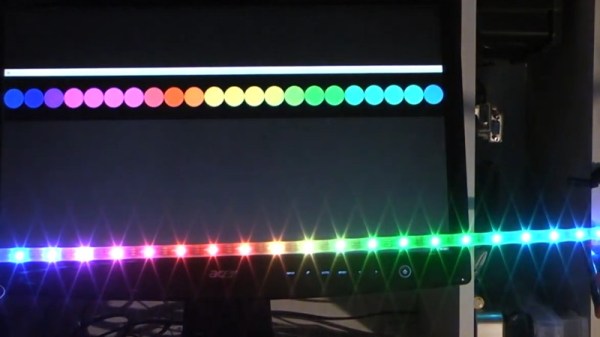
The NeoPill consists of an STM32F103 development board, into which one simply hooks up a NeoPixel data line. The microcontroller then decodes the data using a combination of its onboard timers and SPI hardware. This data is then passed to a PC over the onboard USB serial connection, where it’s decoded by a custom Python app. The app takes the data and displays the pixels on screen, so you can verify they operate as expected before you hook up a single real LED.

It’s a great tool, one that costs very little and yet does the job well. It can even be used with LEDs in circuit to verify if problems are related to the data output or the hardware itself. [Randy] demonstrates the software working with strings of up to 256 LEDs at once; we’d love to see how far it can be pushed before breaking. Code is available on Github for those keen to get their own NeoPill operational.

It’s not the only NeoPixel simulator out there, but it is the first one we’ve seen that can be used to debug actual signals from real hardware, and that’s an incredibly useful thing to have in your toolbelt. Video after the break.

Continue reading “NeoPill Is The NeoPixel Emulator You’ve Always Wanted”

Camera Zero Looks Cool, Runs Cool

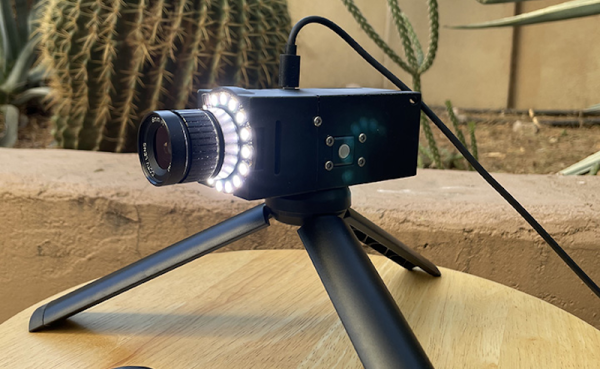
Security cameras are a commodity item these days, but that doesn’t mean [edgett’s] design using a Pi Zero, an Arducam, an LED ring, and active cooling isn’t worth a look. This is a great example of how integrating some off-the-shelf modules and 3D printing can create very professional-looking results. There’s also a trackball interface so you can control the camera. The software, written in Python, is available on GitHub.

The trackball doesn’t move the camera, but it does manage a menu system that lets you capture a photo or video, set the optical parameters like exposure, shutter, and ISO, and launch Camera Remote to offer a Web-based interface instead of the trackball.

If you add infrared illumination, you can swap out the camera for an IR version and have a nice-looking night vision camera, too. The camera is reasonably compact. Not including the lens and the tripod, the camera measures 100 by 44 by 44 mm. So under two inches square and about 4 inches long.

We worried a little about gluing the LED ring down, but then again our phones are all glued together these days, so maybe we should stop fretting. One thing we didn’t see on either site, though, was a picture taken with the camera itself. However, the 12-megapixel camera and quality lens should do a great job. We’ve even seen that particular camera module work with a much smaller computer recently.

Antique Map Of Paris With Modern Tech

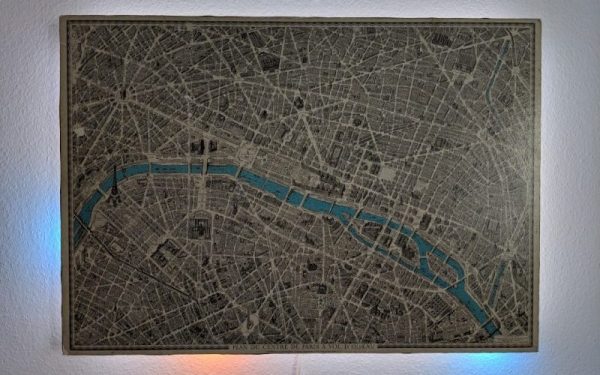
There’s plenty to love about antiques, from cars, furniture, to art. While it might be a little bit of survivorship bias, it’s easy to appreciate these older things for superior quality materials, craftsmanship, or even simplicity. They are missing out on all of our modern technology, though, so performing “restomods” on classics is a popular activity nowadays. This antique map of Paris, for example, is made of a beautiful hardwood but has been enhanced by some modern amenities as well.

At first the creator of this project, [Marc], just wanted to give it some ambient lighting, but it eventually progressed over the course of two years to have a series of Neopixels hidden behind it that illuminate according to the current sun and moon positions. The Neopixels get their instructions from an ESP8266 which calculates these positions using code [Marc] wrote himself based on the current date. Due to the limitations of the ESP8266 it’s not particularly precise, but it gets the job done to great effect.

To improve on the accuracy, [Marc] notes that an ESP32 could be used instead, but we can give the ESP8266 a pass for now since the whole project is an excellent art installation even if it is slightly off on its calculations. If you need higher accuracy for tracking celestial objects, you can always grab a Raspberry Pi too.

Clock-of-Clocks Adds Light-Pipe Hands For Beauty And Function

We’ve gotten used to seeing “meta clocks,” clocks that use an array of analog clock faces and piece together characters using the hands of the clocks. They’re very clever, and we always like to see them, especially when they come with detailed build instructions like this one does.

What’s also nice about [Erich Styger]’s “MetaClockClock” display is the twist on the original concept. Where most clock-of-clocks depend on the contrast between the hands and the faces of the analog movements, [Erich] added light to the mix. Hidden inside the bezel of each clock is a strip of RGB LEDs; coupled with the clear acrylic hands of the clock, which act as light pipes, each clock can contribute different shapes of different colors to the display. Each clock is built around a dual-shaft stepper motor of the kind used in car dashboard gauges; the motors each live on a custom PCB, while the LEDs are mounted on a ring-shaped PCB of their own. Twenty-four of the clocks are mounted in a very nice walnut panel, which works really well with the light-pipe hands. The video below shows just some of the display possibilities.

[Erich] has documented his build process in extreme detail, and has all the design files up on GitHub. We won’t say that recreating his build will be easy — there are a lot of skills needed here, from electronics to woodworking — but at least all the information is there. We think this is a beautiful upgrade to [Erich]’s earlier version, and we’d love to see more of these built.

Continue reading “Clock-of-Clocks Adds Light-Pipe Hands For Beauty And Function”

This Slimline Word Clock Uses Laser Etching To Keep Things Simple

Judging by the tips we get, it seems like the popularity of word clocks has perhaps started falling off lately. But back at peak word clock, we were seeing dozens of designs, some better than others. This simple but classy word clock seems to benefit from all that prior art, making the design just about as simple as it can get while still looking great.

The main tool for [t0mg]’s build is a laser cutter, which is a great choice for keeping the design simple. The tricky part of word clocks is getting the “word search” matrix executed cleanly, and we’ve seen everything from laser-cut wood to inkjet prints, and even commercially produced PCBs, used for the job. [t0mg] opted instead to spray paint a piece of glass and etch away the characters with the laser, which results in superb text quality. Etching the underside of the glass also has the advantage of protecting the paint layer while giving the finished clock a glossy face that really looks nice. Under the template lie layers of MDF that hold the Neopixel strips and act as light guides, while an ESP32 and RTC perform timekeeping and LED-driving duties. [t0mg] finished off the clock with a nice web interface to set the clock, change the colors, and perform maintenance functions. The video below shows the software in use.

We really think this clock looks great, and for those with access to a laser cutter, it seems like a great way to go about building your own.

Continue reading “This Slimline Word Clock Uses Laser Etching To Keep Things Simple”

Weather Note Tells You What You Need To Know, And No More

Smartphones are portals to an overwhelming torrent of information. Yes, they’re a great way to find out the time, your bus schedule, and the weather, but they’re also full of buzzers and bells going off every three minutes to remind you that your uncle has reposted a photo of the fish he caught ten years ago. Sometimes, it’s better to display just the essentials, and that’s what Weather Note does.

It’s built around the Adafruit Feather Huzzah, a devboard built around the venerable ESP8266. It’s a great base for an Internet of Things project like this one, with WiFi built-in and ready to go. The Weather Note talks to a variety of online platforms to scrape weather data and helpful reminders, with the assistance of If This Then That, or IFTTT. Reminders to walk the dog or get some milk are displayed on a small OLED screen, while there’s also a bunch of alphanumeric displays for other information. WS2812 LEDs are used behind a shadowbox to display weather conditions, with cute cloud, rain, and sun icons. It’s all wrapped up in a tidy frame perfect for the mantlepiece or breakfast table.

It’s a great build to learn about programming for the Internet of Things, and with those bright LED displays, it’s probably a viable nightlight too. It’s a rare project that can both tell you about the weather and keep you from stubbing your toe in the kitchen, after all. Those desiring a stealthier build should consider going down the smart mirror route instead. Video after the break.

Continue reading “Weather Note Tells You What You Need To Know, And No More”