A Chrome Extension For Configuring RGB LEDs

Like pretty much all of us, [Andy Schwarz] loves RGB LEDs. Specifically he likes to put them on RC vehicles, such as navigation lights on airplanes or flashers and headlights on cars. He found himself often rewriting very similar Arduino code for each one of these installations, and eventually decided he could save himself (and all the other hackers in the world) some time by creating a customizable Arduino firmware specifically for driving RGB LEDs.

The software side of this project, which he’s calling BitsyLED, actually comes in two parts. The first is the firmware itself, which is designed to control common RGB LEDs such as the WS2812 or members of the NeoPixel family. It can run on an Arduino Pro Mini with no problems, but [Andy] has also designed his own open hardware control board based on the ATtiny84 that you can build yourself. Currently you need a USBASP to program it, but he’s working on a second version which will add USB support.

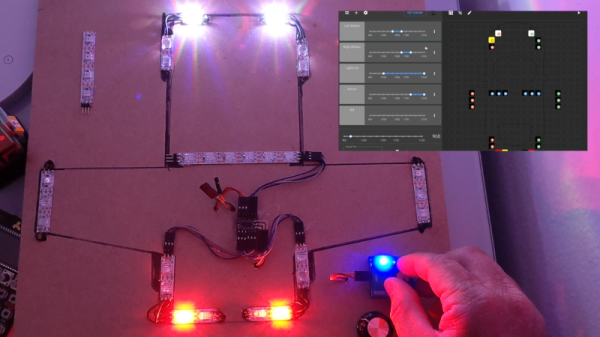
With your controller of choice running the BitsyLED firmware, you need something to configure it. For that, [Andy] has developed a Chrome extension which offers a very slick user interface for setting up colors and patterns. The tool even allows you to create a visual representation of your LEDs so you can get an idea of what it’s going to look like when all the hardware is powered up.

RGB LEDs such as the WS2812 are some of the most common components we see in projects today, mainly because they’re so easy to physically interface with a microcontroller. But even though it only takes a couple of wires to control a large number of LEDs, you still need to write the code for it all. BitsyLED takes a lot of the hassle out of that last part, and we’re very interested to see what the hacker community makes of it.

Continue reading “A Chrome Extension For Configuring RGB LEDs”

A Word Clock, The Hard Way

We’ve all seen word clocks, and they’re great, but there are only so many ways to show the time in words. This word clock with 114 servos is the hard way to do it.

We’re not sure what [Moritz v. Sivers] was aiming for with this projection clock, but he certainly got it right. The basic idea is to project the characters needed to compose the time messages onto a translucent PVC screen, which could certainly have been accomplished with just a simple character mask and some LEDs. But for extra effect, [Moritz] mounted each character to a letterbox mounted over a Neopixel. The letterboxes are attached to a rack and pinion driven by a micro servo. The closer they get to the screen, the sharper the focus and the smaller the size of the character. Add in a little color changing and the time appears to float out from a jumbled, unfocused background. It’s quite eye-catching, and worth the 200+ hours of printing time it took to make all the parts. Complete build instructions are available, and a demo video is after the break.

We like pretty much any word clock – big, small, or even widescreen. This one really pushes all our buttons, though.

Continue reading “A Word Clock, The Hard Way”

Can You Live Without The WS2812?

As near as we can tell, the popular WS2812 individually addressable RGB LED was released to the world sometime around the last half of 2013. This wasn’t long ago, or maybe it was an eternity; the ESP8266, the WiFi microcontroller we all know and love was only released a year or so later. If you call these things “Neopixels”, there’s a good reason: Adafruit introduced the WS28212 to the maker community, with no small effort expended on software support, and branding.

The WS2812 is produced by WorldSemi, who made a name for themselves earlier with LED driver solutions, especially the WS2811, an SOIC chip that would turn a common anode RGB LED into one that’s serially controllable. When they stuffed the brains from the WS2811 into a small package with a few LEDs, they created what is probably the most common programmable LED lighting solution available today.

A lot has changed in the six years that the WS2812 has been on the market. The computer modding scene hasn’t heard the words ‘cold cathode’ in years. Christmas lights are much cooler, and anyone who wants to add blinky to their bling has an easy way to do that.

But in the years since the WS2812 came on the market, there are a lot of follow-up products that do the same thing better. You now have serially addressable LEDs that won’t bring down the rest of the string when they fail. You have RGBW LEDs. There are LEDs with a wider color gamut and more. This is a look at the current state of serially addressable RGB LEDs, and what the future might have in store.

Continue reading “Can You Live Without The WS2812?”

Fueled By Jealousy, This Smart Lamp Really Shines

As a lover of lava lamps, [Julian Butler] knew when he saw a coworker’s modern LED incarnation of the classic piece of illuminated decor that he had to have one for himself. The only problem was that the Kickstarter for it had long since ended, and they were no longer available. So he did what any good hacker would do: he studied it closely, took a bunch of notes, and built his own version that ended up being even better than the original.
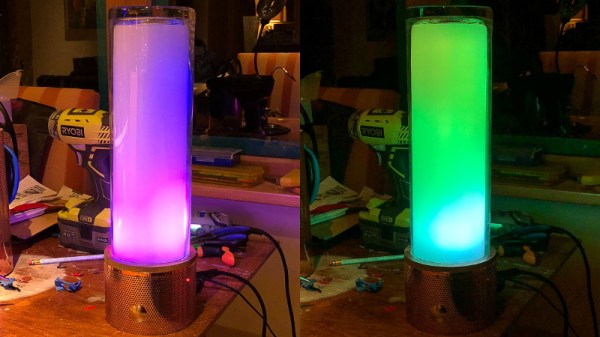
In the three part series on his blog, [Julian] takes us through the design and construction of his take on the Ion Mood Light, which raised over $72,000 back in 2014. The details in the Kickstarter campaign plus his own first-hand observations of the device were enough to give him the high-level summary: the device has a core of RGB LEDs behind a diffuser, and uses some software trickery to pulse out some pleasing effects and patterns. He wasn’t concerned about the Bluetooth or the smartphone application, so all he really needed to do was put some NeoPixel LEDs inside a glass cylinder and he’d be done. Of course, it always sounds easy…

The actual journey to get there, as you might have guessed from the three part series, took awhile. Sourcing the LEDs was easy enough, and using a Fadecandy controller made getting the LEDs to blink out some cool patterns fairly straightforward. But it took [Julian] a bit of experimentation and a few trips to the crafts store before he found a material which would diffuse the LEDs enough for his tastes. Though in the end, he thinks the multiple layers of acrylic he ended up going with actually do a better job of blending the light from the individual LEDs than in the original Ion.

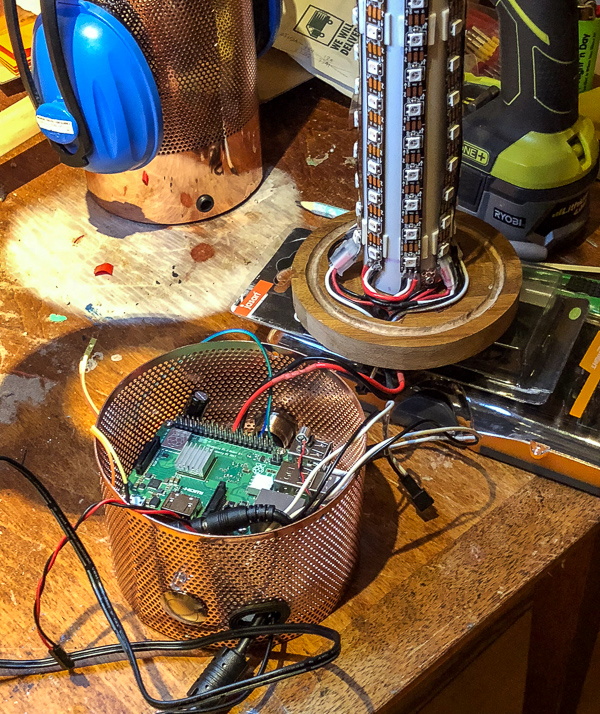
Using the Fadecandy made it easy to drive the LEDs, but he still needed something to provide it with the commands. To that end, he added a decorative base to his LED column that hides a Raspberry Pi and all the lamp’s associated electronics. This includes a microphone which gives his lamp the same sort of sound reactive features that made the Ion so popular. The base does make his lamp a bit bulkier than the original version, but the metallic mesh construction is attractive enough the overall look works.

Of course, you might be wondering how [Julian] got the LEDs to react to sound, or do any of the other gorgeous effects shown off in the video after the break. The software which makes this possible makes up the third and final post in the series, and is really a whole project in itself. The short version of the story is that he used Python and Processing to do real-time computational fluid dynamics, but not before making the necessary adjustments to speed up the simulation on ARM hardware. You know, normal lamp stuff.

This isn’t the first time we’ve seen projects using the Fadecandy board. From creating a Tron inspired desk to building the 5,760 LED “Space Tunnel”, it looks like a great choice if you’ve got a problem that can be solved by the application of a ridiculous number of LEDS.

Continue reading “Fueled By Jealousy, This Smart Lamp Really Shines”

Door Springs And Neopixels Demonstrate Quantum Computing Principles

They may be out of style now, and something of a choking hazard for toddlers, but there’s no denying that spring doorstops make a great sound when they’re “plucked” by a foot as you walk by. Sure, maybe not on a 2:00 AM bathroom break when the rest of the house is sleeping, but certainly when used as sensors in this interactive light show.

The idea behind [Robin Baumgarten]’s “Quantum Garden” is clear from the first video below: engaging people through touch, sound, and light. Each of the 228 springs, surrounded by a Neopixel ring, is connected to one of the 12 inputs on an MPR121 capacitive touch sensor. The touch sensors and an accelerometer in the base detect which spring is sproinging and send that information to a pair of Teensies. A PC then runs the simulations that determine how the lights will react. The display is actually capable of some pretty complex responses, including full-on games. But the most interesting modes demonstrate principles of quantum computing, specifically stimulated Raman adiabatic passage (STIRAP), which describes transfers between quantum states. While the kids in the first video were a great stress test, the second video shows the display under less stimulation and gives a better idea of how it works.

We like this because it uses a simple mechanism of springs to demonstrate difficult quantum concepts in an engaging way. If you need more background on quantum computing, [Al Williams] has been covering the field for a while. Need the basics? Check out [Will Sweatman]’s primer.

Continue reading “Door Springs And Neopixels Demonstrate Quantum Computing Principles”

Hackaday Podcast 007: Everything Microcontrollers, Deadly Clock Accuracy, CT X-Rays, Mountains Of E-Waste

Elliot Williams and Mike Szczys look at all that’s happening in hackerdom. This week we dive deep into super-accurate clock chips, SPI and microcontroller trickery, a new (and cheap) part on the microcontroller block, touch-sensitive cloth, and taking a home X-ray to the third dimension. We’re saying our goodbyes to the magnificent A380, looking with skepticism on the V2V tech known as DSRC, and also trying to predict weather with automotive data. And finally, what’s the deal with that growing problem of electronic waste?

Links for all discussed on the show are found below. As always, join in the comments below as we’ll be watching those as we work on next week’s episode!

Take a look at the links below if you want to follow along, and as always, tell us what you think about this episode in the comments!

Direct download (60 MB or so.)

Continue reading “Hackaday Podcast 007: Everything Microcontrollers, Deadly Clock Accuracy, CT X-Rays, Mountains Of E-Waste”

Inefficient NeoPixel Control Solved With Hardware Hackery

Everyone loves NeoPixels. Individually addressable RGB LEDs at a low price. Just attach an Arduino, load the demo code, and enjoy your blinking lights.

But it turns out that demo code isn’t very efficient. [Ben Heck] practically did a spit take when he discovered that the ESP32 sample code for NeoPixels used a uint32 to store each bit of data. This meant 96 bytes of RAM were required for each LED. With 4k of RAM, you can control 42 LEDs. That’s the same amount of RAM that the Apollo Guidance Computer needed to get to the moon!

His adventure is based on the thought that you should be able to generate these signals with hardware SPI. First, he takes a look at Adafruit’s DMA-Driven NeoPixel example. While this is far more efficient than the ESP32 demo code, it still requires 3 SPI bits per bit of NeoPixel data. [Ben] eventually provides us with an efficient solution for SPI contro using a couple of 7400 series chips:

Schematic of SPI to NeoPixel circuit using 74HC123

[Ben]’s solution uses some external hardware to reduce software requirements. The 74HC123 dual multi-vibrator is used to generate the two pulse lengths needed for the NeoPixels. The timing for each multi-vibrator is set by an external resistor and capacitor, which are chosen to meet the NeoPixel timing specifications.

The 74HC123s are clocked by the SPI clock signal, and the SPI data is fed into an AND gate with the long pulse. (In NeoPixel terms, a long pulse is a logical 1.) When the SPI data is 1, the long pulse is passed through to the NeoPixels. Otherwise, only the short pulse is passed through.

This solution only requires a 74HC123, an AND gate, and an OR gate. The total cost is well under a dollar. Anyone looking to drive NeoPixels with a resource-constrained microcontroller might want to give this design a try. It also serves as a reminder that some problems are better solved in hardware instead of software.

Continue reading “Inefficient NeoPixel Control Solved With Hardware Hackery”