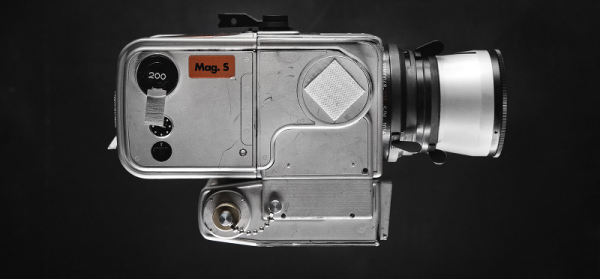
[Cole Price] describes himself as a photographer and a space nerd. We’ll give that to him since his web site clearly shows a love of cameras and a love of the NASA programs from the 1960s. [Cole] has painstakingly made replicas of cameras used in the space program including a Hasselblad 500C used on a Mercury flight and another Hasselblad used during Apollo 11. His work is on display in several venues — for example, the 500C is in the Carl Zeiss headquarters building.
[Cole’s] only made a detailed post about 500C and a teaser about the Apollo 11 camera. However, there’s a lot of detail about what NASA — and an RCA technician named [Red Williams] — did to get the camera space-ready.
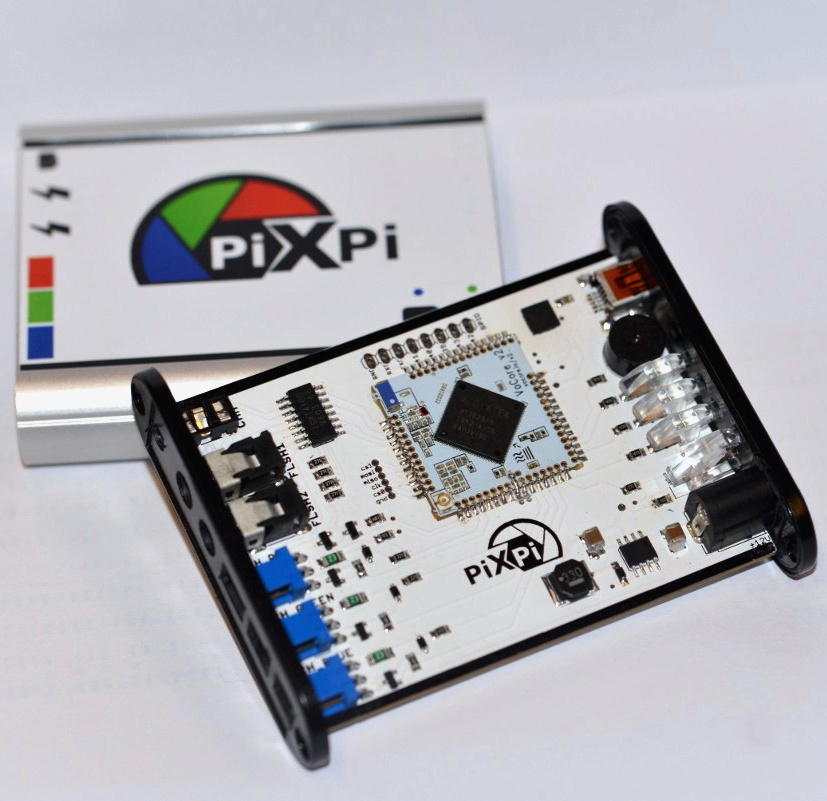
If you’ve ever tried to take a picture of a fast moving object, you know how important timing is. You might only have one chance, and if you hit the shutter a bit too early or too late, the shot could be ruined. Past a certain point, no human camera operator can react quickly enough. Which is exactly why [Krzysztof Krześlak] created PiXPi.
In the past we’ve seen high-speed flashes designed to “freeze time” by illuminating the scene at the precise moment, and while PiXPi can technically do that, it also offers a few alternate methods of capturing that perfect moment. The idea here is to give the photographer the best chance of getting the shot they’re after by offering them as many tools as possible.
Essentially, PiXPi is a microcontroller that allows you to orchestrate your DSLR’s trigger, external flashes, and various other sensors and devices using an easy to use graphical programming interface from your smartphone. So for example, you could program the PiXPi to trigger your camera when it detected a loud enough noise.
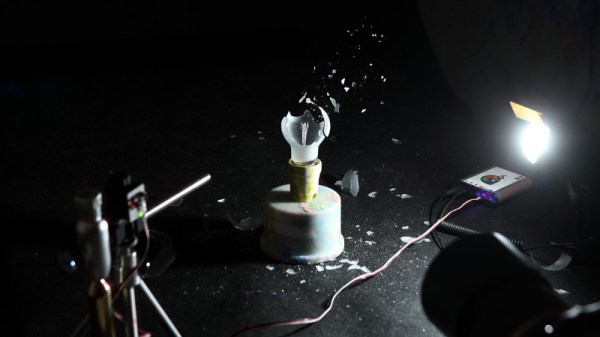
But the device also allows you to be a bit more proactive. Rather than sitting back and waiting for a signal to fire off the camera, the PiXPi can directly take control of the action. As an example, [Krzysztof] has created an electronically triggered valve which can release a drop of liquid on command. Using PiXPi, the photographer can quickly put together a routine that triggers a drop, waits the few milliseconds it takes for it to hit the target, and then snaps a picture.
The goal of the 2019 Hackaday Prize is to develop a product fit for production, and naturally a huge part of that is having a well thought-out design. But if you’re ultimately looking to sell said product, it’s also very important to keep the needs of the end user in mind. To that end, we think [Krzysztof] has done a great job by not only making the system very flexible, but keeping it easy to use.
Even a relatively low-end desktop 3D printer will have no problems running off custom enclosures or parts for your latest project, and for many, that’s more than worth the cost of admission. But if you’re willing to put in the time and effort to become proficient with necessary CAD tools, even a basic 3D printer is capable of producing complex gadgets and mechanisms which would be extremely time consuming or difficult to produce with traditional manufacturing techniques.
Printable bearing cross-section
Once you find yourself at this stage of your 3D printing career, there’s something of a fork in the road. The most common path is to design parts which are printed and then assembled with glue or standard fasteners. This is certainly the easiest way forward, and lets you use printed parts in a way that’s very familiar. It can also be advantageous if you’re looking to meld your own printed parts with existing hardware.
The other option is to fully embrace the unique capabilities of 3D printing. Forget about nuts and bolts, and instead design assemblies which snap-fit together. Start using more organic shapes and curves. Understand that objects are no longer limited to simple solids, and can have their own complex internal geometries. Does a hinge really need to be two separate pieces linked with a pin, or could you achieve the desired action by capturing one printed part inside of another?
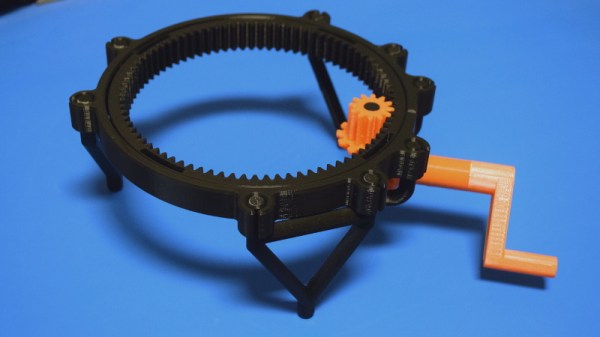
If you’re willing to take this path less traveled, you may one day find yourself creating designs such as this fully 3D printed turntable by Brian Brocken. Intended for photographing or 3D scanning small objects without breaking the bank, the design doesn’t use ball bearings, screws, or even glue. Every single component is printed and fits together with either friction or integrated locking features. This is a functional device that can be printed and put to use anywhere, at any time. You could print one of these on the International Space Station and not have to wait on an order from McMaster-Carr to finish it.
With such a clever design, I couldn’t help but take a closer look at how it works, how it prints, and perhaps even some ways it could be adapted or refined going forward.
Although Iceland is now a popular destination for the day-tripping selfie-seeking Instagrammer who rents a 4×4, drives it off road onto delicate ecosystems and then videos the ensuing rescue when the cops arrive, there are still some genuine photographers prepared to put a huge amount of time and effort into their art. [Dheera Venkatraman] is one of the latter and produces composite photos using a relatively low resolution thermal camera and DIY pan and tilt rig.
Whilst we don’t have the exact details, we think that, since the Seek Reveal Pro camera used has a resolution of 320 x 240, [Dheera] would have had to take at least 20 photos for each panoramic shot. In post processing, the shots were meticulously recombined into stunning landscape photos which are a real inspiration to anybody interested in photography.
If you do go to Iceland you might find the traditional food a little challenging to those not raised upon it, nor would you go there for a stag night as beer is eyewateringly expensive. But if you enjoy uninhabitable, desolate, dramatic landscapes there is a huge range of possibilities for the photographer from rugged, frozen lava flows to extra terrestrial ‘Martian’ crater-scapes, if you know where to find them.
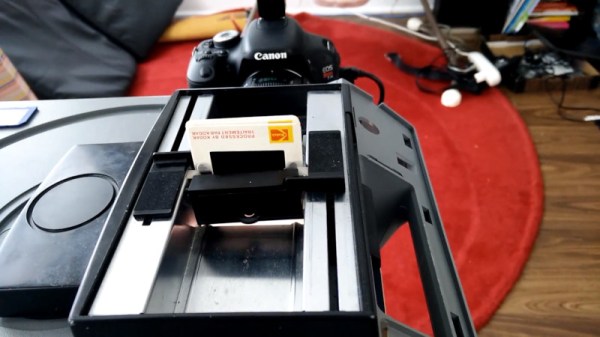
Photographic slides were popular in the middle part of the 20th century, but are long forgotten now. If you’ve found a handful in a dusty attic, you might consider sending them away to be digitized professionally, or using a flatbed scanner at home. [Bryan Howard] found himself with over 200,000 slides, however, so that just wouldn’t do. Instead, he endeavored to build an automated scanner of his own.
Like many similar projects, [Bryan] started with an existing slide projector as a base. This means that all the difficult work of slide transport is already taken care of. The projector has then been upgraded with an LED light source and other tweaks befitting its new role. An Arduino Pro Micro runs the show, firing off the camera to image each slide before loading the next one into place. The DSLR responsible for imaging is then hooked up to a PC so the incoming images can be checked while the machine is in operation.
Preliminary tests are promising, with the scanner successfully capturing several slides in a row. [Bryan] estimates that, with a capture time of between 1 and 2 seconds per slide, it should take somewhere between 2-5 days to image the entire collection.
We wish [Bryan] the best of luck with the project, and look forward to seeing the final results. We’ve seen similar work before, too. Video after the break.
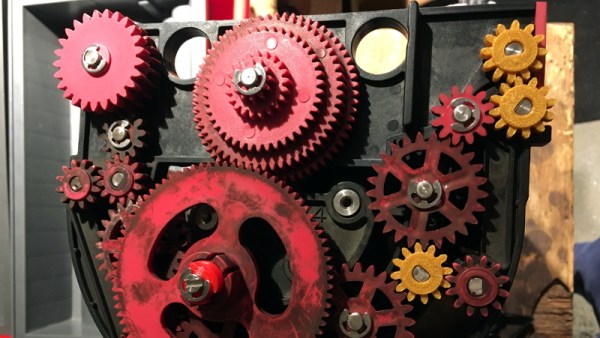
If you don’t know what a print processor is, don’t feel bad. There’s precious few people out there still running home darkrooms, and the equipment used for DIY film development is about as niche as it gets today. For those looking to put together their own darkroom in 2019, buying second hand hardware and figuring out how to fix it on your own is the name of the game, as [Austin Robert Hermann] found out when he recently purchased a Durst Printo Print Processor on eBay.
The auction said the hardware was in working order, but despite the fact that nobody would ever lie on the Internet, it ended up being in quite poor condition. Many of the gears in the machine were broken, and some were simply missing. The company no longer supports these 1990’s era machines, and the replacement parts available online were predictably expensive. [Austin] determined his best course of action was to try his hand at modeling the necessary gears and having them 3D printed; two things he had no previous experience with.
Luckily for [Austin], many of the gears in the Printo appeared to be identical. That meant he had several intact examples to base his 3D models on, and with some educated guesses, was able to determine what the missing gears would have looked like. Coming from an animation background, he ended up using Cinema 4D to model his replacement parts; which certainly wouldn’t have been our first choice, but there’s something to be said for using what you’re comfortable with. Software selection not withstanding, he was able to produce some valid STLs which he had printed locally in PLA using an online service.
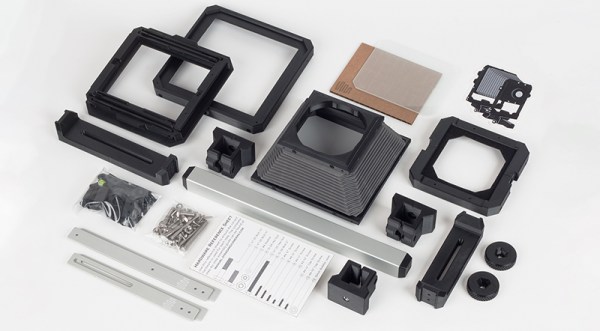
Just like how vinyl records are seeing a resurgence in an era of digital streaming music, we’re also seeing a lot of people interested in another technology that is as obsolete as it is perfected. The large format camera is back as a kit, it makes huge images, and there’s an Open Source version if you want to print your own.
The Standard 4×5 is a project to build an affordable, lightweight, 3D printed large format camera. It was a Kickstarter project last year, and after a lot of work the project has now been improved with better rails, better bellows, and a lot of refinements.
As an Open Source project, this camera has all the models available, dimensioned drawings for all the metal parts, and a lot of patience required to make your own bellows. With this, you can screw a lens on take a picture, just make sure you get the focus right with some ground glass beforehand.
As for why anyone would want a large format camera, there are a few things that big cameras with tiny apertures can do that nothing else can. Here’s the pinhole solution for the Standard 4×5 with a laser drilled hole, and with this camera you’re getting an f-stop between f/240 and f/520.