Pi Zero Power Optimization Leaves No Stone Unturned

If you’ve ever designed a battery-powered device with a Pi Zero, you have no doubt looked into decreasing its power consumption. Generic advice, like disabling the HDMI interface and the onboard LED, is omnipresent, but [Manawyrm] from [Kittenlabs] goes beyond the surface-level, and gifts us an extensive write-up where every recommendation is backed with measurements. Armed with the Nordic Power Profiler kit and an SD card mux for quick experimentation, she aimed at two factors, boot time and power consumed while booting, and made sure to get all the debug information we could use.

Thanks to fast experimentation cycles and immediate feedback, we learn plenty of new things about what a Pi Zero does and when, and how we can tame various power-hungry aspects of its behavior. Disabling the GPU or its aspects like HDMI output, tweaking features like HAT and other peripheral probing, and even tactical overclocking during boot – it’s an extensive look at what makes a Pi Zero tick, and no chance for spreading baseless advice or myths.

All in all, this write-up helps you decrease the boot time from twelve seconds to just three seconds, and slash the power budget of the boot process by 80%. Some recommendations are as simple as config.txt entries, while others require you to recompile the kernel. No matter the amount of effort you can put into power optimization, you’ll certainly find things worth learning while following along, and [Manawyrm]’s effort in building her solar-powered Pi setup will help us all build better Pi-Zero-powered solar devices and handhelds.

2022 Cyberdeck Contest: A Wrist-Worn Deck With A Hybrid Interface

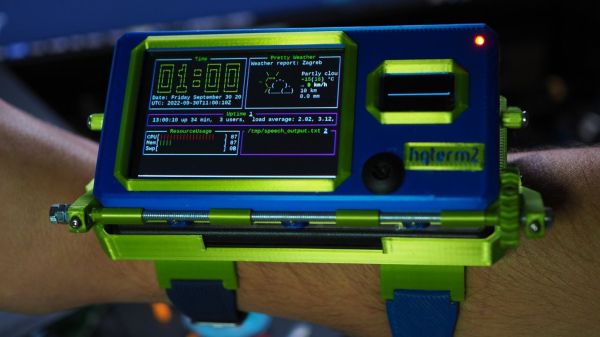
You’d think that now that the 2022 Cyberdeck Contest is wrapped up, we’d stop writing about it. Sorry, but no — there were so many great entries that we just can’t help but keep focusing on them. And this wearable hybrid interface cyberdeck has a look we love so much that we can’t resist spotlighting it.

We wouldn’t go so far as to call the “hgDeck” a PipBoy, but [Igor Brkić]’s wrist-worn deck certainly bears some similarity with to the Fallout-famous terminal. In fact, the design for this one is based on his earlier hgTerm Raspberry Pi mini-laptop, which honestly would have made a great entry all by itself. But while the two version shares some similarities, the hgDeck puts a serious twist on the form factor. In the stowed configuration, the Pi Zero W puts the main display, a 3.5″ Waveshare TFT, to work using the resistive touchscreen interface. But with the flick of a finger, a motor flips the monitor up on a set of pantograph linkages, which exposes a compact Bluetooth keyboard. Another touch stows the screen and returns you to touchscreen-only operation.

There were a fair number of wrist-worn decks in the contest’s final results, and while this one didn’t win, [Igor]’s build has got to be one of the cooler designs we’ve seen, one that almost seems practical in the real world.

Continue reading “2022 Cyberdeck Contest: A Wrist-Worn Deck With A Hybrid Interface”

3D Printed Smart Glasses Put Linux In Your Face

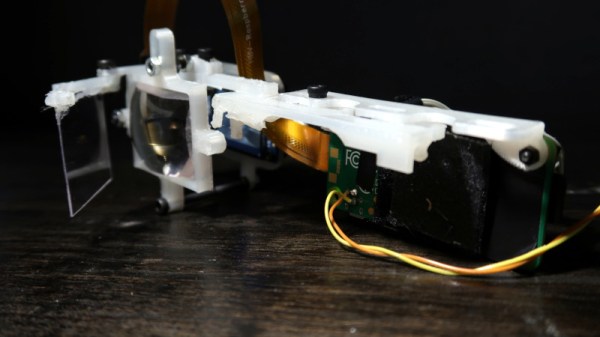
Unimpressed by DIY wearables powered by dinky microcontrollers, [Teemu Laurila] has been working on a 3D printed head-mounted computer that puts a full-fledged Linux desktop in your field of view. It might not be as slim and ergonomic as Google Glass, but it more than makes up for it in terms of raw potential.

Featuring an overclocked Raspberry Pi Zero W, a ST7789VW 240×240 IPS display running at 60 Hz, and a front-mounted camera, the wearable makes a great low-cost platform for augmented reality experiments. [Teemu] has already put together an impressive hand tracking demonstration that can pick out the position of all ten fingers in near real-time. The processing has to be done on his desktop computer as the Zero isn’t quite up to the task, but as you can see in the video below, the whole thing works pretty well.

Precision optics, courtesy of a hacksaw

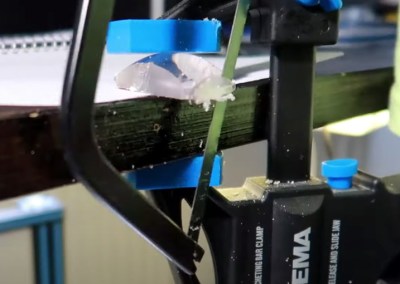
Structurally, the head-mounted unit is made up of nine 3D printed parts that clip onto a standard pair of glasses. [Teemu] says the parts will probably need to be tweaked to fit your specific frames, but the design is modular enough that it shouldn’t take too much effort. He’s using 0.6 mm PETG plastic for the front reflector, and the main lens was pulled from a cheap pair of VR goggles and manually cut down into a rectangle.

The evolution of the build has been documented in several videos, and it’s interesting to see how far the hardware has progressed in a relatively short time. The original version made [Teemu] look like he was cosplaying as a Borg drone from Star Trek, but the latest build appears to be far more practical. We still wouldn’t try to wear it on an airplane, but it would hardly look out of place at a hacker con.

Continue reading “3D Printed Smart Glasses Put Linux In Your Face”

Tightly Packed Raspberry Pi Tricorder Impresses

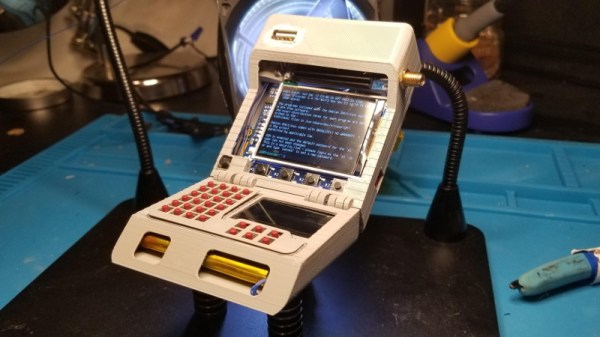
We’ll say upfront that we don’t have nearly as much information about this 3D printed Star Trek: The Next Generation tricorder as we’d like. But from the image galleries [Himmelen] has posted we know it’s running on the Raspberry Pi Zero W, has a color LCD in addition to a monochrome OLED, and that it’s absolutely packed with gear.

So far, [Himmelen] has fit an NESDR RTL-SDR dongle, a GPS receiver, an accelerometer, and the battery charging circuitry in the top half of the case. Calling it a tight fit would be something of an understatement, especially when you take into account all the wires snaking around in there. But as mentioned in the Reddit thread about the device, a custom PCB backplane of sorts is in the works so all these modules will have something a little neater to plug into.
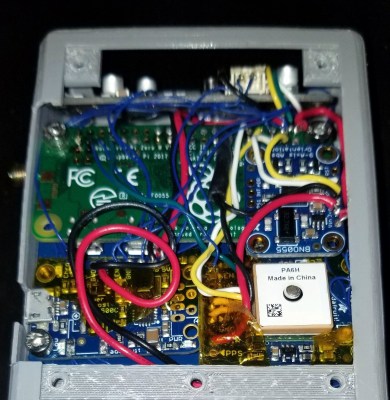
There are a lot of fantastic little details in this build that have us very excited to see it cross the finish line. The female USB port that’s been embedded into the top of the device is a nice touch, as it will make it easy to add storage or additional hardware in the field. We also love the keyboard, made up of 30 individual tact switches with 3D printed caps. It’s hard to imagine what actually typing on such an input device would be like, but even if each button just fired off its own program or function, we’d be happy.

Judging by the fact that the LCD shows the Pi sitting at a login prompt in all the images, we’re going to go out on a limb and assume [Himmelen] hasn’t gotten to writing much software for this little gadget yet. Once the hardware is done and it’s time to start pushing pixels though, something like Pygame could be used to make short work of a LCARS-style user interface that would fit the visual style of The Next Generation. In fact, off the top of our heads we can think of a few turn-key projects out there designed for creating Trek UIs, though the relatively limited computational power of the Pi Zero might be a problem.

We’ve seen several projects that tried to turn the iconic tricorder into a functional device. Some have focused on the arguably more recognizable Next Generation style such as this one, and others have targeted the more forgiving brick-shaped unit from Kirk and Spock’s era. The Wand Company is even working on a officially licensed tricorder that will supposedly be as close to we can get to the real thing with modern tech and a $250 USD price tag, though we’d wager COVID has slowed progress down on that one. In any event, whether you build it or buy it, the tricorder seems destined to become reality before too long.

Join The Movement With This Mini Cyberdeck

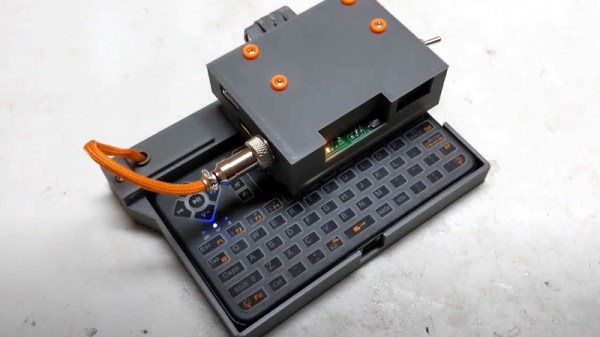
The global pandemic has given many people a lot more time at home, which has undoubtedly pushed an untold number of projects over the finish line. Unfortunately, it’s also disrupted global commerce and shipping to the point that getting parts can be a lot harder than we’d like. Which is why [facelesstech] decided to put together this exceptionally mobile cyberdeck out of things he already had laying around.

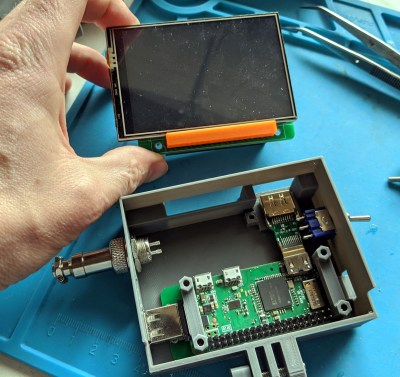
Now to be fair, his parts bin is perhaps a bit better stocked for this kind of thing than most. He’s built a couple of Raspberry Pi portables already, so the Pi Zero W, display, and battery management board were already kicking around. He just had to come up with a new 3D printed enclosure that holds it all together with a little bit of cyberpunk flair.

To that end, he’s done an excellent job of documenting the build and has released the STL files for the 3D printed components. All things considered, we’d say this is probably the most approachable cyberdeck design currently available; if you’ve been wondering what all the fuss is about with these bespoke little computers, this is an ideal project to get started with.

Keep in mind that the idea of a cyberdeck is to build something custom for yourself, so there’s no need to copy this build exactly. If you’re short on parts, you could forgo the battery powered aspect and just keep it tethered. The superfluous (but very cool) GX12 connectors could certainly be deleted as well, although at serious stylistic cost. You’ll probably need to order the specific keyboard that [facelesstech] designed the lower half of the device around, but it’s common enough that it shouldn’t be hard to track down. No matter which way you take it, this design is a great base to start from.

If you’re looking for something a bit more substantial and have the filament to burn, you might take a look at the VirtuScope to fulfill your offset screen needs.

Continue reading “Join The Movement With This Mini Cyberdeck”

Easy Internet For Retro Computers With The PiModem

Retro computers are great, but what really makes a computer special is how many other computers it can talk to. It’s all about the network! Often, getting these vintage rigs online requires a significant investment in dusty old network cards from eBay and hunting down long-corrupted driver discs to lace everything together. A more modern alternative is to use something like PiModem to do the job instead.

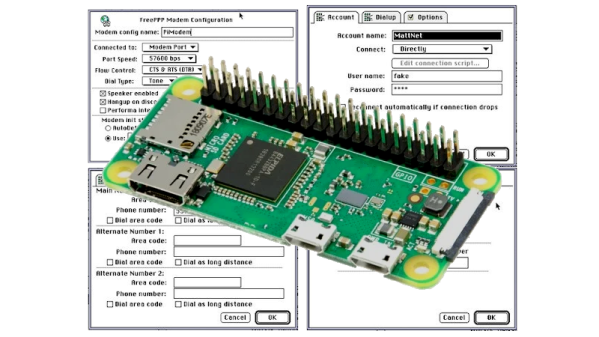
PiModem consists of using a Raspberry Pi Zero W to emulate a serial modem, providing older systems with a link to the outside world. This involves setting up the Pi to use its hardware serial port to communicate with the computer in question. A level shifter is usually required, as well as a small hack to enable hardware flow control where necessary. It’s then a simple matter of using tcpser and pppd so you can talk to telnet BBSs and the wider Internet at large.

It’s a tidy hack that makes getting an old machine online much cheaper and easier than using hardware of the era. We’ve seen similar work before, too!

Turn An Unused Pi Zero Into A Parts Bin WiFi Extender

We know a lot of you are sitting on an unused Raspberry Pi Zero W, maybe even several of them. The things are just too small and cheap not to buy in bulk when the opportunity presents itself. Unfortunately, the Zero isn’t exactly a powerhouse, and it can sometimes be tricky to find an application that really fits the hardware.

Which is why this tip from [Tejas Lotlikar] is worth taking a look at. Using the Pi Zero W, a cheap USB WiFi adapter, and some software trickery, you can put together a cheap extender for your wireless network. The Pi should even have a few cycles left over to run ad-blocking software like Pi-hole while it shuffles your packets around the tubes.

[Tejas] explains every step of the process, from putting the Raspbian image onto an SD card to convincing wpa_supplicant to put the Pi’s WiFi radio into Access Point mode. Incidentally, this means that you don’t need to be very selective about the make and model of the USB wireless adapter. Something with an external antenna is preferable since it will be able to pull in the weak source signal, but you don’t have to worry about it supporting Soft AP.

With the software configured, all you need to finish this project off is an enclosure. A custom 3D printed case large enough to hold both the Pi and the external WiFi adapter would be a nice touch.