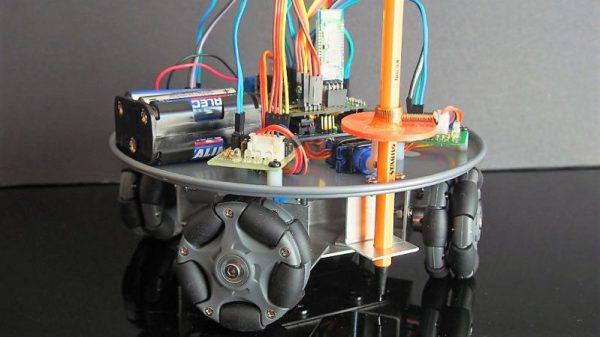
Make An Impression At The Bar With A CNC Coaster Plotter

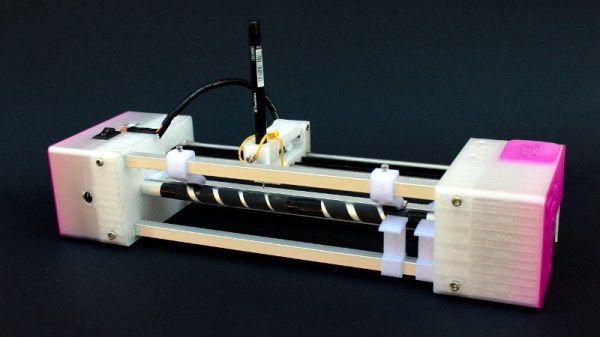
If you’re anything like us, your success with the opposite sex at the bar wasn’t much to brag about. But imagine if you had only had this compact CNC polar plotter and could have whipped up a few custom coasters for your intended’s drink. Yeah, that definitely would have helped.

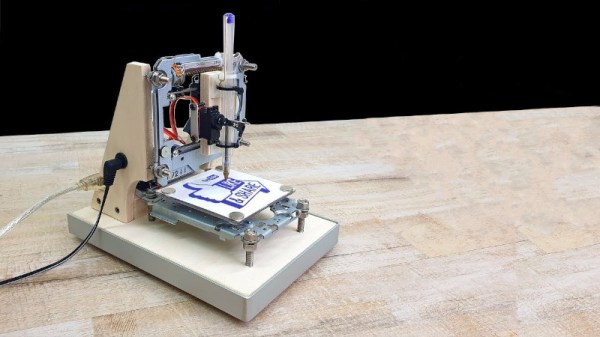
Or not, but at least it would have been fun to play with. This is actually an improved version of [bdring]’s original “Polar Coaster”. Version 2 is really just a more compact and robust version of the original. The new one has a custom controller for the steppers and pen-lift servo, and everything is mounted neatly to the main PCB. Where the original used a timing belt to drive the platter, the new one uses 3D-printed helical gears, and the steppers have been replaced by slimmer motors. It even has an SD card and smartphone UI, and the coasters look pretty good.

There’s no video of the new one, but you can see its predecessor in action below and imagine the possibilities. Snap a picture and have a line art rendition of someone plotted while you’re waiting for drinks? Just remember not to take any laser engraved wooden nickels.

Continue reading “Make An Impression At The Bar With A CNC Coaster Plotter”

Maze Generator Keeps Plotter (and Kids) Busy

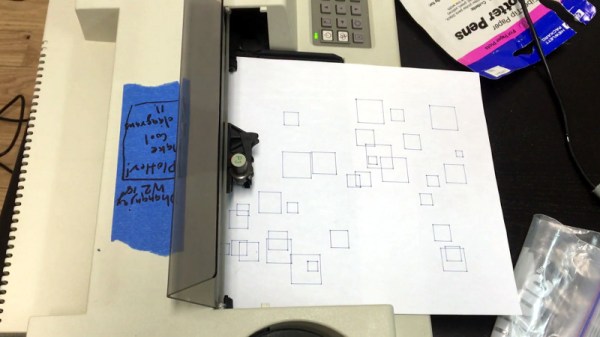
We can tell that [Jon Howell] is our kind of guy. After updating his vintage 1985 Hewlett-Packard plotter with WiFi and the ability to load SVG files, he obviously needed to find a bunch of stuff to run off with it. Gotta justify those hacks somehow. So he doubled down and decided support a hack with another hack by writing a maze generator to keep his plotter well fed. He was kind enough to unleash his creation on an unsuspecting Internet as an open source project, and now we all can benefit from a couple of reams worth of mazes.

The generator itself is written in Java, and should work on whatever operating system your box happens to be running thanks to the *nix and Windows wrapper scripts [Jon] provides. To create a basic maze, one simply needs to provide the script with the desired dimensions and the paper size. You can define the type of paper with either standard sizes (such as --paper a4) or in the case of a plotter with explicit dimensions (--paper 36x48in).

If you aren’t a big fan of right angles, there’s support for changing the internal geometry of the maze to use a hexagonal or triangle grid. You can even pass the program a black and white PNG “mask” which it will use as the boundaries for the maze itself, allowing for personalized puzzles of whatever shape catches your fancy. [Jon] even ran the Wrencher though his software, leading to the creation of a maze which we can neither confirm nor deny will be making an appearance on our Christmas cards this year.

Whether you need to prove to your significant other that the hours you spent fiddling with your plotter are well spent, or an easy way to entertain the junior humans in your life, you can thank [Jon] for your solution.

Vintage Plotter Turned Fruit Spectrometer

Fruit can be a tricky thing: if you buy it ripe you’ll be racing against time to eat the pieces before they turn into a mushy mess, but if you buy the ones which are a bit before their prime it’s not always easy to tell when they’re ready to eat. Do you smell it? Squeeze it? Toss it on the counter to see if it bounces? In the end you forget about them and they go bad anyway. That’s why here at Hackaday we sustain ourselves with only collected rainwater and thermo-stabilized military rations.

But thankfully Cornell students [Christina Chang], [Michelle Feng], and [Russell Silva] have come up with a delightfully high-tech solution to this decidedly low-tech problem. Rather than rely on human senses to determine when a counter full of fruit has ripened, they propose an automated system which uses a motorized spectrometer to scan an arrangement of fruit. The device measures the fruit’s reflectance at 678 nm, which can be used to determine the surface concentration of chlorophyll-a; a prime indicator of ripeness.

If that sounds a bit above your pay grade, don’t worry. The students were able to build a functional prototype using a 1980’s era plotter, a Raspberry Pi, and a low-cost AS7263 NIR spectral sensor from SparkFun which just so happens to have a peak responsivity of 680 nm. The scanning is performed by a PIC32MX250F128B development board with an attached TFT LCD display so the results can be easily viewed. The Raspberry Pi is used in conjunction with a Adafruit PCA9685 I2C PWM driver to control the plotter’s stepper motors. The scanning and motor control could be done with the PIC32 alone, but to save time the students decided to use the Raspberry Pi to command the PCA9685 as that was what the documentation and software was readily available for.

To perform a scan, the stepper motors home the AS7263 sensor module, and then passes it under the fruit which is laying on a clear acrylic sheet. Moving the length of the acrylic sheet, the sensor is able to scan not only multiple pieces of fruit but the entirety of each piece; allowing it to determine for example if a section of a banana has already turned. The relative ripeness of the fruit is displayed to the user on the LCD display as a heatmap: the brighter the color the more ripe it is.

At the end of their paper, [Christina], [Michelle], and [Russell] note that while the scanner worked well there’s still room for improvement. A more scientific approach to calculating how ripe each fruit is would make the device more accurate and take out the guess work on the part of the end user, and issues with darker colored fruit could potentially be resolved with additional calibration.

While a spectrometer might sound like the kind of equipment that only exists in multi-million dollar research laboratories, we occasionally see projects like this which make the technology much more accessible. This year we saw a compact spectrometer in the Hackaday Prize, and going a bit farther back in time we even featured a roundup of some of the most impressive spectrometer builds on Hackaday.io.

Continue reading “Vintage Plotter Turned Fruit Spectrometer”

Mug-O-Matic Plots On Coffee Mugs

There is something fascinating about watching an autonomous machine. An automatic car wash, a soda vending machine that picks up the product behind a window, a plotter, or a robot like a CNC or 3D printer are all interesting to watch. Although [EngineerDog] bills Mug-O-Matic as a tiny CNC, we think it is more of a plotter for coffee mugs. It’s still fun to watch though, as you can see in the video below.

The design has about 60 printed parts and uses a Sharpie at the business end. It accepts gcode and can even emblazon your favorite mug with our own Jolly Wrencher, so you know we like it.

Continue reading “Mug-O-Matic Plots On Coffee Mugs”

The 3D Printed Plotter You Didn’t Know You Needed

We’ve been seeing an influx of repurposed 3D printers recently. Thrifty hackers have been leveraging cheap 3D printers as a way to bootstrap their builds, on everything from laser engravers to pick and place machines. There’s nothing wrong with that, and honestly when you can get a cheap 3D printer for less than the cost of the components separately thanks to the economies of scale, you’d be foolish not to.

But there’s still something to be said for the classic RepRap mentality of building things using printed parts and smooth rods. Case in point, the largely 3D printed plotter that [darth vader] sent in for our viewing pleasure. This isn’t somebody sicking a pen on the extruder of their open box Monoprice special, this is a purpose built plotter and it shows. In the video after the break you can see not only how well it draws, but also how large of a work area it has compared to a modified 3D printer.

If you know your way around a 3D printer, most of it should look pretty familiar to you. Using the same GT2 belts, steppers, end stop switches, and linear bearings which are ubiquitous in 3D printers, it shouldn’t be difficult to source the parts to build your own. It even uses a Mega 2560 with RAMPS 1.4 running Marlin 1.1.9 for control.

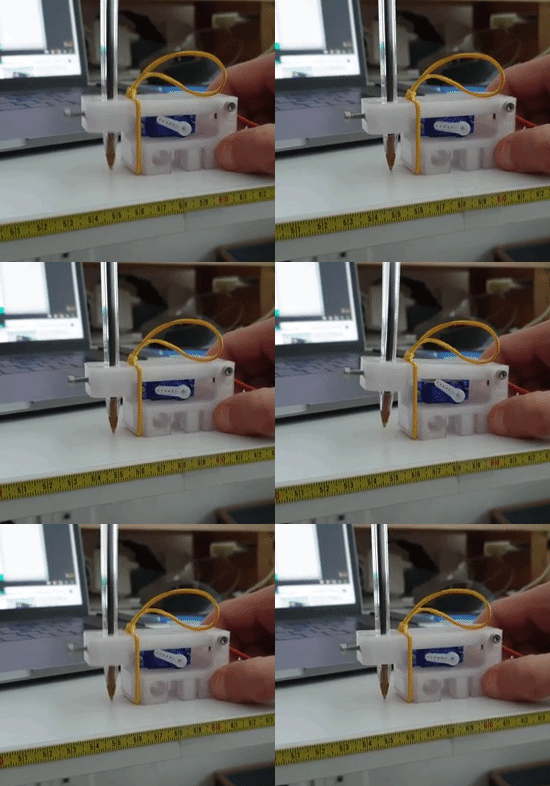
The biggest difference is the physical layout. Since there’s no heavy hotend or extruder assembly to move around, the plotter has a cantilever design which gives it far greater reach. As it only needs to sightly lift the pen off the paper, there’s no need for a complex Z axis with leadscrews either; a simple servo mounted to the end of the arm is used to raise and lift the pen. We especially like the use of a tape measure as strain relief for his wiring, a fantastic tip that we (and many of you) fell in love with last year.

While it’s hard to beat just tossing a pen onto the business end of your desktop 3D printer in terms of convenience, we think it’s pretty clear from this build that the results don’t quite compare. If you want a real plotter, build a real plotter.

Continue reading “The 3D Printed Plotter You Didn’t Know You Needed”

Knock Your 3D Printer Down To 2D

Hackers love 3D printers. In fact, they might love them a little too much. We hope know we aren’t be the only ones who couldn’t turn down a good deal on an overseas printer (or two). But when you’re not pumping out plastic boats and other PLA dust collectors, what are you supposed to do with them?

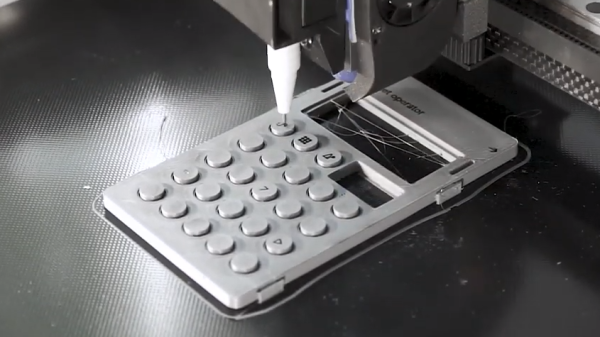
Well if you’re like [Uri Shaked] you could hand them a pen and tell them to get writing. The holidays are coming up quick, and somebody’s gotta sign all these cards. In his detailed write-up, he shows how he was able to add a pen to his Creality CR-10 printer to turn it into a lean mean letter-writing machine without making any permanent changes to the printer.

The physical aspect of this hack is about as simple as they come: just come up with some way to hold the pen a bit below the printer’s hotend. The positioning here is a bit critical, as you don’t want to crash the nozzle into the bed while writing out a missive. [Uri] got fancy and designed a little bracket that clamps onto the CR-10 and even has a M3 screw to hold the pen in place, but you could get away with zip ties if you just want to experiment a bit.

[Uri] goes into much greater detail on the software side of things, which is good, as it does take a bit of Inkscape trickery to get the printer to perform the specific dance moves required. He goes through step by step (with screen shots) explaining how to set up Orientation Points and configure the tool parameters for optimal performance. Even if you aren’t looking to put a 3D printer to work autographing your 8x10s before the next hackerspace meet, this is an excellent guide on producing GCode with Inkscape which can be helpful for tasks such as making PCBs.

The general process here is very similar to adding a laser module to your 3D printer, but with considerably lower risk of your eyeballs doing their best Death Star impression.

Continue reading “Knock Your 3D Printer Down To 2D”

Tiny Plotter Is Made Of Strings And Cardboard

If you’ve been hanging around Hackaday for any length of time, you’ve undoubtedly seen the work of [Niklas Roy]. A prolific maker of…everything, we’ve covered his projects for over a decade now. He’s one of an elite group of hackers who can say they’ve been around since Hackaday was still using black & white pictures. Yet sometimes projects fall through the cracks.

Thanks to a tip sent in from one of our beloved readers, we’re just now seeing this incredible cardboard plotter [Niklas] made for a workshop he ran at the University of Art and Design Offenbach several years ago. The fully manual machine is controlled with two rotary dials and a switch, and it even comes with a book that allows you to “program” it by dialing in specific sequences of numbers.

Not that it detracts from the project, but its worth mentioning that the “cardboard” [Niklas] used is what is known as Finnboard, a thin construction material made of wood pulp that looks similar to balsa sheets. The material is easy to work with and much stronger than what we’d traditionally think of as cardboard. Beyond the Finnboard, the plotter uses welding rods as axles and slide rails, with glue, tape, and string holding it all together.

The dials on the control panel correspond to the X and Y axes: turning the X axis dial moves the bed forward and backward, and the Y dial moves the pen left and right. The switch above the dial lowers and raises the pen so it comes into contact with the paper below. With coordination between these three inputs, the operator can either draw “freehand” or follow the sequences listed in the “Code Book” to recreate stored drawings and messages.

Believe it or not, this isn’t the first time we’ve seen somebody made a plotter out of cardboard. Though previous entries into this specific niche did use servos to move around.

Continue reading “Tiny Plotter Is Made Of Strings And Cardboard”