Hackaday Links: May 15, 2016

The Hackaday Overlords (or Hackaday family) are running a series of AMAs on SupplyFX. What is SupplyFX? It’s a social network for EEs. Who’s in the first AMA? [Brady Forrest], the guy who runs Highway1, a Bay Area hardware accelerator. They’re the accelerator responsible for the lustworthy Keyboardio, and the startup that is purely mechanical and has shipped zero lines of code, CoolChip. If you want to talk about hardware startups, [Brady] is your man. The AMA is tomorrow, May 16th, at 13:00 Pacific.

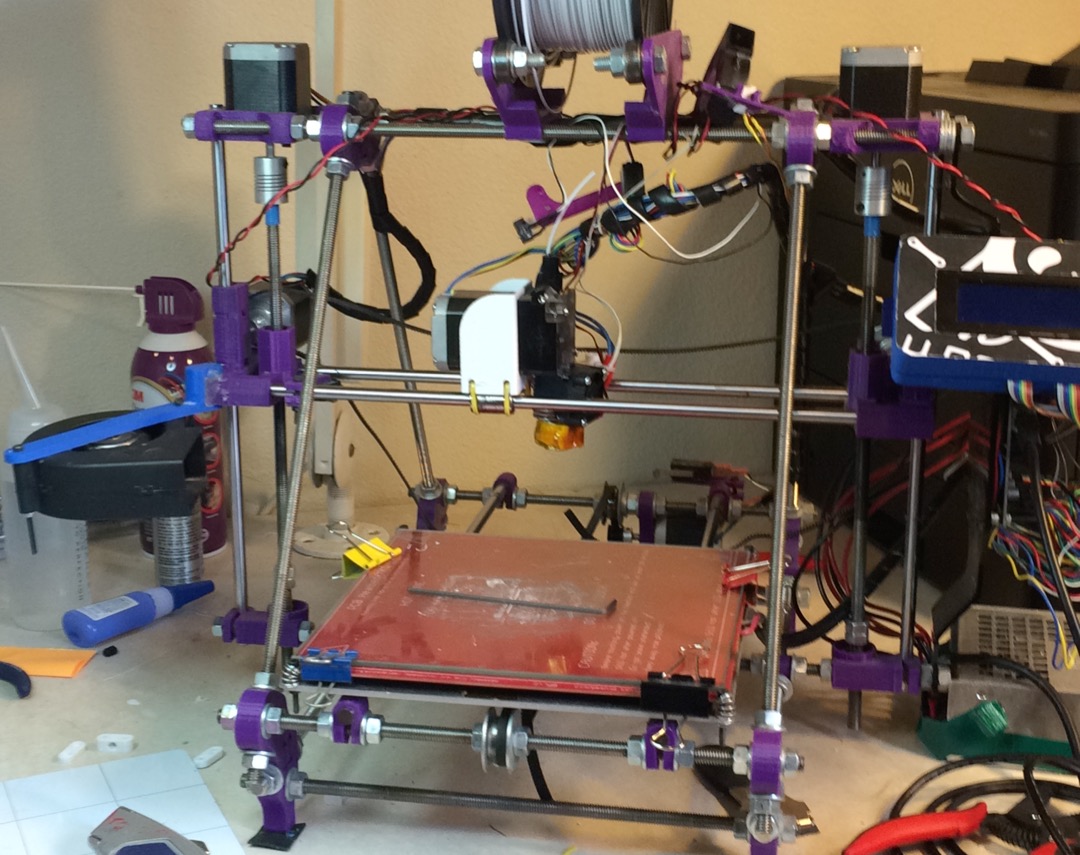
Makerbot is dead, or at least they will be soon. Whatever. Nothing of value was lost. Lulzbot, on the other hand, is going gangbusters. They saw eight hundred percent growth over the last two years. and $15M in revenue in 2015. They did this all with open source hardware and software, and using 3D printing in a manufacturing context. They’re the jewel of the Open Hardware movement, and a shining example of what Free Software can do.

The current generation of software defined radios started with the ubiquitous TV tuner dongles, and quickly graduated to the HackRF. You can only get so much bandwidth out of a USB 2.0 socket, and the newest and bestest SDR is the LimeSDR. They’re about halfway through their crowdfunding campaign (and halfway funded), and have finally changed out the USB A connector to a USB micro B connector. Good choice.

The ESP8266 is quickly becoming the go-to device for when you want a cheap way to put a sensor on the Internet. The only problem is programming it. No problem – here’s a bunch of Lua scripts that do 90% of everything. Need to read a PIR sensor? Light up a few LEDs? Put the data from a temperature and humidity on the Internet? There you have it.

The Vintage Computer Festival West is back on this year. We’ve gone to VCF East in New Jersey for a few years now, and had a few occasional outings to the southeast and midwest Vintage Computer Festivals over the years. This is the first time the west coast has had a Vintage Computer Festival in several years. It’s in Mountain View, on August 6th and 7th. Yes, that’s the same weekend as DEF CON.

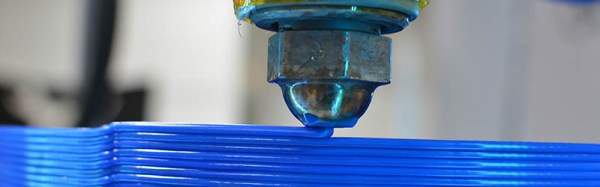
E3D, makers of fine hot ends and 3D printer paraphernalia, have released a new kind of filament. It’s called Edge, it’s based on PET, and it prints as easily as PLA, with better mechanical properties than ABS. A few sample prints made from Edge were at this year’s Midwest RepRap Festival, and the Edge’s bridging ability is crazy. You need a heated bed for Edge and it’s sensitive to moisture, but it has some very interesting properties that can be cleverly exploited.

In other filament news, Colorfabb released a filament to print clear parts. Yes, that’s very weird. Clear parts require 100% infill, meaning it will use a lot of filament. It’s still very advanced wizardry, and I’m very interested in seeing the first print of a sanded and polished convex lens.

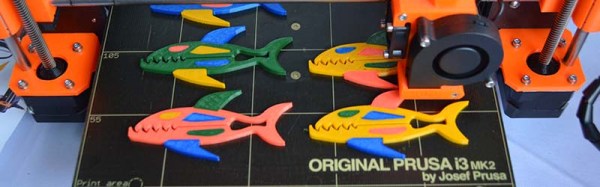
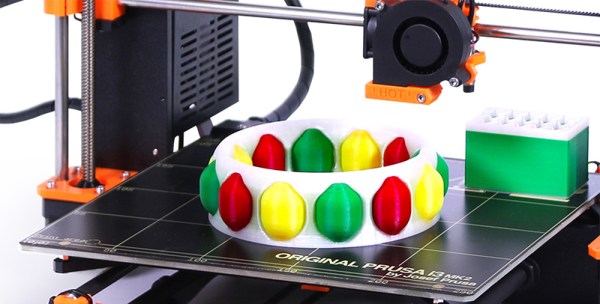
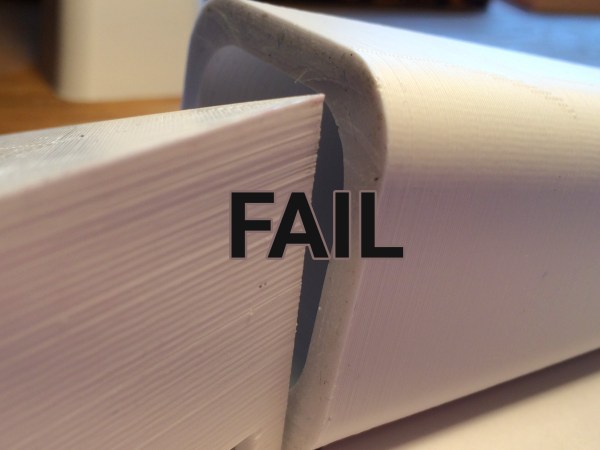
Holy Crap it’s the 3D printing edition of the links post. [Prusa] just released the latest version of the i3. It’s now bigger: 250x210x200mm build volume. The heated bed – [Prusa] was one of the first to experiment with PCB heated beds – is now vastly improved when looking at it through a FLIR. The Mk. 42 heated bed doesn’t have a hot center or cool corners. PEI sheet removes the need for blue painters tape, glass, aqua net, or glue sticks. The printer has self-test capabilities. The mechanics of the printer, especially the Z axis, are improved. [Prusa] will be selling this as a kit for ~19000 Czech Crowns or $699 USD, but he’s RepRap to the core. Buy a spool and start printing your next printer.


My precision mechanism adjuster. NSFW. As in if you use one of these to adjust a precision mechanism at work you'll get fired. Home use is fine tho;)

Fail Of The Week: My 3D Printer Upgrade

After years of cutting my hands on the exposed threads of my Prusa Mendel i2, it was time for a long overdue upgrade. I didn’t want to just buy a new printer because it’s no fun. So, I decided to buy a new frame for my printer. I settled on the P3Steel, a laser cut steel version of the Prusa i3. It doesn’t suffer from the potential squaring problems of the vanilla i3 and the steel makes it less wobbly than the acrylic or wood framed printers of similar designs.

My trusty i2. Very sharp. It... uh.. grew organically.
My trusty i2. Very sharp. It… uh.. grew organically.

I expected a huge increase in reliability and print quality from my new frame. I wanted less time fiddling with it and more time printing. My biggest hope was that switching to the M5 threaded screw instead of the M8 the i2 used would boost my z-layer accuracy. I got my old printer working just long enough to print out the parts for my new one, and gleefully assembled my new printer.

I didn’t wait until all the electronics were nicely mounted. No. It was time. I fired it up. I was expecting the squarest, quietest, and most accurate print with breathtakingly aligned z-layers. I did not get any of that. There was a definite and visible ripple all along my print. My first inclination was that I was over-extruding. Certainly my shiny new mechanics could not be at fault. Plus, I built this printer, and I am a good printer builder who knows what he’s doing. Over-extruding looks very much like a problem with the Z-axis. So, I tuned my extrusion until it was perfect.

Continue reading “Fail Of The Week: My 3D Printer Upgrade”

The State Of 3D Printing At MRRF

Only a few days ago, a significant proportion of the Hackaday crew was leaving Goshen, Indiana after the fourth annual Midwest RepRap Festival. We go to a lot of events every year, and even when you include DEF CON, security conferences, ham swap meets, and Maker Faires, MRRF is still one of the best. The event itself is an odd mix of people rallying under a banner of open source hardware and dorks dorking around with 3D printer. It’s very casual, but you’re guaranteed to learn something from the hundreds of attendees.

Hundreds of people made the trek out to Goshen this year, and a lot of them brought a 3D printer. Most of these printers aren’t the kind you can buy at a Home Depot or from Amazon. These are customized machines that push the envelope of what consumer 3D printing technology. If you want to know what 3D printing will be like in two or three years, you only need to come to MRRF. It’s an incubator of great ideas, and a peek at what the future of 3D printing holds.

Continue reading “The State Of 3D Printing At MRRF”

Keep Your Nozzle Hot And Your Prints Cool

Despite tuning my extruder steps perfectly, and getting good results instantly on larger prints. I was still having a ton of trouble with smaller parts. PLA is the favored printing material for its low odor, low warping, and decent material properties. It also has many downside, but it’s biggest, for the end user, lies in its large glass transition temperature range. Like all thermoplastics, it shrinks when it cools, but because of this large range, it stays expanded and, getting deep into my reserve of technical terms, bendy for a long time. If you don’t cool it, the plastic will pile up in its expanded state and deform.

The old cooling fan on my trusty and thoroughly battered Prusa i2.

I am working on a project that needs a tiny part, pictured above. The part on the left is what I was getting with my current cooling set-up and temperature settings. It had very little semblance with the CAD file that brought it into this world.

The bond between layers in a 3d print occurs when the plastic has freshly left the nozzle at its melting point. Almost immediately after that, the plastic crosses from the liquid state into a glass state, and like pressing two pieces of glass together, no further bonding occurs. This means that in order to get a strong bond between the print layers, the plastic has to have enough thermal mass to melt the plastic below it. Allowing the polymer chains to get cozy and hold hands. Nozzle geometry can help some, by providing a heat source to press and melt the two layer together, but for the most part, the fusing is done by the liquid plastic. This is why large diameter nozzles produce stronger parts.

What I’m getting at is that I like to run my nozzle temperature a little hotter than is exactly needed or even sensible. This tends to produce a better bond and sometimes helps prevent jamming (with a good extruder design). It also reduces accuracy and adds gloopiness. So, my first attempt to fix the problem was to perhaps consider the possibility that I was not 100% right in running my nozzle so hot, and I dropped the temperature as low as I could push it. This produced a more dimensionally accurate part, but a extraordinarily weak one. I experimented with a range of temperatures, but found that all but the lowest produced goopy parts.

After confirming that I could not get a significant return on quality by fine tuning my temperature, I reduced the speed of the nozzle by a large percentage. By reducing the speed I was able to produce the middle of the three printed parts shown in the opening image. Moving the nozzle very slowly gave the ambient air and my old cooling fan plenty of time to cool the part. However, what was previously a five minute part now took twenty minutes to print. A larger part would be a nightmare.

I had a little cage fan my friend had given me, and a huge one from a Mac G5 powersupply lying around. This will do.
This will do.

So, if I can’t adjust the temperature to get what I want, and I can adjust the speed; this tells me I just need to cool the part better. The glass state of the plastic is useless to me for two reasons. One, as stated before, no bonding occurs. Two, while the plastic remains expanded and bendy, the new layer being put down is being put down in the wrong place. When the plastic shrinks to its final dimension is when I want to place the next layer. Time to solve this the traditional way: overkill.

A while back my friend gifted me a little squirrel cage fan he had used with success on his 3d printer. Inspired by this, I had also scrounged a 12v, 1.7A fan from a broken Power Mac G5 power supply. When it spins up I have to be careful that it doesn’t throw itself off the table.

I should have added a rib to this bracket, this fan is heavy!

I printed out mounts for the fans. The big one got attached to the Z axis, and the little one rides behind the extruder. I fired up the gcode from before and started to print, only to find that my nozzle stopped extruding mid way. What? I soon discovered I had so much cooling that my nozzle was dropping below the 160C cold extrusion cut-off point and the firmware was stopping it from damaging itself. My heated bed also could no longer maintain a temperature higher than 59C. At this point I felt I was onto something.

I wrapped my extruder in fiberglass insulation and kapton tape, confidently turned the nozzle temperature up, set the speed to full, and clicked print. With the addition of the overkill cooling I was able to get the part shown to the right in my three example prints. This was full speed and achieved full bond. Not bad! Thus concludes this chapter in my adventures with cooling. I was really impressed by the results. Next I want to try cooling ABS as it prints. Some have reported horrible results, others pretty good ones, I’m interested. I also wonder about cooling the plastic with a liquid at a temperature just below the glass state as it is deposited. Thoughts?

Upgrading A 3D Printer With A Leadscrew

Consumer 3D printers have really opened up the floodgates to personal at home fabrication. Even the cheapest of 3D printers will yield functional parts — however the quality of the print varies quite a lot. One of the biggest downfalls to affordable 3D printers is the cost cutting of crucial parts, like the z-Axis. Almost all consumer 3D printers use standard threaded rod for the z-axis, which should really use a leadscrew instead.

Threaded rod is not designed for accurate positioning — it’s primarily designed to be a fastener. You can have issues with backlash, wobble, and they usually aren’t even perfectly straight — not to mention they gunk up easily with dirt and grime. In other words, you’ll never see a threaded rod on a commercial machine.

Continue reading “Upgrading A 3D Printer With A Leadscrew”

Interview With A Printer

The Hackaday European tour continues, this time in Prague with Josef Průša (Google translate), core developer in the RepRap project, feature at all the Maker Faires and cons, and creator of his namesake, the Prusa Mendel and i3 printers.

[Prusa]’s involvement with the RepRap project started with a RepRap Mendel, the second iteration of RepRap hardware, but the first popular and easy to build version. [Jo] found the Mendel rather difficult to build, so he loaded OpenSCAD and started to design his own version of the hardware. This version became the de facto standard RepRap for a few years, with many inspired by and derivative printers making their way to hackerspaces and workshops around the world.

The first Prusa printer, derived from the RepRap Mendel.

A few years ago, [Prusa] was one of the first to make a complete break with the traditional ‘threaded rod and nut’ construction of RepRaps with the introduction of the Prusa i3. This was the first model that had a metal plate as the frame, another feature that would be seen in dozens of other models. It’s not something that was without controversy, either; using a metal plate for the frame doesn’t allow for as much self-replication, something that’s a core value of the RepRap project. That didn’t matter to the community; the Prusa i3 or a similar design is the third most popular printer on 3Dhubs.

The first Prusa printer showing off its Makerbot heritage

What’s the future of the Prusa name? There is an i4 in the works, and I’m pretty sure that’s all I can tell you. Someone already bought the Prusai4 domain, so there may be a name change.

In the interview below, [Prusa] goes over his involvement with the RepRap project, his business, what he considers to be the latest advances in 3D printing for the past year, what the worst things about the 3D printing scene is (it’s Kickstarter), the state of the RepRap project, and thoughts on SLS, DLP, and SLA printing technologies. Video below.

Continue reading “Interview With A Printer”

Midwest RepRap Festival

midwest-reprap-meetup

Midwesterner’s should take note — here’s an event that’s happening somewhere other than New York or California! We jest, of course there are great events in the Midwestern states every year, like the Kanasas City or Detroit Maker Faires. This event puts focus on 3D printing. The Midwest RepRap Festival will be held in Elkhart, Indian March 15-17, 2013. Despite the name, the event is meant to encompass all things involved with any brand, make, or variety of 3D printing.

The owners of a local business called The Royal Phoenix have opened their doors for the weekend. Organizers have arranged for [Josef Prusa] and [Johnny R] to speak. There will also be build events (one session will show the build process of the MendelMax 2.0) so feel free to bring your own equipment for help with construction or getting it dialed in.

There is no registration fee, or tickets. But it would be best if you did fill out the questionnaire so they have some semblance of how many people might be coming.