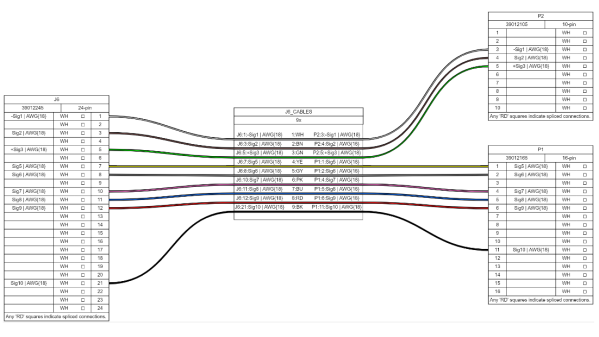
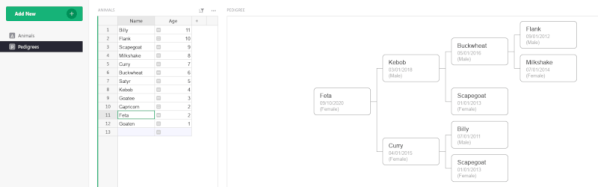
When building electronic assemblies there is quite often the need to construct custom cables to hook things up. It’s all very well if you’re prototyping by hand, or just building one or two of a thing, but if you’re cranking them out using outside help, then you’re going to want to ensure that cable is described very accurately. [Christian Nimako-Boateng Jr.] presents for us the first version of wirely, a wiring harness tool. This is a web-based tool that allows one to describe the cable ends and connectivity between them, producing a handy graphic and exports to excel in a format that should be easy to follow.
Based around the wireviz Python library running on a flask-based backend, image data are sent to the web assembly front-end and rendered with OpenGL. Configuration files can be imported and exported as JSON, making it easily linkable to other tools if required. Helpfully, the tool also seems to support some kind of revision control, although we didn’t try that yet. The process is straightforward enough, one simply defines a few groups (these relate to individual PCBs or other floating items in the assembly) which each contain one or more connectors. First, the connectors are described with part numbers, and wire gauge data, before defining the list of connections (wires) showing which signal and physical pins are connected together. Nothing more complex than that yet. We think there is still some more functionality that the tool could manage, such as shielding and guarding details, twisted pair definitions and a few others, but for a first pass, wirely looks pretty handy.
If you want a more heavyweight option using IEC 60617 symbols for describing wiring harnesses, then look no farther than QElectroTech, and yes, we have covered wireviz before, just for those that want to cut out the middleman and describe their cables in Python directly.
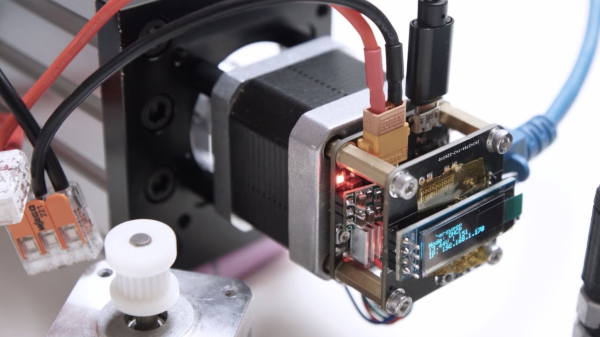
 making uploading firmware a breeze. To that end, a USB port is also provided, hooked up to the uC with the cheap CP2102 USB bridge chip as per most Arduino-like designs. The thing that makes this build a little unusual is the ethernet port. The hardware side of things is taken care of with the