Recreating The Quadrophonic Sound Of The 70s

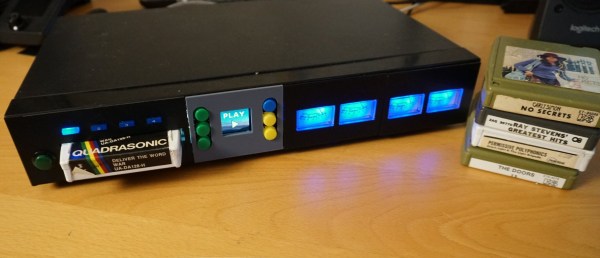
For plenty of media center PCs, home theaters, and people with a simple TV and a decent audio system, the standard speaker setup now is 5.1 surround sound. Left and right speakers in the front and back, with a center speaker and a subwoofer. But the 5.1 setup wasn’t always the standard (and still isn’t the only standard); after stereo was adopted mid-century, audio engineers wanted more than just two channels and briefly attempted a four-channel system called quadrophonic sound. There’s still some media from the 70s that can be found that is built for this system, such as [Alan]’s collection of 8-track tapes. These tapes are getting along in years, so he built a quadrophonic 8-track replica to keep the experience alive.

The first thing needed for a replica system like this is digital quadrophonic audio files themselves. Since the format died in the late 70s, there’s not a lot available in modern times so [Alan] has a dedicated 8-track player connected to a four-channel audio-to-USB device to digitize his own collection of quadrophonic 8-track tapes. This process is destructive for the decades-old tapes so it is very much necessary.

With the audio files captured, he now needs something to play them back with. A Raspberry Pi is put to the task, but it needs a special sound card in order to play back the four channels simultaneously. To preserve the feel of an antique 8-track player he’s cannibalized parts from three broken players to keep the cassette loading mechanism and track indicator display along with four VU meters for each of the channels. A QR code reader inside the device reads a QR code on the replica 8-track cassettes when they are inserted which prompts the Pi to play the correct audio file, and a series of buttons along with a screen on the front can be used to fast forward, rewind and pause. A solenoid inside the device preserves the “clunk” sound typical of real 8-track players.

As a replica, this player goes to great lengths to preserve the essence of not only the 8-track era, but the brief quadrophonic frenzy of the early and mid 70s. There’s not a lot of activity around quadrophonic sound anymore, but 8-tracks are popular targets for builds and restorations, and a few that go beyond audio including this project that uses one for computer memory instead.

Continue reading “Recreating The Quadrophonic Sound Of The 70s”

Read QR Codes Without A Computer

Did you ever watch Star Wars and wondered how people understood what R2D2 was saying? Maybe [Luke Skywalker] would enjoy learning to decode QR Codes by hand, too. While it might not be very practical, it would be a good party trick — assuming, like us, you party with nerds.

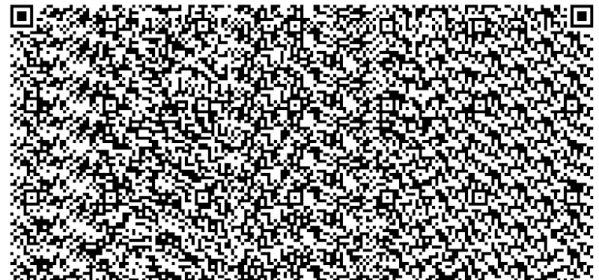
You can start by scanning a code, or the site will create one according to your specifications or generate one randomly. It then takes the selected code and shows you how it is put together. Fun fact: 21×21 “modules” (QR-speak for pixels) is the size of a version 1 QR code. Each version increases the size by four modules.

Continue reading “Read QR Codes Without A Computer”

A Paper Printer For QR Code Menus

Do you miss the days of thumbing through a sticky, laminated booklet to order your food? Sick of restaurants and their frustrating electronic menus? Fear not, for [Guy Dupont] and his QR code menu printer are here to save the day.

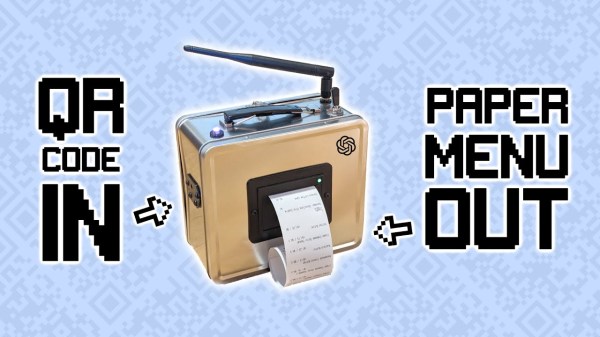
Yes, that’s right — it’s a lunchbox-sized printer designed to spit out a paper version of a digital menu. Using a Tiny Code Reader from Useful Sensors, the device can scan a QR code at a restaurant to access its menu. A Seeed Studio XIAO ESP32 takes the link, and then passes it to a remote computer which accesses the menu online and screenshots it. The image is processed with TesseractOCR to extract food items and prices, and the data is then collated into a simple text-only format using ChatGPT. The simplified menu is finally sent to a thermal printer to be spat out on receipt paper for your casual perusal.

[Guy] was inspired to build the project after hating the experience of using QR code menus in restaurants and bars around town. It’s his latest project that solves an everyday problem, it makes a great sequel to his smart jeans that tell you when your fly is down.

Continue reading “A Paper Printer For QR Code Menus”

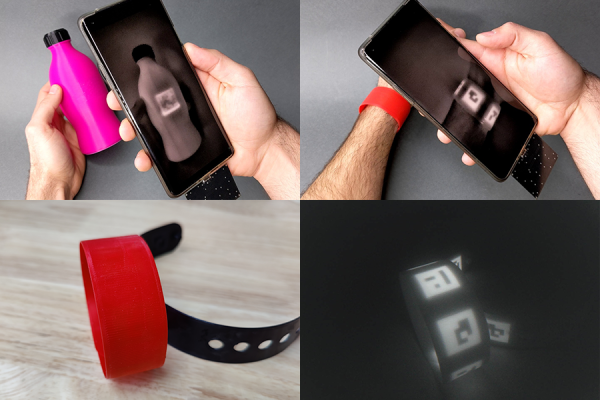
Four images in as many panes. Top left is a fuchsia bottle with a QR code that only shows up on the smartphone screen held above it. Top right image is A person holding a smartphone over a red wristband. The phone displays a QR code on its screen that it sees but is invisible in the visible wavelengths. Bottom left is a closeup of the red wristband in visible light and the bottom right image is the wristband in IR showing the three QR codes embedded in the object.

Fluorescent Filament Makes Object Identification Easier

QR codes are a handy way to embed information, but they aren’t exactly pretty. New work from MIT’s Computer Science and Artificial Intelligence Laboratory (CSAIL) have a new way to produce high contrast QR codes that are invisible. [PDF]

If this sounds familiar, you may remember CSAILs previous project embedding QR codes into 3D prints via IR-transparent filament. This followup to that research increases the detection of the objects by using an IR-fluorescent filament. Another benefit of this new approach is that while the InfraredTags could be any color you wanted as long as it was black, BrightMarkers can be embedded in objects of any color since the important IR component is embedded in traditional filament instead of the other way around.

One of the more interesting applications is privacy-preserving object detection since the computer vision system only “sees” the fluorescent objects. The example given is marking a box of valuables in a home to be detected by interior cameras without recording the movements of the home’s occupants, but the possibilities certainly don’t end there, especially given the other stated application of tactile interfaces for VR or AR systems.

We’re interested to see if the researchers can figure out how to tune the filament to fluoresce in more colors to increase the information density of the codes. Now, go forth and 3D print a snake with snake in a QR code inside!

Continue reading “Fluorescent Filament Makes Object Identification Easier”

It’s Snake, In A QR Code, But Smaller

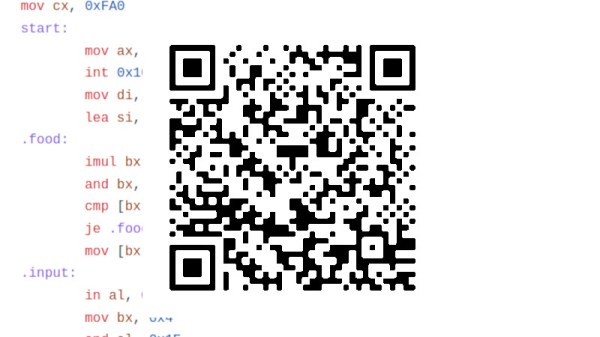
We’re not sure that many of you have recognised the need in your life for an x86 machine code program encoded into a QR code, but following on from someone else work [donno2048] has created a super-tiny Snake clone in assembly which comes in at only 85 bytes long. It fits far better in a QR code than the previous effort, but perhaps more useful is a web page demo which runs an in-browser DOS compatibility library. We followed the compilation instructions and got it running on our Manjaro installation, with the result of a somewhat unplayable but recognisable Snake, we’re guessing because it was written for a slower platform. The web version is more usable, and allows us to investigate its operation more thoroughly.

To achieve a working game in so little code is an impressive feat, and since we found different keys responded on machines with different keyboards we’re curious how it does its keyboard input. Also we think it has the Snake bug where turning back on yourself means instant game over. We would be interested to hear the views in the comments of readers who know something about x86 assembly, to help explain these points.

Color Can Triple QR Code Capacity

Recently [mit41301] wondered about increasing the data capacity of QR codes, and was able to successfully triple the number of bits using color. He chose the new rectangular micro QR code (rMQR) standard which was adopted last year as ISO/IEC 23941:2022. This rectangular-shaped QR code is designed to be used on narrow spaces, with an aspect ratio similar to that of a traditional 1D bar code. There are quite a few variations of rMQR, but the largest can hold 361 bytes. The basic idea is to generate three different rMQR codes, coloring them as red, green, blue, and merging the result. Decoding is performed by separating the color image into its RGB components and then decoding the resulting three images.

To do these experiments, [mit41301] took advantage of readily available tools. Generating rMQR codes can be done with this Python module by [Takahiro Tomita], who also makes the generator available online. Or if you’re more comfortable with Go, check out this repository by [Ichinose Shogo]. As a proof-of-concept, [mit41301] takes the first 449 digits of pi, plus the decimal point, and splits them into three each 150 byte chunks. Then he uses the image manipulation program ImageJ, an open-source Java program developed at the National Institutes of Health, to implement the combination and deconstruction processes.

The first 449 digits of pi expressed as a colorful rMQR code

There might be a few pitfalls if you want to do this outside the laboratory, however. First of all, this standard is reasonably new, and after a brief search this author couldn’t find any decoder that would recognize rMQR codes, nor any software modules or libraries. Research into colorization of QR codes, known as HCC2D (High Capacity Colored 2-Dimensional) codes has been ongoing. One issue is that correcting for arbitrary chromatic abnormalities in a scanner’s lens requires a baseline color palette in the code, which eats up some of the newly-gained data capacity.

Nonetheless, we really do like this concept. Do you have any applications of QR codes in your projects where coloring could be helpful? Is anyone using (monochrome) rMQR codes and if so, how are you scanning them? Check out our overview of barcodes, their history, and their future, in this recent article.

3D Printer Recognizes Third-Party Build Plates, Just Make Your Own ID Codes

The Bambu X1C 3D printer is a machine known for its speed, and it has a number of useful features like automatic build platform recognition. Factory build platforms are marked with an identifier code, and thanks to [elumspe] it’s now possible to make your own identifiers to stick onto third-party platforms and have the printer recognize them as though they were factory offerings. There’s even a super handy 3D-printable alignment tool that ensures the identifier goes in the correct spot, which is a nice touch.

These codes aren’t DRM so much as they are used by the printer to automatically verify that the installed build plate matches the slicer settings before a job begins. Printing one and sticking it in the right place is an easy way to get third-party plates recognized the same as factory offerings.

The identifier codes aren’t DRM so much as they are a way for the printer to verify that the installed build platform matches the slicer settings before a print begins, and throw up a warning if it doesn’t. The printer is perfectly happy to use third-party build surfaces, but since they lack an identifier, the printer will throw a warning each time. One solution is to simply disable checking the build platform before a print, but for those who would prefer to have the printer see what it expects to see, printing a small 2D barcode to stick on is an easy way to do it.

We see these sometimes called QR codes, but they look more like AprilTags. Both are types of 2D barcode, but while QR codes can encode a variety of information types, AprilTags are simpler and usually represent identifiers. In this case, they’re an appropriate way to let a camera-enabled printer know what kind of build plate is installed.

AprilTags are common in computer vision applications, and even relatively modest hardware can detect and decode them almost in real time. AprilTags are convenient and easy to use, as this gate access system demonstrates.