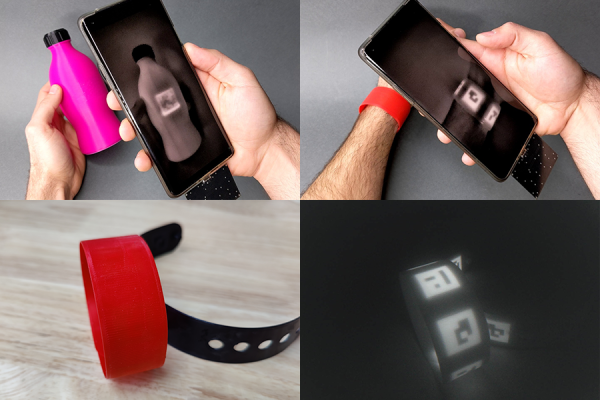
Four images in as many panes. Top left is a fuchsia bottle with a QR code that only shows up on the smartphone screen held above it. Top right image is A person holding a smartphone over a red wristband. The phone displays a QR code on its screen that it sees but is invisible in the visible wavelengths. Bottom left is a closeup of the red wristband in visible light and the bottom right image is the wristband in IR showing the three QR codes embedded in the object.

Fluorescent Filament Makes Object Identification Easier

QR codes are a handy way to embed information, but they aren’t exactly pretty. New work from MIT’s Computer Science and Artificial Intelligence Laboratory (CSAIL) have a new way to produce high contrast QR codes that are invisible. [PDF]

If this sounds familiar, you may remember CSAILs previous project embedding QR codes into 3D prints via IR-transparent filament. This followup to that research increases the detection of the objects by using an IR-fluorescent filament. Another benefit of this new approach is that while the InfraredTags could be any color you wanted as long as it was black, BrightMarkers can be embedded in objects of any color since the important IR component is embedded in traditional filament instead of the other way around.

One of the more interesting applications is privacy-preserving object detection since the computer vision system only “sees” the fluorescent objects. The example given is marking a box of valuables in a home to be detected by interior cameras without recording the movements of the home’s occupants, but the possibilities certainly don’t end there, especially given the other stated application of tactile interfaces for VR or AR systems.

We’re interested to see if the researchers can figure out how to tune the filament to fluoresce in more colors to increase the information density of the codes. Now, go forth and 3D print a snake with snake in a QR code inside!

Continue reading “Fluorescent Filament Makes Object Identification Easier”
It’s Snake, In A QR Code, But Smaller

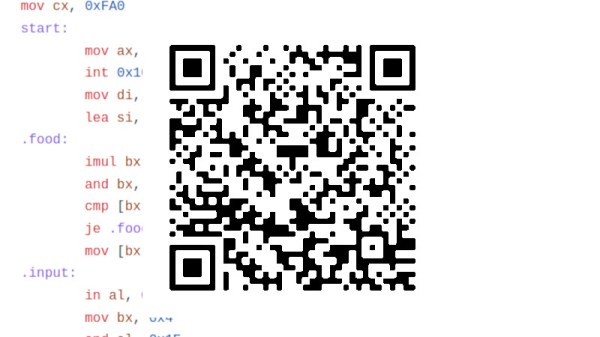
We’re not sure that many of you have recognised the need in your life for an x86 machine code program encoded into a QR code, but following on from someone else work [donno2048] has created a super-tiny Snake clone in assembly which comes in at only 85 bytes long. It fits far better in a QR code than the previous effort, but perhaps more useful is a web page demo which runs an in-browser DOS compatibility library. We followed the compilation instructions and got it running on our Manjaro installation, with the result of a somewhat unplayable but recognisable Snake, we’re guessing because it was written for a slower platform. The web version is more usable, and allows us to investigate its operation more thoroughly.

To achieve a working game in so little code is an impressive feat, and since we found different keys responded on machines with different keyboards we’re curious how it does its keyboard input. Also we think it has the Snake bug where turning back on yourself means instant game over. We would be interested to hear the views in the comments of readers who know something about x86 assembly, to help explain these points.

Color Can Triple QR Code Capacity

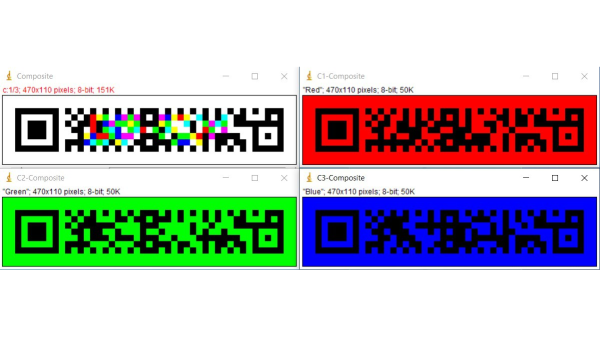
Recently [mit41301] wondered about increasing the data capacity of QR codes, and was able to successfully triple the number of bits using color. He chose the new rectangular micro QR code (rMQR) standard which was adopted last year as ISO/IEC 23941:2022. This rectangular-shaped QR code is designed to be used on narrow spaces, with an aspect ratio similar to that of a traditional 1D bar code. There are quite a few variations of rMQR, but the largest can hold 361 bytes. The basic idea is to generate three different rMQR codes, coloring them as red, green, blue, and merging the result. Decoding is performed by separating the color image into its RGB components and then decoding the resulting three images.

To do these experiments, [mit41301] took advantage of readily available tools. Generating rMQR codes can be done with this Python module by [Takahiro Tomita], who also makes the generator available online. Or if you’re more comfortable with Go, check out this repository by [Ichinose Shogo]. As a proof-of-concept, [mit41301] takes the first 449 digits of pi, plus the decimal point, and splits them into three each 150 byte chunks. Then he uses the image manipulation program ImageJ, an open-source Java program developed at the National Institutes of Health, to implement the combination and deconstruction processes.

The first 449 digits of pi expressed as a colorful rMQR code

There might be a few pitfalls if you want to do this outside the laboratory, however. First of all, this standard is reasonably new, and after a brief search this author couldn’t find any decoder that would recognize rMQR codes, nor any software modules or libraries. Research into colorization of QR codes, known as HCC2D (High Capacity Colored 2-Dimensional) codes has been ongoing. One issue is that correcting for arbitrary chromatic abnormalities in a scanner’s lens requires a baseline color palette in the code, which eats up some of the newly-gained data capacity.

Nonetheless, we really do like this concept. Do you have any applications of QR codes in your projects where coloring could be helpful? Is anyone using (monochrome) rMQR codes and if so, how are you scanning them? Check out our overview of barcodes, their history, and their future, in this recent article.

3D Printer Recognizes Third-Party Build Plates, Just Make Your Own ID Codes

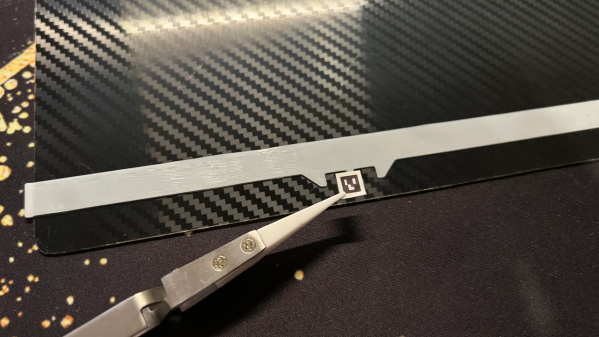
The Bambu X1C 3D printer is a machine known for its speed, and it has a number of useful features like automatic build platform recognition. Factory build platforms are marked with an identifier code, and thanks to [elumspe] it’s now possible to make your own identifiers to stick onto third-party platforms and have the printer recognize them as though they were factory offerings. There’s even a super handy 3D-printable alignment tool that ensures the identifier goes in the correct spot, which is a nice touch.

These codes aren’t DRM so much as they are used by the printer to automatically verify that the installed build plate matches the slicer settings before a job begins. Printing one and sticking it in the right place is an easy way to get third-party plates recognized the same as factory offerings.

The identifier codes aren’t DRM so much as they are a way for the printer to verify that the installed build platform matches the slicer settings before a print begins, and throw up a warning if it doesn’t. The printer is perfectly happy to use third-party build surfaces, but since they lack an identifier, the printer will throw a warning each time. One solution is to simply disable checking the build platform before a print, but for those who would prefer to have the printer see what it expects to see, printing a small 2D barcode to stick on is an easy way to do it.

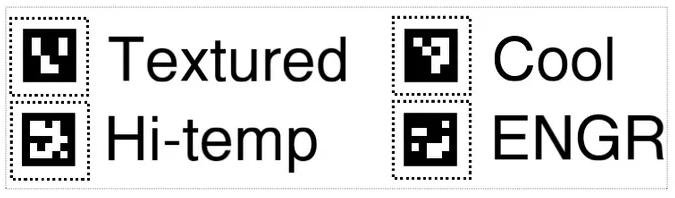
We see these sometimes called QR codes, but they look more like AprilTags. Both are types of 2D barcode, but while QR codes can encode a variety of information types, AprilTags are simpler and usually represent identifiers. In this case, they’re an appropriate way to let a camera-enabled printer know what kind of build plate is installed.

AprilTags are common in computer vision applications, and even relatively modest hardware can detect and decode them almost in real time. AprilTags are convenient and easy to use, as this gate access system demonstrates.

Barcodes Enter The Matrix In 2027

Beep. We’ve come a long way since June 26, 1974 when the first bar code was scanned at a grocery store in Troy, Ohio. That legendary pack of Juicy Fruit proved that even the smallest of items could now carry numbers associated with inventory and price.

By now, we’re all too familiar with this sound as self-checkouts have become the norm. Whereas you yourself could at one time literally check out during the transaction, you must now be on your toes and play find the bar code on every item.

What does the consumer gain from the bar code today? Practically nothing, except the chance to purchase, and potentially return, the item without too much hassle. Well, the non-profit outfit that runs the bar code world — GS1 US — wants to change all that. By 2027, they are confident that all 1D bar codes will be replaced with 2D bar codes similar to QR codes. Why?

Continue reading “Barcodes Enter The Matrix In 2027”

Pi Pico QR Display Hands Out WiFi Info With Style

At this point, you’re likely aware that you can store your wireless network’s credentials in a QR code, so that anyone who wants to connect with their smartphone need only scan the 2D barcode. Whether you print it out on paper, extrude it out of plastic, or paint the thing on the wall, it still works the same. It’s a neat trick for when you’ve got friends and family over, and saves you having to explain your ponderously long WPA key.

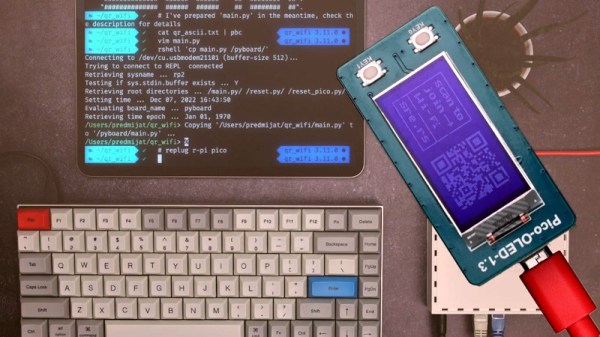
But what if you want to change up the encryption key every so often? Sure would be a hassle to have to repaint the wall. Enter this interesting project from [Predrag Mijatovic], which uses a few scripts to automatically set up a new encrypted guest WiFi network and present the appropriate QR code on an OLED display attached to a Raspberry Pi Pico. It’s a bit convoluted, and almost certainly won’t work on your network without significant tweaks, but we’re intrigued by the idea.

As [Predrag] explains, the whole thing is based on a Latvian MikroTik router that can be configured over SSH. A Bash script generates a new encryption key by base64 encoding the output /dev/urandom,  logs into the router to set up a new network using it, and then generates the matching ASCII QR code. With some sed trickery, the code is then embedded into a MicroPython program that gets uploaded to the connected Pi Pico.

In the video after the break [Predrag] takes us through the process manually so it’s easier to see what’s going on. Under normal circumstances, it would all happen automatically and would take just a few seconds to complete. We’d feel more comfortable if the scripts had some error correction that would allow them to gracefully exit if something goes wrong, but as a proof of concept, it certainly works.

We’d like to see this concept explored a bit further, perhaps using one of the physical QR code displays we’ve seen over the years. A programmable electronic paper display would also be a logical way to show off a dynamic QR code.

Continue reading “Pi Pico QR Display Hands Out WiFi Info With Style”

Invisible 3D Printed Codes Make Objects Interactive

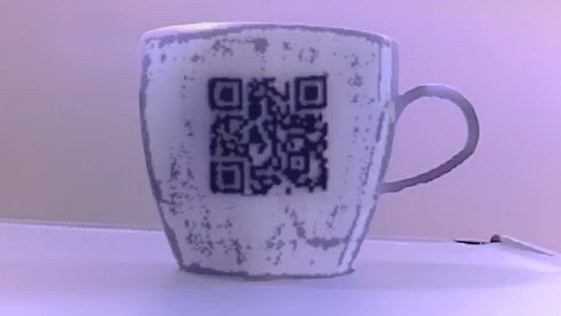
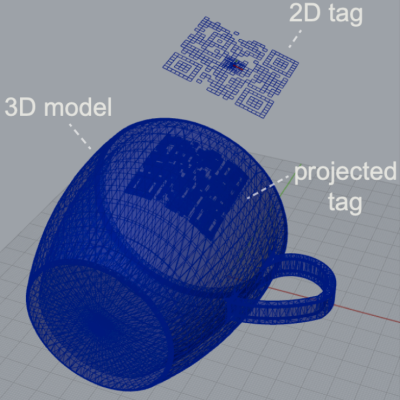
An interesting research project out of MIT shows that it’s possible to embed machine-readable labels into 3D printed objects using nothing more than an FDM printer and filament that is transparent to IR. The method is being called InfraredTags; by embedding something like a QR code or ArUco markers into an object’s structure, that label can be detected by a camera and interactive possibilities open up.

One simple proof of concept is a wireless router with its SSID embedded into the side of the device, and the password embedded into a different code on the bottom to ensure that physical access is required to obtain the password. Mundane objects can have metadata embedded into them, or provide markers for augmented reality functionality, like tracking the object in 3D.



How are the codes actually embedded? The process is straightforward with the right tools. The team used a specialty filament from vendor 3dk.berlin that looks nearly opaque in the visible spectrum, but transmits roughly 45% in IR.  The machine-readable label gets embedded within the walls of a printed object either by using a combination of IR PLA and air gaps to represent the geometry of the code, or by making a multi-material print using IR PLA and regular (non-IR transmitting) PLA. Both provide enough contrast for an IR-sensitive camera to detect the label, although the multi-material version works a little better overall. Sadly, the average mobile phone camera by itself isn’t sufficiently IR-sensitive to passively read these embedded tags, so the research used easily available cameras with no IR-blocking filters, like the Raspberry Pi NoIR.

The PDF has deeper details of the implementation for those of you who want to know more, and you can see a demonstration of a few different applications in the video, embedded below. Determining the provenance of 3D printed objects is a topic of some debate in the industry, and it’s not hard to see how technology like this could be used to covertly identify objects without compromising their appearance.

Continue reading “Invisible 3D Printed Codes Make Objects Interactive”