Raspberry Pi Pico Gets A Tiny Keyboard On Its Back

With hackers and makers building custom computing devices that don’t necessarily follow conventional design paradigms, there’s been a growing demand for smaller and smaller keyboards. Many of the cyberdecks we’ve seen over the last couple of years have used so-called 60% or even 40% keyboards, and there’s been a trend towards repurposing BlackBerry keyboards for wearables and other pocket-sized gadgets. But what if you need something even smaller?

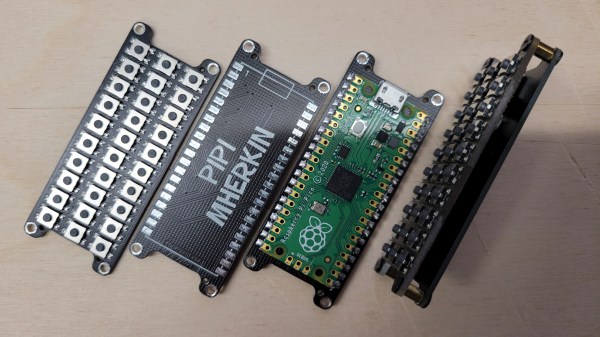
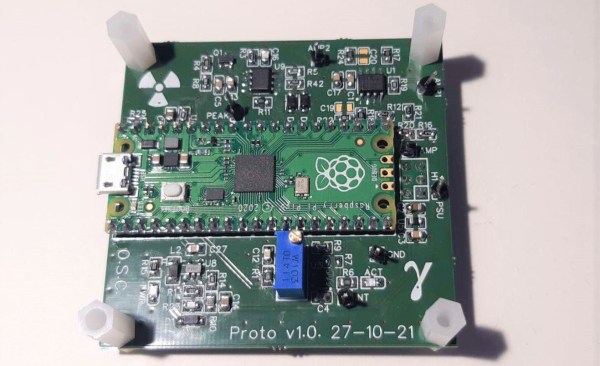
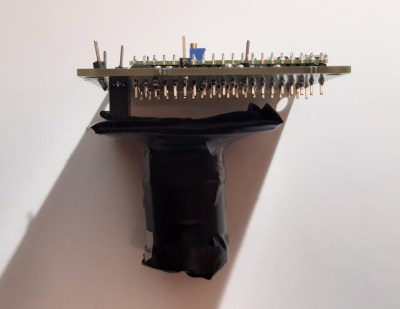
Enter this incredibly diminutive keyboard created by [TEC.IST]. With 59 keys crammed into an area scarcely larger than three US pennies, it may well be the smallest keyboard ever made. The PCB has been designed to mount directly onto the back of a Raspberry Pi Pico, which is running some CircuitPython code to read the switch matrix and act as a standard USB Human Interface Device. The board design files as well as the source code for the Pico have been released on the project’s Hackaday.io page, giving you everything you need to spin up your own teeny tiny input device.

The Pi Pico’s castellated pads make attaching the PCB a snap.

Of course, you probably won’t be breaking any speed records when banging out text on this thing. We know from past Hackaday badges that an array of microswitches make for a functional, if somewhat unpleasant, method of text entry.

Continue reading “Raspberry Pi Pico Gets A Tiny Keyboard On Its Back”

A pair of RP2040-based USB microphones

Mico Is A USB Microphone Based On A Pi Pico

When [Mahesh Venkitachalam] was experimenting with machine learning for audio applications on a Raspberry Pi, he found himself looking for a simple USB microphone. A cheap one was easy to find, but the sound quality and directionality left much to be desired. A large, studio-quality mic would be overkill, so [Mahesh] decided to simply build exactly what was needed: a compact, yet high-quality USB microphone that he called Mico.

The sensing device is a MEMS microphone that outputs a pulse density modulated (PDM) signal. There are chips available to directly interface such a microphone to a USB port, but [Mahesh] found them difficult to work with and therefore settled on something he knew already: the Raspberry Pi Pico platform. Luckily, someone had already figured out how to read out a microphone and present a USB device to a PC, so all that was needed was to put all the bits together into a convenient form factor.

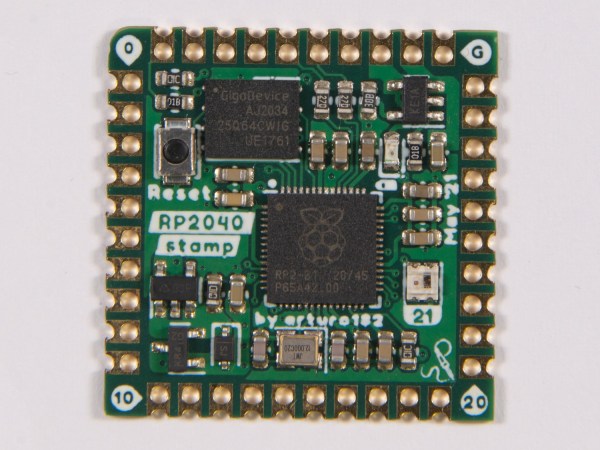
The great thing about the Pico platform is that its main controller chip, the RP2040, is available as a separate component. [Mahesh] designed a sleek little PCB that holds the RP2040 along with the MEMS microphone and a USB connector. The end result looks tidy enough that it might have come out of a mass-produced gizmo. Those don’t usually come with full schematics and source code, but the Mico does: everything is available on its GitHub page for anyone to re-use and improve.

You can judge the sound quality for yourself in the video embedded below. If you like DIY USB microphones, you’re in luck: we’ve featured one based on an STM32 as well as a beautiful recreation of a studio-quality mic.

Continue reading “Mico Is A USB Microphone Based On A Pi Pico”

PicoMite Gives Your Pico A Deluxe BASIC

What makes developing a microcontroller project quick and easy? Tops on our list are an interactive shell and comprehensive libraries that handle all the low-level peripheral stuff. You think we’re talking MicroPython? Not today! MMBasic has just been ported to the Raspberry Pi Pico dev board, and it has all the batteries included.

Just to give you a taste, it has built-in support for SD cards, all sorts of displays, touch screens, real-time clocks, IR remotes, numerous sensors, and of course WS2812 LED strips. And because all of this is baked into the BASIC, writing code to use any of these peripherals is straightforward.

Now, there’s BASIC and there’s BASIC. This is a modern BASIC: it has loops, functions, arrays, floating point, and a built-in full-screen editor. You connect to the Pico via UART, and you’re off to the races. If you’ve got a Pico sitting around, flash it and give it a try. Or check out the GitHub repository if you want to poke around in the internals.

This is a port of the BASIC that’s used on the Maximite virtual retrocomputer platform, which means that there are many working examples out there for you to crib from, and even a forum. Add in the incredibly nice user manual and tutorial (PDF), and you’ve got the perfect weekend afternoon.

Think MicroPython killed BASIC? Think again. BASIC is small enough that it can run where Python can’t, but that’s of course a more minimal experience. In contrast, MMBasic looks like it’s got all the toppings. The whole enchilada. It’s like BASIC Deluxe.

A conventiongoer plays Pokemon on a working Color Game Boy costume.

Convention Plays Pokemon On Giant Color Game Boy Costume

Standard cosplay is fun and all, but what is there for admirers to do but look you up and down and nitpick the details? Interactive cosplay, now that’s where it’s at. [Jaryd Giesen] knows this, and managed to pull together a working color Game Boy costume in a few days.

The original plan was to use a small projector on an arm, like one of those worm lights that helped you see the screen, but [Jaryd] ended up getting a secondhand monitor and strapping it to his chest. Then he took the rest of the build from there. Things are pretty simple underneath all that cardboard: there’s a Raspberry Pi running the RetroPie emulator, a Pico to handle the inputs, and two batteries — one beefy 12,000 mAH battery for the monitor, and a regular power pack for the Pi and the Pico.

As you’ll see in the build and demo video after the break, nearly 100 people stopped to push [Jaryd]’s buttons. They didn’t get very far in the game, but it sure looks like they had fun trying.

Since we’re still in a pandemic, you may want to consider incorporating a mask into your Halloween costume this year. Just a thought.

Continue reading “Convention Plays Pokemon On Giant Color Game Boy Costume”

Raspberry Pi Pico Used As A Transputer

You can’t fake that feeling when a $4 microcontroller dev board can stand in as cutting-edge 1980s technology. Such is the case with the working transputer that [Amen] has built using a Raspberry Pi Pico.

For a thorough overview of the transputer you should check out [Jenny List’s] longer article on the topic but boiled down we’re talking about a chip architecture mostly forgotten in time. Targetting parallel computing, each transputer chip has four serial communication links for connecting to other transputers. [Amen] has wanted to play with the architecture since its inception. It was expensive back then and today, finding multiple transputers is both difficult and costly. However, the RP2040 chip found on the Raspberry Pi Pico struck him as the perfect way to emulate the transputer design.

The RP2040 chip on the Pico board has two programmable input/output blocks (PIOs), each with four state machines in them. That matches up perfectly with the four transputer links (each is bi-directional so you need eight state machines). Furthermore, the link speed is spec’d at 10 MHz which is well within the Pico’s capabilities, and since the RP2040 runs at 133 MHz, it’s conceivable that an emulated core can get close to the 20 MHz top speed of the original transputers.

Bringing up the hardware has been a success. To see what’s actually going on, [Amen] sourced some link adapter chips (IMSC011), interfacing them through an Arduino Mega to a computer to use the keyboard and display. The transputer architecture allows code to be loaded via a ROM, or through the links. The latter is what’s running now. Future plans are to figure out a better system to compile code, as right now the only way is by running the original INMOS compiler on DOS in a VM.

Listen to [Amen] explain the project in the first of a (so far) six video series. You can find the links to the rest of those videos on his YouTube channel.

Continue reading “Raspberry Pi Pico Used As A Transputer”

New Video Series: Raspberry Pi Pico And RP2040 Deep Dive With Uri Shaked

In case you’ve been living under a rock that doesn’t have internet access, the Raspberry Pi Foundation got into the silicon sales and microcontroller game all at once this year with the Raspberry Pi Pico. It’s small, it’s capable, and it costs a measly $4. Surely you have one or two of them by now, right? But how much do you know about what it can do?

Or maybe you don’t have one yet, but it’s on your list. In either case, you can get started learning about them right away because [Uri Shaked]’s Raspberry Pi Pico and RP2040 Deep Dive course has recently been freed from the hallowed halls of HackadayU. He even built an emulator to go with it. [Uri] is a great instructor, and we’re sure that goes double if you ever need a salsa dance teacher, which he has also mastered.

This class was held for five weeks beginning in May 2021, with each session being roughly an hour long. The only prerequisite is a basic understanding of bitwise math, but there are resources for that on the class IO page linked above.

Each class is incredibly well-organized and informative. In the first class, [Uri] begins building a living document that includes the class agenda, links to all resources used and mentioned, code examples, and assembly instructions where applicable. It’s basically a syllabus plus a whole lot more. [Uri] also spends a lot of time in the incredibly thorough 649-page data sheet for the RP2040, and a little bit of time in the much shorter Getting Started guide. If you think the data sheet is inaccessible, you’ll likely change your tune by the end of the first class after you’ve seen [Uri] use and peruse it.

Continue reading “New Video Series: Raspberry Pi Pico And RP2040 Deep Dive With Uri Shaked”

Raspberry Pi Pico Oscilloscope

As you dive deeper into the world of electronics, a good oscilloscope quickly is an indispensable tool. However, for many use cases where you’re debugging low voltage, low speed circuits, that expensive oscilloscope is using only a fraction of its capabilities. As a minimalist alternative for these use cases [fhdm-dev] created Scoppy, a combination of firmware for the Raspberry Pi Pico and an Android app to create a functional oscilloscope.

As you would expect, the specifications are rather limited, capturing a maximum of 100 kpts at a speed of 500 kS/s shared between the two channels. Without some additional front end circuitry to protect the Pico, the input voltage is limited to 0-3.3 V. Neither the app nor the firmware is open source, and getting access to the second channel and removing ads requires a ~$3 in-app purchase. Even so, we can still think of plenty of practical uses for a ~$7 oscilloscope. If you do decide to add some front-end circuitry to change to voltage range, you can set them in the app, and switch between them by pulling certain GPIO pins high or low. The app has most of the basic oscilloscope features covered, continuous and single shot capture, adjustable trigger settings and a scalable waveform display.

Simple, cheap oscilloscopes like these have their place, but you start to understand why the “real” ones are so expensive when you see what goes into developing a high performance oscilloscope.