Home Automation: Evolution Of A Term

Home automation: for me the term recalls rich dudes in the ’80s who could turn off their garage lights with remote-control pads. The stereotype for that era was the more buttons your system had—even non-enabled ones—the more awesome it was, and by extension any luxury remote control had to be three times the size of any TV remote.

And it was a luxury–the hardware was expensive and most people couldn’t justify it. Kind of like the laser-disc player of home improvements. The technology was opaque to casual tinkering, it cost a lot to buy, and also was expensive to install.

The richie-rich stereotypes were reinforced with the technology seen in Bond movies and similar near-future flicks. Everything, even silly things, is motorized, with chrome and concrete everywhere. You, the hero, control everything in the house in the comfort of your acrylic half-dome chair. Kick the motorized blinds, dim the track lighting, and volume up the hi-fi!

This Moonraker-esque notion of home automation turned out to be something of a red herring, because home automation stopped being pretty forever ago; eventually it became available to everyone with a WiFi router in the form of Amazon Echo and Google Nest.

But the precise definition of the term home automation remains elusive. I mean, the essence of it. Let’s break it down.

Continue reading “Home Automation: Evolution Of A Term”

The Perfect Tourist Techno-Cap

How many times are you out on vacation and neglect to take pictures to document it all for the folks back at home? Or maybe you forgot just exactly where that awesome waterfall was. [Mark Williams] has made a Raspberry Pi Zero enabled cap that can take photos and geotag them with the location as well as the attitude of the camera.

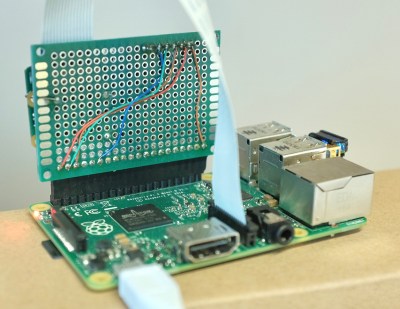
The idea is to enable the reconstruction of a trip photographically. The hardware consists of a Raspberry Pi Zero W coupled with a Raspberry Camera V2 and a BerryGPS-IMU. Once activated, the system starts taking photos every two minutes. Within each photograph, the location of the photographer is recorded like most GPS enabled camera.

An additional set of data including yaw, pitch, and roll along with direction is also captured to understand where the camera is pointing when the image was taken. Even if he’s tilting his head at the time the photo was taken, the metadata allows it to be straightened out in software later.

This information is decoded using GeoSetter which puts the images on a map along with the field of view. Take a peek at the video below for the result of a trip around Sydney Harbour and the system in action. The Raspberry Pi Zero and camera combo are useful for a lot of things including this soldering microscope. Hopefully, we will be seeing some DIY VR gear with stereo cameras in the near future. Continue reading “The Perfect Tourist Techno-Cap”

Hackaday Prize Entry: Hydroponic Garden Control

[Todd Christell] grows tomatoes in hydroponic buckets in his backyard, and recently he suffered a crop loss when a mechanical timer failed to dispense the nutrient flow as directed. He decided the solution was to add a sensor array to his home network.

[Todd]’s home automation setup runs on a Raspberry Pi loaded with Jessie OS and Node-Red, with Mosquitto as his MQTT message broker. With a sensor network in place, [Todd] would get updates on his phone alerting him if there was a problem with the pumps or if the nutrient bath was getting too low.

The proposed hydroponic setup would consist of an ESP8266-12 equipped with a DS18B20 waterproof temperature sensor, a reed sensor detecting nutrient levels, and a relay board triggering one pump to fill the grow buckets from the main sump and another to top off the sump with the solution from a reserve tank. One early problem he encountered was the electric fence (pictured above) that he employs to keep squirrels away from his tomatoes, interfered with the ESP8266’s signal.

Robot Car Follows Wherever You Go

Having a pet can really make a difference to your happiness at the end of the day, but they’re also a lot of work. This project by [Ioannis Stoltidis] does something similar — minus all the responsibility. The Smart Car Follower Project is designed to track people using Bluetooth and IR and follow them around from room to room.

Submitted as part of a Master’s thesis, this project hacks a toy car and uses a key chain transmitter that sends the tracking signals. A Raspberry Pi 3 combines the Bluetooth RSSI and IR signals to make create an estimate of the position of the beacon. Arduinos facilitate the IR signaling as well as the motor control allowing the robot to chase the user around like a puppy. The whole thing also comes with obstacle avoidance using ultrasonic sensors on all sides which are good if you have a lot of furniture in the house.

You can also choose to go manual-mode and drive it around the block using a PC and gamepad. A webcam connected to the onboard computer allows a first person view of the vehicle by sending the video feed over wifi to a PC application. OpenCV is used to create the final GUI which allows you to see and control the project remotely. The source code is available for download for anyone who wants to replicate the project. Check out the video of it in action below.

Continue reading “Robot Car Follows Wherever You Go”

Old Intercom Gets Googled With Raspberry Pi And AIY Hat

Old Radio Shack intercom; brand new Google Voice interface for a Raspberry Pi. One of these things is not like the other, but they ended up together in this retro-look Google Voice interface, and the results are pretty slick.

The recipient of the Google hive-mind transplant was one of three wireless FM intercoms [MisterM] scored for a measly £4. Looking much as they did when they were the must-have office tool or home accessory for your modern mid-80s lifestyle, the intercom case was the perfect host for the Pi and the Google AIY hat. Only the case was used — not even the original speaker made it into the finished product. The case got a good scrubbing, a fresh coat of paint to perk up the gone-green plastic, and an accent strip of Google’s logo colors over the now-deprecated station selector switch. [MisterM] provided a white LED behind the speaker grille for subtle feedback. A tap of the original talk bar gets Google’s attention for answers to quick questions, and integration into the family’s existing home automation platform turns the lights on and off. See it in action after the break.

[MisterM] was lucky enough to score an AIY hat for free, and as far as we know they’re still hard to come by. If you’re itching to try out the board, fear not — turns out you can roll your own.

Continue reading “Old Intercom Gets Googled With Raspberry Pi And AIY Hat”

Trackpad with Arduino PS/2-to-USB converter

Raspberry Pi Trackpad From Salvaged Trackpad Plus Arduino

Old laptops are easy to find and many have a trackpad with a PS/2 interface hardwired into the guts of the laptop. [Build It] wanted one of those trackpads for use in the DIY Raspberry Pi laptop he’s working on. But the Raspberry Pi has no PS/2 input, and he read that a PS/2 to USB adapter wouldn’t be reliable enough. His solution? Wire the trackpad to an Arduino and have the Arduino convert the trackpad’s PS/2 to USB.

After removing a few screws, he had the trackpad free of the laptop. Looking up the trackpad’s part number online he found the solder pads for data, clock and five volts. He soldered his own wires to them, as well as to the trackpad’s ground plane, and from there to his Arduino Pro Micro. After installing the Arduino PS/2 mouse and the Mouse and Keyboard libraries he wrote some code (see his Instructables page). The finishing touch was to use generous helpings of hot glue to secure all the wires, as well as the Arduino, to the back to the trackpad. By plugging a USB cable into the Arduino, he now had a trackpad that could plug in anywhere as a USB trackpad. Watch [Build It] put it all together step-by-step in the video below.

Continue reading “Raspberry Pi Trackpad From Salvaged Trackpad Plus Arduino”

Almost An Amiga For Not A Lot

If you ask someone old enough to have been a computer user in the 16-bit era what machine they had, you’ll receive a variety of answers mentioning Commodore, Atari, Apple, or even PC brands. If your informant lay in the Commodore camp though, you’ll probably have an impassioned tale about their Amiga, its capabilities, and how it was a clearly superior platform whose potential was wasted. The Amiga was for a while one of the most capable commonly available computers, and became something of a cult within its own lifetime despite the truly dismal performance of the various companies that owned it. Today it retains one of the most active retro computer scenes, has an active software community, and even sees new hardware appearing.

For Amiga enthusiasts without the eye-watering sums required to secure one of the new Amiga-compatible machines with a PowerPC or similar at its heart, the only option to relive the glory beside finding an original machine is to run an emulator. [Marco Chiapetta] takes us through this process using a Raspberry Pi, and produces an Amiga that’s close enough to the real thing to satisfy most misty-eyed enthusiasts.

He starts with a cutesy Amiga-themed Raspberry Pi case that while it’s not essential for the build, makes an entirely appropriate statement about his new machine, We’re taken through the set-up of the Amibian emulator distro, then locating a set of Amiga ROMs. Fortunately that last step is easier than you might think, even without trawling for an illicit copy.

The result is an Amiga. OK, it’s not an Amiga, but without the classic Commodore logo is it any more not an Amiga than some of the other non-branded Amiga-compatible boards out there? Less talking, more classic gaming!

We’ve covered quite a few Amigas on these pages. Getting an A500 online was the subject of a recent post, and we brought you news of a new graphics card for the big-box Amiga’s Zorro slot.