Discrete LEDs Make A Micro Display

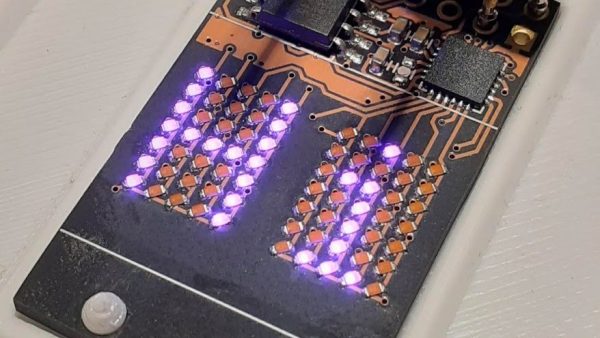
Few things excite a Hackaday staff member more than a glowing LED, so it should be no surprise that combining them together into a matrix really gets us going. Make that matrix tiny, addressable, and chainable and you know it’ll be a hit at the virtual water cooler. We’ve seen [tinyledmatrix]’s work before but he’s back with the COPXIE, a pair of tiny addressable displays on one PCBA.

The sample boards seen at top are a particularly eye catching combination of OSH Park After Dark PCB and mysterious purple SMT LEDs that really explain the entire premise. Each PCBA holds two groups of discrete LEDs each arranged into a 5×7 display. There’s enough density here for a full Latin character set and simple icons and graphics, so there should be enough flexibility for all the NTP-synced desk clocks and train timetables a temporally obsessed hacker could want.

Continue reading “Discrete LEDs Make A Micro Display”

Who Says Solder Paste Stencils Have To Be CNC Cut?

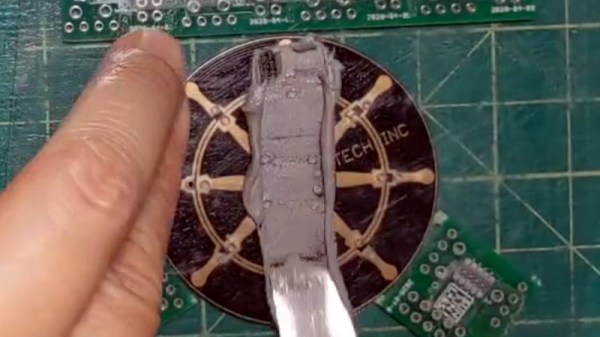
Imagine having a surface mount kit that you’d like to stencil with solder paste and reflow solder, but which doesn’t come with a solder stencil. That was what faced [Honghong Lu], and she rose to the challenge by taking a piece of PET sheet cut from discarded packaging and hand-cutting her own stencil. It’s not a huge kit, the Technologia Incognita 2020 kit, but her home-made stencil still does an effective job.

So how does one create a solder stencil from household waste? In the video we’ve put below the break, she starts with her packaging, and cuts from it a square of PET sheet. It’s 0.24mm thick, which is ideal for the purpose. She then lays it over the PCB and marks all the pads with a marker pen, before cutting or drilling the holes for the pads. The underside is then sanded to remove protruding swarf, and the stencil can then be used in the normal way. She proves it by stenciling the solder paste, hand placing the parts, and reflowing the solder on a hotplate.

It’s clear that this is best suited to smaller numbers of larger components, and we’ll never use it to replace a laser-cut stencil for a thousand tiny 0201 discretes. But that’s not the point here, it’s an interesting technique for those less complex boards, and it’s something that can be tried by anyone who is curious to give stenciling and reflowing a go and who doesn’t have a project with a ready-cut stencil. And for that we like it.

Making your own stencils doesn’t have to include this rather basic method. They can be etched, or even 3D printed.

Continue reading “Who Says Solder Paste Stencils Have To Be CNC Cut?”

Exhaust Fan-Equipped Reflow Oven Cools PCBs Quickly

With reflow soldering, sometimes close is good enough. At the end of the day, the home gamer really just needs a hot plate or an old toaster oven and a calibrated Mark I eyeball to get decent results. This exhaust fan-equipped reflow oven is an attempt to take control of what’s perhaps the more challenging part of the reflow thermal cycle — the cool down.

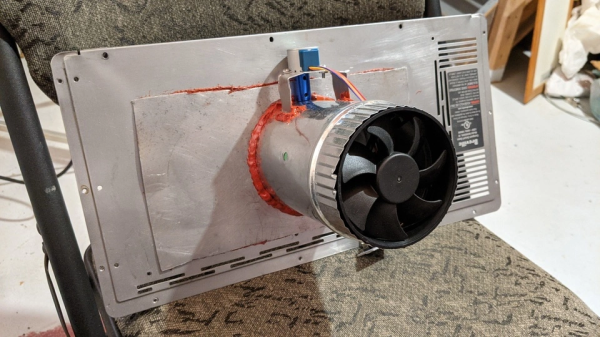
No fan of the seat-of-the-pants school of reflow soldering, [Nabil Tewolde] started with a cast-off toaster oven for what was hoped to be a more precise reflow oven. The requisite temperature sensors and solid-state relays were added, along with a Raspberry Pi Zero W and a small LCD display. Adding the cooling assist started by cutting a gaping hole cut in the rear wall of the oven, which was then filled with a short stretch of HVAC duct and a stepper-controlled damper. The far end of the duct was fitted with a PC cooling fan; while it seems sketchy to use a plastic fan to eject hot air from the oven, [Nabil] says the exhaust isn’t really that hot by the time it gets to the fan. At the end of the reflow phase of the thermal profile, the damper opens and the fan kicks on, rapidly cooling the oven’s interior.

Unfortunately, [Nabil] still needs to crack open the oven door to get decent airflow; seems like another damper to admit fresh air would help with that. That would complicate things a bit, but it still wouldn’t be as over-the-top as some reflow builds we’ve seen. Then again, that calibrated eyeball thing can work pretty well too, even without a toaster oven.

Continue reading “Exhaust Fan-Equipped Reflow Oven Cools PCBs Quickly”

Robotics Club Teaches Soldering

Oregon State University must be a pretty good place to go to school if you want to hack on robots. Their robotics club, which looks active and impressive, has a multi-part video series on how to solder surface mount components that is worth watching. [Anthony] is the team lead for their Mars Rover team and he does the job with some pretty standard-looking tools.

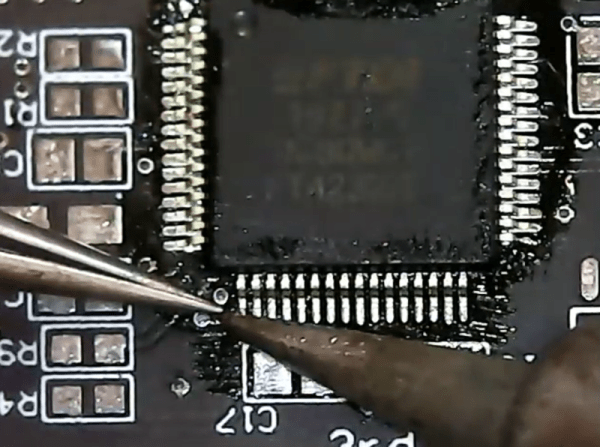
The soldering station in use is a sub-$100 Aoyue with both a regular iron and hot air. There’s also a cheap USB microscope that looks like it has a screen, but is covered in blue tape to hold it to an optical microscope. So no exotic tools that you’d need a university affiliation to match.

Continue reading “Robotics Club Teaches Soldering”

Building A Compact Reflow Oven With Halogen Lamps

Very often, particularly on the Internet, we’re fooled into thinking bigger is always better. The fact remains that this isn’t always the case. When it comes to reflow ovens, for example if you’re working with short runs of small PCBs, or if you just don’t have a lot of space in the workshop, a smaller oven will be more desirable than a large one. It’s factors like these that drove [Sergi Martínez]’s latest build.

Built inside a metal project case, first attempts involved using an off-the-shelf heating element, with poor results. The element had a high thermal inertia, and was designed for use in water, so didn’t last in the reflow application. Learning from the experience of others, [Sergi] switched to using halogen lamps, netting much greater success. An Arduino Nano is responsible for running the show, using firmware developed by [0xPIT]. There’s also a screen for monitoring reflow profiles, and a cooling fan to help keep temperature in the ideal zone.

It’s a tidy build that would be particularly useful for quickly running batches of small PCBs without the long wait times required to heat a larger oven. Energy efficiency should be better, too. Of course, if you’re a fan of the classic toaster oven builds, we’ve got those too. Video after the break.

Continue reading “Building A Compact Reflow Oven With Halogen Lamps”

The Art Of USB Dongle Repair

Faced with a broken USB dongle for our wireless devices, most of us would likely bin the part and order a replacement, after all the diminutive size of those things probably means hard to impossible repairability, right? Well, [The Equalizor] took it as a challenge and used the opportunity to practice his microscopic soldering skills just for funsies.

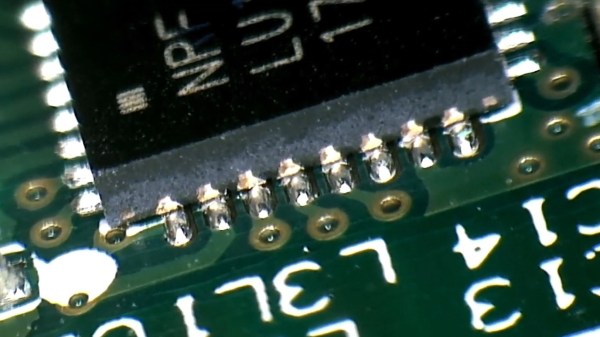
The wireless adapter in question, which came from one of his clients who accidentally bent it while it was plugged into a laptop, refused to be recognized by a computer under any circumstances. After sliding out the metal casing for the USB plug and snapping off the plastic housing, [The Equalizor] discovered that the slightly bent exterior hid a deeply cracked PCB. Then, with an inspection of the severed traces and lifted components, it was simply a matter of reflowing solder a few times to try to make the board whole again. Once the dongle was confirmed working, a new 3D shell was printed for it, replacing the original which had to be broken off.

It might not seem extraordinary to some people, but this video is a good example to show that repairs to delicate electronics in such a small scale are feasible, and can serve to reduce the amount of electronic waste we constantly dump out. Just because some electronics seem dauntingly elaborate or beyond salvaging, it doesn’t always mean there isn’t light at the end of the tunnel. You can see the work performed on this tiny dongle after the break.

Continue reading “The Art Of USB Dongle Repair”

With PowerCore And FluxLamp, Reflow Is Possible

[nathan] sends in this combo of projects which combine to make a very interesting reflow oven.

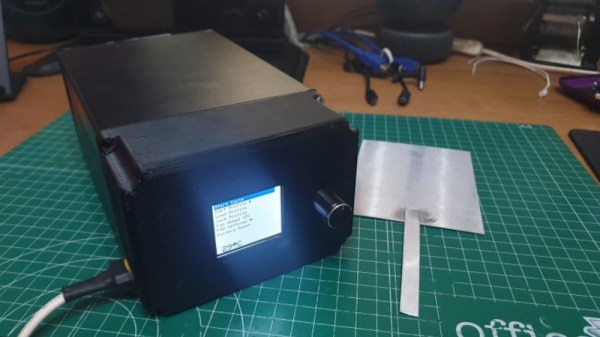
First is PowerCore which has two microcontrollers, an ATmega and a ESP8366 working in tandem to turn the AC on and off at set intervals. A GLCD displays the current profiles and WiFi allows for remote control as well. Input is handled by a momentary switch rotary controller. He decided to go this route after reading forums on the commercial controllers and deciding they needed too much fiddling and weren’t hacker friendly enough.

The PowerCore then attaches to a halogen work light. He took the front glass off the halogen light and covered it in aluminum foil. This becomes the base of the oven. The PowerCore and a sensor are attached to the back. Using the lighting element as a heating one makes sense and, as we can see from the curves, appears to provide a very accurate response.

On top of all this [nathan] has documented the project beautifully. The small size and great control bump it way up in our list of reflow builds to recommend.