Epoxy LED Cube Looks Sleek, And Flashes To The Beat

If there’s one thing that’s universally popular in these polarizing times, it’s colorful glowing objects. LEDs reign supreme in this area, and we’re accustomed to seeing all manner of fun flashy devices hit the tips line. Today is no different, and we’ve been looking at [Modustrial Maker]’s stylish epoxy LED cube.

The build starts with the casting of a black epoxy cube, with a cutout near the top in which the LEDs will be installed. A melamine form is used, with aluminium foil tape, caulk and paste wax to help seal it up. After releasing the cast from the form, there were some unsightly voids which were swiftly dispatched, by trimming the block down with a table saw. With the block cut to size, LED strips were installed, and the light cavity sealed with hot glue before white epoxy was poured in as a diffuser. All that’s left was a simple matter of polishing the cube and installing electronics.

The cube runs from a single-cell LiPo battery, and there’s a wireless power receiver and charging module to keep the power flowing. The cube can be used on most wireless phone chargers, as well as its own dedicated charging base. The LEDs are controlled by an off-the-shelf module, which offers a variety of flashing displays as well as a music-reactive mode.

While the electronics side is done with off-the-shelf parts, the real art in this piece is in the build of the cube. Its glossy, attractive form would look stunning on any coffee table or bedside shelf.

LED cubes are a great rabbit hole to go down on your lunch break. This OpenGL-enabled build is particularly impressive. Video after the break.

Continue reading “Epoxy LED Cube Looks Sleek, And Flashes To The Beat”

Transparent And Flexible Circuits

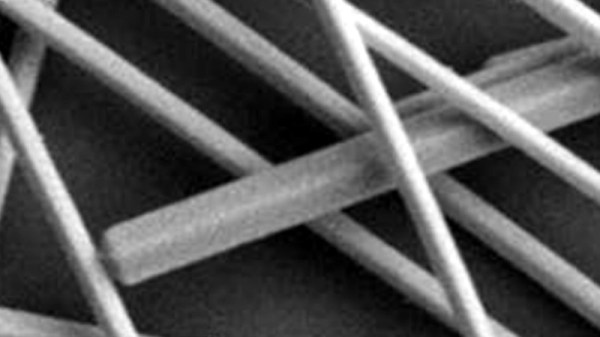
German researchers have a line on 3D printed circuitry, but with a twist. Using silver nanowires and a polymer, they’ve created flexible and transparent circuits. Nanowires in this context are only 20 nanometers long and only a few nanometers thick. The research hopes to print things like LEDs and solar cells.

Of course, nothing is perfect. The material has a sheet resistance as low as 13Ω/sq and the optical transmission was as high as 90%. That sounds good until you remember the sheet resistance of copper foil on a PCB is about 0.0005Ω.

Continue reading “Transparent And Flexible Circuits”

Building Keyboards With Resin Printers

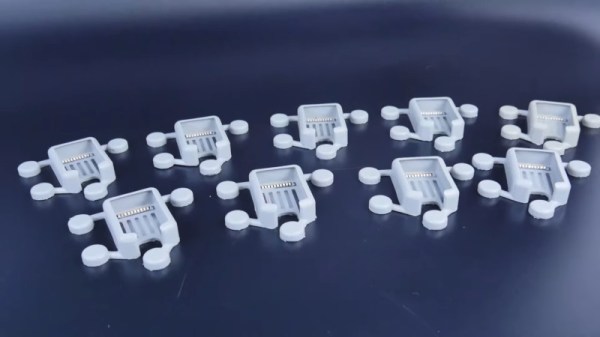
Aside from putting a whole lot of tact switches on a board, no one has quite figured out how to make very small keyboards for wearable projects. [Madaeon] might have the answer, and it’s using a resin-based 3D printer to create a flexible keyboard without silicone.

The world of small keyboards is filled with what are effectively the squishy parts of a remote control. This uses a piece of silicone and tiny carbon ‘dots’ on the underside of each button. Press the button, and these carbon dots bridge two traces on a PCB, closing a switch. No one has yet mastered home-casting silicone, although the people behind the ESP32 WiPhone have been experimenting with aluminum molds.

Instead of going down the path of casting and curing silicone, [Madaeon] decided to use 3D printing, specifically resin 3D printing, using a very flexible resin. The build process is what you would expect — just some button-shaped objects, but this gets clever when it comes to bridging the connections on the keyboard matrix. This is done with conductive paint, carefully applied to the underside of each button.

Right now this is a viable means of getting a tiny keyboard easily. The color is a garish pink, and the labels on each button aren’t quite as visible as anyone would like, but the latter can be fixed with silkscreening, just like how it’s done on the silicone buttons for remote controls.

Reproducing Vintage Plastic Parts In Top-Notch Quality

Plastic is a highly useful material, but one that can also be a pain as it ages. Owners of vintage equipment the world over are suffering, as knobs break off, bezels get cracked and parts warp, discolor and fail. Oftentimes, the strategy has been to rob good parts from other broken hardware and cross your fingers that the supply doesn’t dry up. [Eric Strebel] shows us that’s not the only solution – you can replicate vintage plastic parts yourself, with the right tools.

In the recording industry there’s simply no substitute for vintage gear, so a cottage industry has formed around keeping old hardware going. [Eric] was tasked with reproducing VU meter bezels for a classic Neve audio console, as replacement parts haven’t been produced since the 1970s.

The first step is to secure a good quality master for replication. An original bezel is removed, and polished up to remove scratches and blemishes from 40+ years of wear and tear. A silicone mold is then created in a plywood box. Lasercut parts are used to create the base, runner, and vents quickly and easily. The mold is then filled with resin to produce the final part. [Eric] demonstrates the whole process, using a clear silicone and dyed resin to make it more visible for the viewer.

Initial results were unfortunately poor, due to the silicone and hardener used. The parts were usable dimensionally, but had a hazy surface finish giving very poor optical qualities. This was rectified by returning to a known-good silicone compound, which was able to produce perfectly clear parts first time. Impressively, the only finishing required is to snap off the runner and vents. The part is then ready for installation. As a final piece of showmanship, [Eric] then ships the parts in a custom laser-engraved cardboard case. As they say, presentation is everything.

With modern equipment, reproducing vintage parts like knobs and emblems is easier than ever. Video after the break.

Continue reading “Reproducing Vintage Plastic Parts In Top-Notch Quality”

Entry-Level SLA Printer Gets Upgrades, Prints Better

Fused-deposition modeling (FDM) printers have the lion’s share of the 3D-printing market, with cheap, easy-to-use printers slurping up thousands of kilos of filament every year. So where’s the challenge with 3D-printing anymore? Is there any room left to tinker? [Physics Anonymous] thinks so, and has started working on what might be the next big challenge in additive manufacturing for the hobbyist: hacking cheap stereolithography (SLA) printers. To wit, this teardown of and improvements to an Anycubic Photon printer.

The Photon, available for as little as $450, has a lot going for it in the simplicity department. There’s no need to worry about filament and extruder issues, since the print is built up a layer at a time by photopolymerization of a liquid resin. And with but a single moving part – the build platform that rises up gradually from the resin tank on a stepper-driven lead screw – SLA printers don’t suffer from the accumulated errors of three separate axes. But, Anycubic made some design compromises in the motion control area to meet their price point for the Photon, leaving a perfect target for upgrades. [Physics Anonymous] added quality linear bearings to each side of the OEM vertical column and machined a carrier for the build platform. The result is better vertical positioning accuracy and decreased slop. It’s a simple fix that greatly improves print quality, with almost invisible layers.

Sadly, the Photon suffered a major, unrelated injury to its LCD screen, but it looks like [PA] will be able to recover from that. We hope so, because we find SLA printing very intriguing and would like to dive right in. But maybe we should start small first.

Continue reading “Entry-Level SLA Printer Gets Upgrades, Prints Better”

How To Make Bisected Pine Cones Look Great, Step-by-Step

[Black Beard Projects] sealed some pine cones in colored resin, then cut them in half and polished them up. The results look great, but what’s really good about this project is that it clearly demonstrates the necessary steps and techniques from beginning to end. He even employs some homemade equipment, to boot.

Briefly, the process is to first bake the pine cones to remove any moisture. Then they get coated in a heat-activated resin for stabilizing, which is a process that infuses and pre-seals the pine cones for better casting results. The prepped pine cones go into molds, clear resin is mixed with coloring and poured in. The resin cures inside a pressure chamber, which helps ensure that it gets into every nook and cranny while also causing any small air bubbles introduced during mixing and pouring to shrink so small that they can’t really be seen. After that is cutting, then sanding and polishing. It’s an excellent overview of the entire process.

The video (which is embedded below) also has an outstanding depth of information in the details section. Not only is there an overview of the process and links to related information, but there’s a complete time-coded index to every action taken in the entire video. Now that’s some attention to detail.

Continue reading “How To Make Bisected Pine Cones Look Great, Step-by-Step”

3D Printing With Tomography In Reverse

The 3D printers we’re most familiar with use the fused deposition process, in which hot plastic is squirted out of a nozzle, to build up parts on a layer by layer basis. We’ve also seen stereolithography printers, such as the Form 2, which use a projector and a special resin to produce parts, again in a layer-by-layer method. However, a team from the University of North Carolina were inspired by CT scanners, and came up with a novel method for producing 3D printed parts.

The process, as outlined in the team’s paper.

The technique is known as Computed Axial Lithography. The team describe the system as working like a CT scan in reverse. The 3D model geometry is created, and then a series of 2D images are created by rotating the part about the vertical axis. These 2D images are then projected into a cylindrical container of photosensitive resin, which rotates during the process. Rather than building the part out of a series of layers in the Z-axis, instead the part is built from a series of axial slices as the cylinder rotates.

The parts produced have the benefit of a smooth surface finish and are remarkably transparent. The team printed a variety of test objects, including a replica of the famous Thinker sculpture, as well as a replica of a human jaw. Particularly interesting is the capability to make prints which enclose existing objects, demonstrated with a screwdriver handle enclosing the existing steel shank.

It’s a technique which could likely be reproduced by resourceful makers, assuming the correct resin isn’t too hard to come by. The resin market is hotting up, with Prusa announcing new products at a recent Makerfaire. We’re excited to see what comes next, particularly as the high cost of resin is reduced by economies of scale. Video after the break.

[via Nature, thanks to Philip for the tip!]

Continue reading “3D Printing With Tomography In Reverse”