A Mobile Phone From 1985

It might seem quaint through the lends of history we have the luxury of looking through, but in the mid 1980s it was a major symbol of status to be able to communicate on-the-go. Car phones and pagers were cutting-edge devices of the time, and even though there were some mobile cellular telephones, they were behemoths compared to anything we would recognize as a cell phone today. It wasn’t until 1985 that a cell phone was able to fit in a pocket, and that first device wasn’t just revolutionary because of its size. It made a number of technological advancements that were extremely impressive for its time, and [Janus Cycle] takes us through some of those in this teardown video.

The Technophone came to us from Great Britain by way of a former Ericsson engineer named Nils MÃ¥rtensson. It was able to achieve its relatively small stature using a surface-mount PCB, which was a cutting-edge manufacturing process for the time. Not only did it use surface-mount components and boards, but the PCB itself has 12 layers and two sides and hosts two custom Technophone chips. The phone is relatively modular as well, with the screen, battery pack, and other components capable of easily disconnecting from the main board. Continue reading “A Mobile Phone From 1985”

Exploring The Early Days Of QRP Radio

Morse code might seem obsolete but for situations with extremely limited bandwidth it’s often still the best communications option available. The code requires a fair amount of training to use effectively, though, and even proficient radio operators tend to send only around 20 words per minute. As a result of the reduced throughput, a type of language evolved around Morse code which, like any language, has evolved and changed over time. QRP initially meant something akin to “you are overloading my receiver, please reduce transmitter power” but now means “operating radios at extremely low power levels”. [MIKROWAVE1] explores some of the earlier options for QRP radios in this video.

There’s been some debate in the amateur radio community over the years over what power level constitutes a QRP operation, but it’s almost certainly somewhere below 100 watts, and while the radios in this video have varying power levels, they tend to be far below this upper threshold, with some operating on 1 watt or less. There are a few commercial offerings demonstrated here, produced from the 70s to the mid-80s, but a few are made from kits as well. Kits tended to be both accessible and easily repairable, with Heathkit being the more recognizable option among this category. To operate Morse code (or “continuous wave” as hams would call it) only requires a single transistor which is why kits were so popular, but there are a few other examples in this video with quite a few more transistors than that. In fact, there are all kinds of radios featured here with plenty of features we might even consider modern by today’s standards; at least when Morse code is concerned.

QRP radios in general are attractive because they tend to be smaller, simpler, and more affordable. Making QRP contacts over great distances also increases one’s ham radio street cred, especially when using Morse, although this benefit is more intangible. There’s a large trend going on in the radio world right now surrounding operating from parks and mountain peaks, which means QRP is often the only way to get that done especially when operating on battery power. Modern QRP radios often support digital and voice modes as well and can have surprisingly high prices, but taking some cues from this video about radios built in decades past could get you on the radio for a minimum or parts and cost, provided you can put in the time.

Continue reading “Exploring The Early Days Of QRP Radio”

SheepShaver: A Cross-Platform Tool For Retro Enthusiasts

The world of desktop computing has coalesced into what is essentially a duopoly, with Windows machines making up the bulk of the market share and Apple carving out a dedicated minority. This relatively stable state hasn’t always existed, though, as the computing scene even as late as the 90s was awash with all kinds of competing operating systems and various incompatible hardware. Amiga, Unix, OS/2, MacOS, NeXT, BeOS, as well as competing DOSes, were all on the table at various points.

If you’ve still got a box running one of these retro systems, SheepShaver might be able to help expand your software library. It’s not the sort of virtualization that we’re used to in the modern world, with an entire operating system running on a sanctioned-off part of your system. But SheepShaver does allow you to run software written for MacOS 7.5.2 thru 9.0.4 in a different environment. Unix and Linux are both supported, as well as Mac OS X, Windows NT, 2000, and XP, and the enigmatic BeOS. Certain configurations allow applications to run natively without any emulation at all, and there is plenty of hardware support built-in as well.

For anyone running retro hardware from the late 90s or early 00s, this could be just the ticket to get an application running that wasn’t ever supported on one of these machines. As for the name, it’s a play on another piece of software called ShapeShifter which brought a Mac-II emulator to the Amiga. SheepShaver has been around since the late 90s, too, so we’re surprised that we haven’t featured it before since it is such a powerful tool for cross-platform compatibility for computers of this era. Even if all you are hanging on to is an old BeBox.

Commodore 64 Reports The News

In the late 80s and into the 90s, [Cameron Kaiser] aka [ClassicHasClass] was an aspiring journalist, first becoming interested in the career in elementary school and then working on various publications into university. At some point, he started using a piece of software for laying out newspapers called The Newsroom which, he admits, was lacking a lot of tools that would have been modern even for the time, but had an otherwise agreeable price tag thanks to its focus more on home desktop publishing and newsletter production than on full-scale newspaper operations. It did have one interesting feature that he never could figure out, though, at least until he went back and pieced this mystery together.

The software itself ran on the Apple II and was eventually ported to other systems of the era, including the Commodore 64. The mystery feature was known as “Wire Service” and appeared to be a way that users of the software who had a modem could connect with one another and share news releases, layouts, graphics, and other content created in Newsroom, but in the days where it would have been modern never was able to connect to anything. In fact, it was eventually abandoned by the developers themselves in later releases of the software. But [ClassicHasClass] was determined to get it working. Continue reading “Commodore 64 Reports The News”

Classic Gaming With FPGA And ATX

Playing classic games, whether they are games from the golden age of arcades or simply games from consoles that are long out of production, tends to exist on a spectrum. At one end is grabbing a game’s ROM file, finding an emulator, and kludging together some controls on a keyboard and mouse with your average PC. At the other is meticulously restoring classic hardware for the “true” feel of what the game would have felt like when it was new. Towards the latter end is emulating the hardware with an FPGA which the open-source MiSTer project attempts to do. This build, though, adds ATX capabilities for the retrocomputing platform. Continue reading “Classic Gaming With FPGA And ATX”

A Loving Look Inside Vacuum Fluorescent Displays

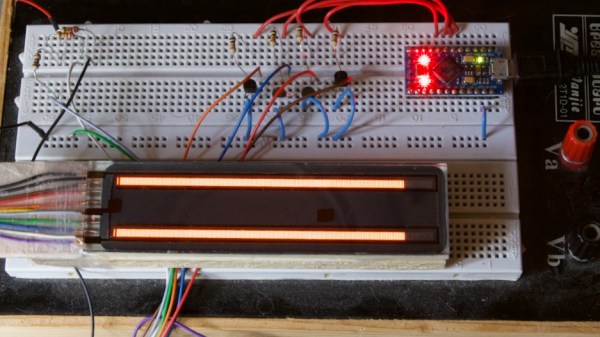
Everyone knows we’re big fans of displays that differ from the plain old flat-panel LCDs that seem to adorn most devices these days. It’s a bit boring when the front panel of your widget is the same thing you stare at hour after hour while using your phone. Give us the chunky, blocky goodness of a vacuum fluorescent display (VFD) any day of the week for visual interest and retro appeal.

From the video below, it seems like [Posy] certainly is in the VFD fandom too, rolling out as he does example after example of unique and complicated displays, mostly from audio equipment that had its heyday in the 1990s. In some ways, the video is just a love letter to the VFD, and that’s just fine with us. But the teardowns do provide some insights into how VFDs work, as well as suggest ways to tweak the overall look of a VFD.

For example, consider the classy white VFDs that graced a lot of home audio gear back in the day. It turns out, the phosphors used in those displays weren’t white, but closer to the blue-green color that VFDs are often associated with. But put a pink filter between the display and the world, and suddenly those turquoise phosphors look white. [Posy] does a lot of fiddling with the stock filters to change the look of his VFDs, some to good effect, others less so.

As for the internals of VFDs, [Posy]’s look at a damaged display reveals a lot about how they work. With a loose scrap of conductor shorting one of the cathodes inside the tube, the damaged VFD isn’t much to look at, and is beyond reasonable repair, but it’s kind of cool to examine the spring mechanisms that take up slack as the cathodes heat up and expand.

Thanks to [Posy] for this heartfelt look into the VFDs of yesterday. If you need more about how VFDs work, we’ve covered that before, too.

Continue reading “A Loving Look Inside Vacuum Fluorescent Displays”

This CRT-Style Pi Portable Gets All The Details Right

A quick glance at the “Pi Terminal” built by [Salim Benbouziyane], and you might think he pulled an old CRT monitor out of a video editing bay and gutted it. Which, of course, is the point. But what you’re actually looking at is a completely new construction, featuring a fully 3D printed enclosure, a clever PCB control panel, and some very slick internal engineering.

[Salim] started the design by recreating the principle components of the build, namely the 8 inch 4:3 IPS LCD panel and Raspberry Pi 4, digitally in CAD. This let him design the enclosure around the parts, rather than trying to cram everything in after the fact. After printing the case, which clearly took considerable inspiration from broadcast video monitors of the early 2000s, he then painstakingly post-processed the parts using tips and techniques picked up from prop builders. To really finish things off, he designed his control panel as a PCB so he could have it professionally fabricated, and used heat set inserts to hold everything tight. Continue reading “This CRT-Style Pi Portable Gets All The Details Right”