
Hardware support under Linux is far better than it ever has been in the past. These days, most things “just work” out of the box, and you probably won’t have to compile any custom kernel modules. Certainly a far cry from where things were a decade ago. But that doesn’t mean everything will work to 100% of its abilities. Take for example, the Duck keyboard that [Cynthia Revström] has. Sure it works as a basic keyboard under any OS, but getting those fancy RGB LEDs working is another story entirely.
Don’t get the wrong idea here, [Cynthia] isn’t just trying to get the keyboard to flash along to music; the goal was to use the RGB lighting of the Ducky keyboard for notifications that the user can’t possibly ignore. Even the most laser-focused among us would have a hard time not noticing that the entire keyboard is blinking red. But the “DuckyRGB” software that you need to do something like that is Windows-only and apparently distributed via a sketchy Google Drive link. Yikes.
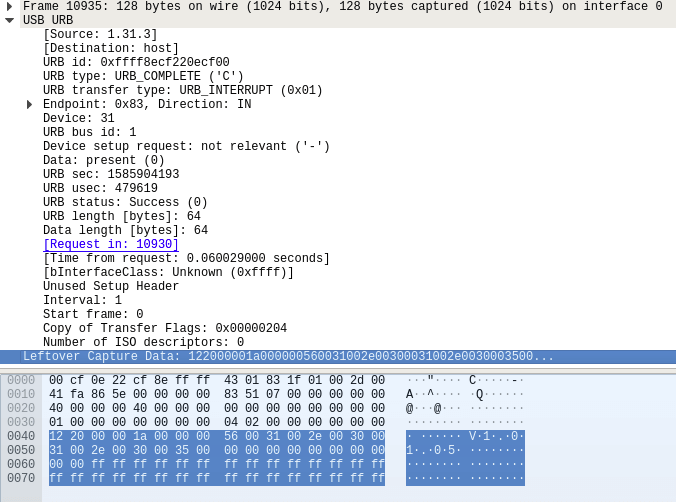 The first step to creating an alternative was to spin up a Windows VM and install DuckyRGB. From there, Wireshark could listen in between the virtual computer and the Ducky keyboard to see what the software was sending over the wire. After identifying a version number being sent in the clear, [Cynthia] was able to isolate the LED commands by searching for the hex color codes. From there, it was a relatively simple matter of writing some glue code to connect it up to an alert service and get notifications going.
There was only one problem; the keyboard didn’t work anymore. Turns out the tool that [Cynthia] wrote to control the keyboard’s LEDs was claiming the device so the kernel couldn’t access it for normal input. It took a detour with HIDAPI to get everyone playing together nicely, and now changing the color of your Ducky keyboard on Linux doesn’t turn it into a paperweight.
Even if you don’t have a Ducky keyboard, or aren’t particularly interested in having its LEDs blinked at you if you do, this project is a phenomenal example of practical USB reverse engineering. [Cynthia] says the inspiration for this project came from friend [Ben Cox], who’s write-up on creating USB userspace drivers we covered last year. If you’ve got and old USB gadget with Windows-only drivers, maybe it’s time you take a crack at unlocking it.