Drawing Lines In The Sand: Taking Beach Graffiti To The Next Level

When strolling down the beach, there’s always an urge to draw in the sand – it seems compulsory to make your mark by inscribing something. But there’s a dilemma: how do you go about physically drawing it? You could opt to remain standing and attempt to deploy a toe, but that requires a level of dexterity few possess. The only other option is to bend down and physically use your hands. Ultimately, there’s no way to draw anything in the sand without losing your dignity.

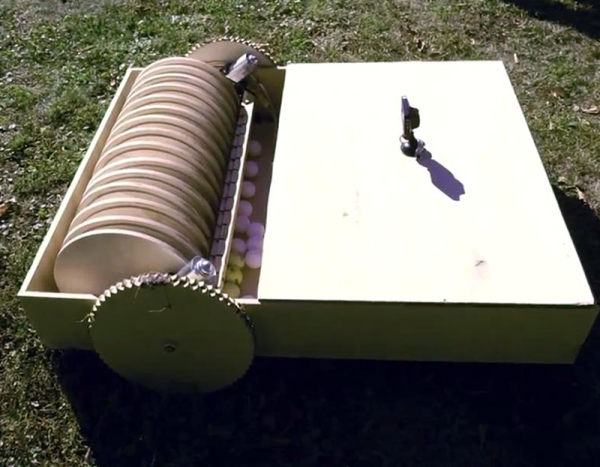
The solution? A robot, of course – the brainchild of [Ivan Miranda]. The idea is simple and elegantly executed: make a large linear actuator, place it on wheels, and attach a servo which can position an etching tool to be either in the sand or above it. The whole contraption moves forward one column at a time, making a vertical pass with the marker being engaged or disengaged as required. The columns are quite thin, giving relatively high-resolution text, though this does mean it take a while. Adding another servo and marking two adjacent columns at the same time would be an easy way to instantly double the speed.

The wheels are big and chunky, to ensure the horizontal distance travelled does not change between the top and the bottom. Of course, when making big parts like these it always helps if you’ve already built a giant custom 3D printer. If you want to read more of [Ivan]’s large scale 3D printing antics, checkout his tank with suspension, or plus-sized seven-segment clock.

Continue reading “Drawing Lines In The Sand: Taking Beach Graffiti To The Next Level”

Handmade Robot Brings Stop Motion To Life

Stop motion animation is often called a lost art, as doing it (or at least, doing it well) is incredibly difficult and time consuming. Every detail on the screen, no matter how minute, has to be placed by human hands hundreds of times so that it looks smooth when played back at normal speed. The unique look of stop motion is desirable enough that it still does get produced, but it’s far less common than hand drawn or even computer animation.

If you ever wanted to know just how much work goes into producing even a few minutes of stop motion animation, look no farther than the fascinating work of [Special Krio]. He not only documented the incredible attention to detail required to produce high quality animation with this method, but also the creation of his custom robotic character.

Characters in stop motion animation often have multiple interchangeable heads to enable switching between different expressions. But with his robotic character, [Special Krio] only has to worry about the environments, and allow his mechanized star do the “acting”. This saves time, which can be used for things such as making 45 individual resin “drops” to animate pouring a cup of tea (seriously, go look).

To build his character, [Special Krio] first modeled her out of terracotta to get the exact look he wanted. He then used a DIY 3D laser scanner to create a digital model, which in turn he used to help design internal structures and components which he 3D printed on an Ultimaker. The terracotta original was used once again when it was time to make molds for the character’s skin, which was done with RTV rubber. Then it was just the small matter of painting all the details and making her clothes. All told, the few minutes of video after the break took years to produce.

This isn’t the first time we’ve seen 3D printing used to create stop motion animation, but the final product here is really in a league of its own.

[Thanks to Antonio for the tip.]

Continue reading “Handmade Robot Brings Stop Motion To Life”

Controlling Robotics Visually

The world — and the Hackaday Prize — is filled with educational robots. These are small, wheeled robots loaded up with sensors, actuators, a few motor drivers, and some sort of system that is easy to program. The idea behind these educational robots is to give students an easy-to-use platform to test out code, learn inverse kinematics, and realize odometry is a lot harder than you think it is. Give these kids some time and patience, and you’ll have a fleet of Battlebots at the end of the semester, if the teacher is cool.

But there’s a problem with all educational robots. The programming. For someone just starting out in robotics club, being able to code isn’t a guarantee. You need an easy to use programming interface. This project for the Hackaday Prize gives all students a great visual programming interface. It’s basically like the first generation of Lego Mindstorms, only you don’t need a weird IR tower attached to a serial port.

Of course you can’t program a robot without a board, and this project brings it in spades. The brain for this platform is built on an ARM microcontroller, has Bluetooth, supports up to six DC motors, twelve analog inputs, PWM and serial ports, and all the ports are color-coded for kids who can’t read so good.

This is a visual programming environment, though, and with that, you get a fancy IDE filled with loops that wrap around commands, IO access that’s in easy to read blocks, and control software that gives students a dashboard filled with buttons and odometers and the video feed from the camera. It’s a great Hackaday Prize entry, and an excellent way to introduce kids to robotics.

ROPS Will Be The Board X86 Robot Builders Are Waiting For

If your robot has outgrown a Raspberry Pi and only the raw computing power of an x86 motherboard will suffice, you are likely to encounter a problem with its interfaces. The days of ISA cards are long gone, and a modern PC is not designed to easily talk to noisy robot hardware. Accessible ports such as USB can have interfaces connected to them, but suffer from significant latency in the process.

A solution comes from ROPS, or Robot on a PCI-e Stick, a card that puts an FPGA on a blazing-fast PCI-e card that provides useful real-world interfaces such as CAN and RS485 and a pile of I/O lines as well as an IMU, barometer, and GPS. If you think you may have seen it before then you’d be right, it was one of the first-round winners of the Open Hardware Design Challenge. They’re very much still at the stage of having an FPGA dev board and working out the software so there aren’t any ROPS boards to look at yet, but this is a project that’s going somewhere, and definitely one to watch.

Festo BionicFinWave underwater robot

[Festo]’s Underwater Robot Uses Body-Length Fins

[Festo] have come up with yet another amazing robot, a swimming one this time with an elegant propulsion mechanism. They call it the BionicFinWave. Two fins on either side almost a body-length long create a wave which pushes water backward, making the robot move forward. It’s modeled after such fish as the cuttlefish and the Nile perch.

The BionicFinWave's fin mechanismWhat was their elegant solution for making the fins undulate? Nine lever arms are attached to each fin. Those lever arms are controlled by two crankshafts which extend from the front of the body to the rear, one for each side. A servo motor then turns each crankshaft. Since the crankshafts are independent, that means each fin operates independently. This allows for turning by having one fin move faster than the other. A third motor in the head flexes the body, causing the robot to swim up or down.

There’s also a pressure sensor and an ultrasonic sensor in the head for depth control and avoiding objects and walls. While these allow it to swim autonomously in its acrylic, tubular track, there is wireless communication for recording sensor data. Watch it in the video below as it effortlessly swims around its track.

[Festo] has created a lot of these marvels over the years. We’ve previously covered their bionic hopping kangaroo (we kid you not), their robot ants with circuitry printed on their exoskeleton, and perhaps the most realistic flapping robotic bird ever made.

Continue reading “[Festo]’s Underwater Robot Uses Body-Length Fins”

Wiping Robots And Floors: STM32duino Cleans Up

Ever find yourself with nineteen nameless robot vacuums lying around? No? Well, [Aaron Christophel] likes to live a different life, filled with zebra print robots (translated). After tearing a couple down, only ten vacuums remain — casualties are to be expected. Through their sacrifice, he found a STM32F101VBT6 processor acting as the brains for the survivors. Coincidentally, there’s a project called STM32duino designed to get those processors working with the Arduino IDE we either love or hate. [Aaron Christophel] quickly added a variant board through the project and buckled down.

Of course, he simply had to get BLINK up and running, using the back-light of the LCD screen on top of the robots. From there, the STM32 processors gave him a whole 80 GPIO pins to play with. With a considerable amount of tinkering, he had every sensor, motor, and light under his control. Considering how each of them came with a remote control, several infra-red sensors, and wheels, [Aaron Christophel] now has a small robotic fleet at his beck and call. His workshop must be immaculate by now. Maybe he’ll add a way for the vacuums to communicate with each other next. One robot gets the job done, but a whole team gets the job done in style, especially with a zebra print cleaner at the forefront.

If you want to see more of his work, he has quite a few videos on his website demonstrating the before and after of the project — just make sure to bring a translator. He even has a handy pinout for those looking to replicate his work. If you want to dive right in to STM32 programming, we have a nice article on how to get it up and debugged. Otherwise, enjoy [Aaron Christophel]’s demonstration of the eight infra-red range sensors and the custom firmware running them.

Tables Are Turned As Robots Assemble IKEA Furniture

Hackaday pages are rife with examples of robots being built with furniture parts. In this example, the tables are turned and robots are the masters of IKEA pieces. We are not silly enough to assume that these robots unfolded the instructions, looked at one another, scratched their CPUs, and began assembling. Of course, the procedure was preordained by the programmers, but the way they mate the pegs into the ends of the cross-members is a very human thing to do. It reminds us of finding a phone charging socket in the dark. This kind of behavior is due to force feedback which tell the robots when a piece is properly seated which means that they can use vision to fit the components together without sub-millimeter precision.

All the hardware used to make the IKEA assembler is publicly available, and while it may be out of the typical hacker price range, this is a sign of the times as robots become part of the household. Currently, the household robots are washing machines, smart speakers, and 3D printers. Ten years ago those weren’t Internet connected machines so it should be no surprise if robotic arms join the club of household robots soon. Your next robotics project could be the tipping point that brings a new class of robots to the home.

Back to our usual hijinks, here is a robot arm from IKEA parts and a projector built into a similar lamp. or a 3D printer enclosed in an IKEA cabinet for a classy home robot.

Continue reading “Tables Are Turned As Robots Assemble IKEA Furniture”