If you’ve got a decent CRT monitor, you can usually adjust the settings to make sure the image scans nicely across the whole display. But what if you could rotate the whole image itself? [Jeri Ellsworth] has shown us how to achieve this with an amusing mechanical hack.
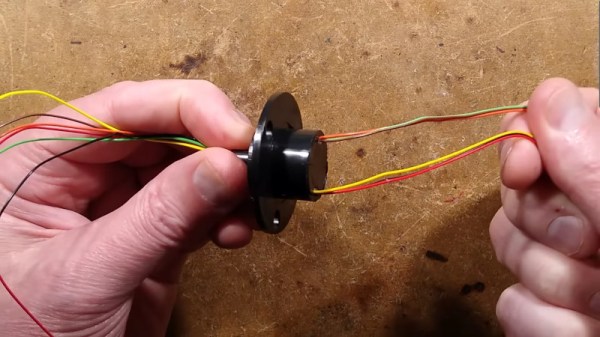
The trick behind this is simple. On a standard CRT, the deflection yoke uses magnetic coils to steer the electron beam in the X and Y axes, spraying electrons at the phosphors as needed. To rotate the display as a whole, you could do some complicated maths and change how you drive the coils and steer the electron beams… or you could just rotate the entire yoke instead. [Jeri] achieves this by putting the whole deflection yoke on a custom slip ring assembly. This allows it to receive power and signal as it rotates around the neck of the tube, driven by a stepper motor. Continue reading “Making A CRT Spin Right Round, Round, Round”