The Super Nintendo recently experienced a surge in popularity, either from a combination of nostalgic 30-somethings recreating their childhoods, or because Nintendo released a “classic” version of this nearly-perfect video game system. Or a combination of both. But what made the system worthy of being remembered at all? With only 16 bits and graphics that look ancient by modern standards, gameplay is similarly limited. This video from [Nerdwriter1] goes into depth on a single part of the console – the sound chips – and uses them to illustrate a small part of what makes this console still worth playing even now.
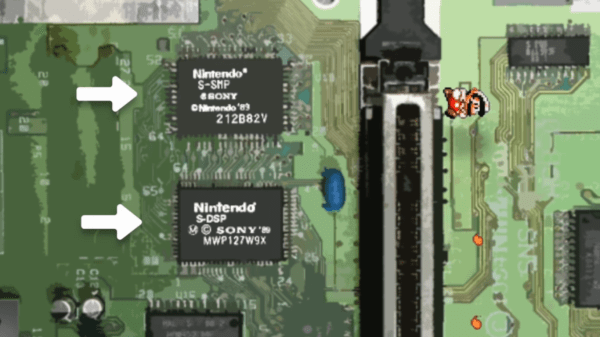
The SNES processed sound with two chips, a processing core and a DSP. They only had a capacity of 64 kb, meaning that all of a game’s sounds and music had to fit in this tiny space. This might seem impossible if you’ve ever played enduring classics like Donkey Kong Country, a game known for its impressive musical score. This is where the concept of creative limitation comes in. The theory says that creativity can flourish if given a set of boundaries. In this case it was a small amount of memory, and within that tiny space the composer at Rare who made this game a work of art was able to develop a musical masterpiece within strict limitations.
Even though this video only discusses the sound abilities of the SNES, which are still being put to good use, it’s a good illustration of what made this system so much fun. Even though it was limited, game developers (and composers) were able to work within its limitations to create some amazingly fun games that seem to have withstood the test of time fairly well. Not all of the games were winners, but the ones that were still get some playtime from us even now.
Continue reading “Creative Limitation And The Super Nintendo Sound Chips”