Pico Does PID

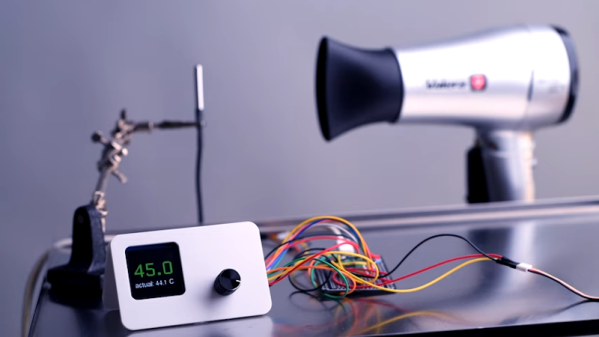
If you wanted to, say, control a temperature you might think you could just turn on a heater until you reach the desired temperature and then turn the heater off. That sort of works, but it is suboptimal — you’ll tend to overshoot the goal and then as the system cools down, you’ll have to catch up and the result is often a system that oscillates around the desired value but never really settles on the correct temperature. To solve that, you can use a PID — proportional integral derivative — loop and that’s what [veebch] has done with a Rasberry Pi PICO and Micropython.

The idea is to control an output signal based on the amount of difference between the actual temperature and the desired temperature (the proportional error). In addition, the amount is adjusted based on the long term error (integral) and any short term change (the derivative). You can also see a video about using the control loop to make a better sous vide burger, below. Continue reading “Pico Does PID”

When Engineering, Fine Art, And ASMR Collide

The success that [Julian Baumgartner] has found on YouTube is a perfect example of all that’s weird and wonderful about the platform. His videos, which show in utterly engrossing detail the painstaking work that goes into restoring and conserving pieces of fine art, have been boosted in popularity by YouTube’s Autonomous Sensory Meridian Response (ASMR) subculture thanks to his soft spoken narration. But his latest video came as something of a surprise to lovers of oil paintings and “tingles” alike, as it revealed that he’s also more than capable of scratch building his own equipment.

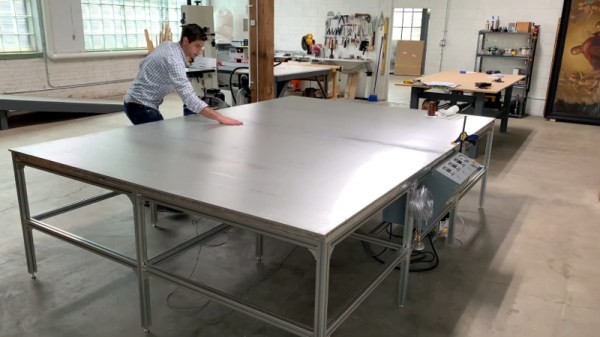
Anyone who’s been following his incredible restorations will be familiar with his heated suction table, which is used to treat various maladies a canvas may be suffering from. For example, by holding it at a sufficiently high temperature for days on end, moisture can be driven out as the piece is simultaneously smoothed and flattened by the force of the vacuum. But as [Julian] explains in the video after the break, the heated suction table he’s been using up to this point had been built years ago by his late father and was starting to show its age. After a recent failure had left him temporarily without this important tool, he decided to design and build his own fault-tolerant replacement.
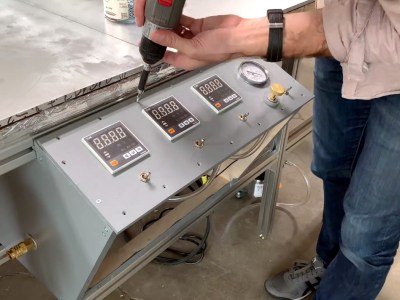
The table itself is built with a material well known to the readers of Hackaday: aluminum extrusion. As [Julian] constructs the twelve legged behemoth, he extols the many virtues of working with 4040 extrusion compared to something like wood. He then moves on to plotting out and creating the control panel for the table with the sort of zeal and attention to detail that you’d expect from a literal artist. With the skeleton of the panel complete, he then begins wiring everything up.

Underneath the table’s 10 foot long surface of 6061 aluminum are 6 silicone heat pads, each rated for 1,500 watts. These are arranged into three separate “zones” for redundancy, each powered by a Crydom CKRD2420 solid state relay connected to a Autonics TC4M-14R temperature controller. Each zone also gets its own thermocouple, which [Julian] carefully bonds to the aluminum bed with thermally conductive epoxy. Finally, a Gast 0523-V4-G588NDX vacuum pump is modified so it can be activated with the flick of a switch on the control panel.

What we like most about this project is that it’s more than just a piece of equipment that [Julian] will use in his videos. He’s also released the wiring diagram and Bill of Materials for the table on his website, which combined with the comprehensive build video, means this table can be replicated by other conservators. Whether it’s restoring the fine details on Matchbox cars or recreating woodworking tools from the 18th century, we’re always excited to see people put their heart into something they’re truly passionate about.

Continue reading “When Engineering, Fine Art, And ASMR Collide”

DIY Industrial Oven Brings The Heat

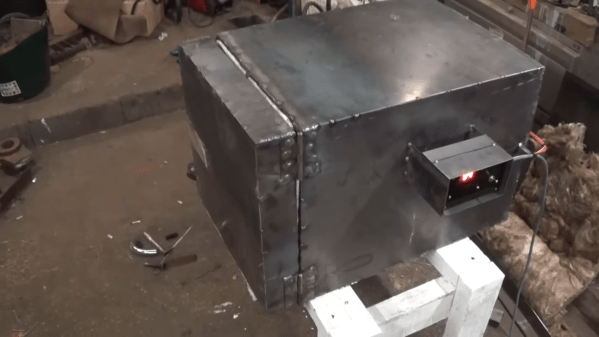
When [Turbo Conquering Mega Eagle] tried lost wax casting, he ended up with a fireball and a galvanizing sense of disappointment. There wasn’t enough heat to get all the wax out, and the paraffin ignited. Though a bit burned by the experience, it didn’t extinguish his desire to do lost wax casting. In a textbook case of project-spawns-project, this eagle decided to wing it and made his own high-temperature oven.

This is true, seat-of-your-pants DIY. For this project, [TCME] treated himself to a virgin sheet of mild steel, a metallic delicacy for a guy who seems used to using whatever is available. The oven consists of a welded-together box inside a larger box, with insulation between the two. The door is a shallower box filled with insulation, with hinges on the right and a sturdy-looking gravity catch on the left. [TCME] welded together a nice little box for the 12-volt, 1000 °C temp controller module, and tacked some tabs to the outside to help wrangle the wires. Lower your visor and click past the break to watch this hot box come together.

We hope [TCME] answers the burning questions of how well the thing loses wax, and how fast it bakes a pizza. Meantime, here’s a clay oven that’s built to pizza.

Continue reading “DIY Industrial Oven Brings The Heat”

Review: CXG E90W Temperature-Controlled Soldering Iron

It’s an entertaining pastime when browsing the array of wonders available from the other side of the world at the click of the mouse, to scour the listings of the unusual, the interesting, or the inexpensive. Sometimes when you find something unexpected you are rewarded with a diamond in the rough, while at other moments your bargain basement purchase is revealed as a hilariously useless paperweight. This is a game in which the stake is relatively low and the reward can be significant, so rarely does an order for some parts or sundries go by without a speculative purchase.

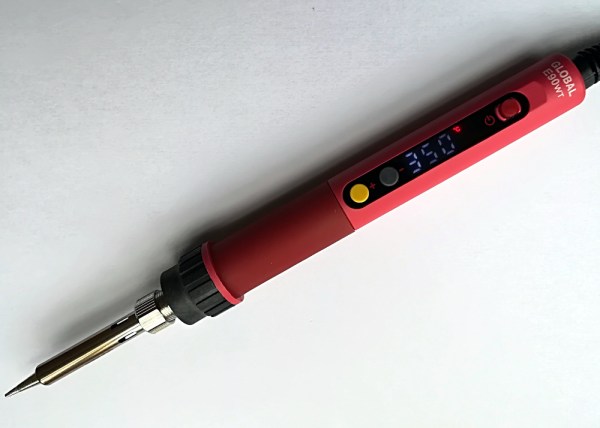
The latest to arrive is a soldering iron. The CXG E90W is a 90W mains-powered temperature controlled iron with its control electronics built into its handle. Such irons are by no means unusual, what makes this one different is that it has a low price tag.

The Miniware TS100, an iron I quite like and the current darling of the pack, is priced at nearly £50 ($71). Just how can this iron priced at just under £15 ($21) be any good? I placed one on the order, and waited for delivery.

Continue reading “Review: CXG E90W Temperature-Controlled Soldering Iron”

See A Cheap Smoker Get An Automation Power Up

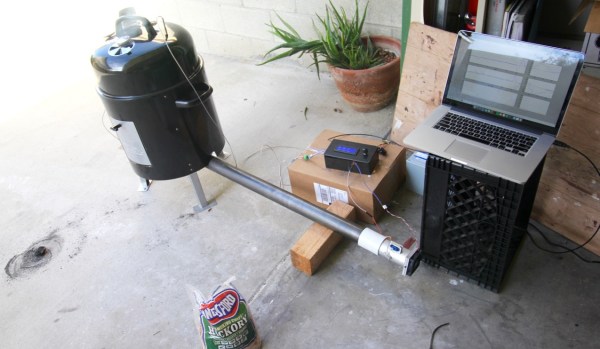
[Jason] learned a lot by successfully automating this meat smoker. This is just the first step in [Jason’s] smoker project. He decided to begin by hacking a cheaper charcoal-fed unit first, before setting his sights on building his own automatic pellet-fed smoker. With a charcoal smoker it’s all about managing the airflow to that hot bed of coals.

automated-meat-smoker-air-valve
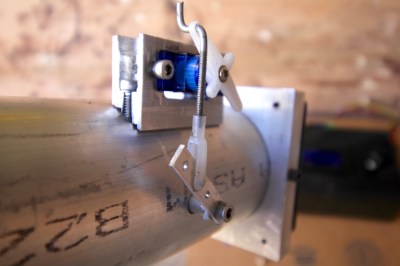
Custom mount for servo was actually one of the more challenging things to get just right.

[Jason] started by making sure the bottom was sealed off from stray airflow, then he cut a hole into the charcoal pan and attached a length of steel pipe. The opposite end of the pipe has a fan. Inside the pipe there is a baffle separating the fan from the charcoal pan. The servo motor shown here controls that valve.

The pipe is how air is introduced into the smoker, with the fan and valve to control the flow rate. The more air, the higher the temperature. The hunk of pipe was left uncut and works fine but is much longer than needed; [Jason says] the pipe is perfectly cool to the touch only a foot and a half away from the smoker.

With the actuators in place he needed a feedback loop. A thermocouple installed into the lid of the smoker is monitored by an Arduino running a PID control loop. This predicts the temperature change and adjusts the baffle and fan to avoid overshooting the target temp. The last piece of hardware is a temperature probe inside the meat itself. With the regulation of the smoker’s temperature taken care of and the meat’s internal temperature being monitored, the learning (and cooking) process is well underway.

There are many, many smoker automation projects out there. Some smokers are home-made electric ones using flower pots, and some focus more on modifying off the shelf units. In a way, every PID controlled smoker is the same, yet they end up with different problems to solve during their creation. There is no better way to learn PID than putting it into practice, and this way to you get a tasty treat for your efforts.

A Tale Of Three Soldering Iron Controllers

[ZL2PD] needed to replace an old Weller soldering station and decided not to go with one of the cheap soldering stations you can find all over the Internet. He has a long story about why he had to design his own controller, but you never have to explain that to us. He kept detailed notes of his journey and in the end, he built three different controllers before settling on one.

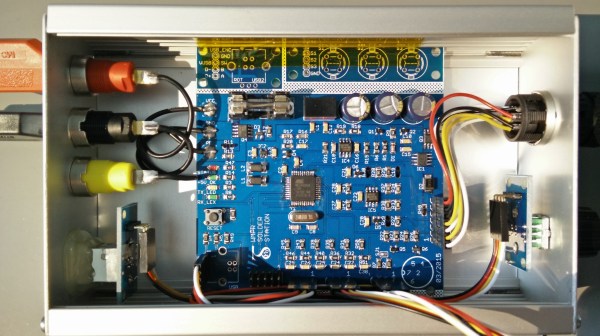
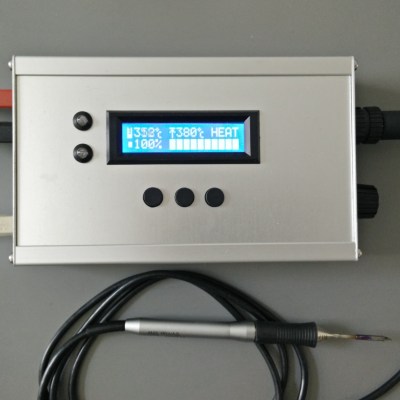
He started with a Hakko hand piece that uses a thermistor for temperature measurements. The first iteration of the controller had analog controls. He wasn’t happy with the number of parts in the design and the simple LED display. That led him to replace the controller with an ATTiny CPU and a use a serial LCD.

Continue reading “A Tale Of Three Soldering Iron Controllers”

Hacking Amazing Soldering Features Into The Already Great Weller WMRP

Weller, the German soldering tools manufacturer, has a nice range of micro soldering irons (pencils) designated as the WMRP series. These are 12V, 40 W or 55W units with a 3 second heat up time, and allow quick tip exchange without needing any tools. [FlyGlas] built a neat soldering station / controller for the WMRP series based around an ATMega microcontroller running Arduino.

It’s packed with most of the features you see in a professional rig.

  • low offset op amp for soldering tip temperature measurement with type c thermocouple
  • cold junction compensation using the PTC (KTY82-210) included in the WMRP soldering pencil
  • input voltage measurement
  • soldering pencil current measurement
  • recognizing if the soldering pencil rests in the stand (–> standby)
  • 3 buttons to save and recall temperature values
  • rotary encoder to set soldering temperature
  • illuminated 16×2 character LCD module
  • USB for debugging and firmware update
  • 4mm safety socket for +12V power input and a protective earth socket for connection to ESD protection

WMRP_controller_02A PWM signal from the microcontroller controls the load current using a MOSFET. Load current is measured using a Hall Effect-Based Linear Current Sensor – ACS712. The corresponding linear output voltage is buffered and slightly amplified using AD8552 zero drift, single supply, RRIO Dual Op Amp before being sent to the microcontroller ADC input. To ensure ADC measurements are accurate and stable, a low noise precision voltage reference – ADR392 is used. Another precision resistive voltage divider allows input voltage measurement. The supply input has over-current and reverse voltage protection. A set of buttons and a rotary encoder are connected to the microcontroller to allow settings and adjustments. An analog section measures the thermocouple voltage from the soldering pencil as well as the stand-by switch status. The handle has an embedded reed switch that is activated by a magnet in the support stand which puts it into stand-by mode. Another analog section performs cold junction compensation using the PTC sensor within the soldering pencil.

The Git repo contains the initial Arduino code which is still a work in progress. While the hardware source files are not available, the repo does have the pdf’s, gerbers and BOM list, if you want to take a shot at building it. Check a demo video after the break. Thanks [Martin] for sending in the tip.

Continue reading “Hacking Amazing Soldering Features Into The Already Great Weller WMRP”