The No-Parts Temperature Sensor In Your Arduino

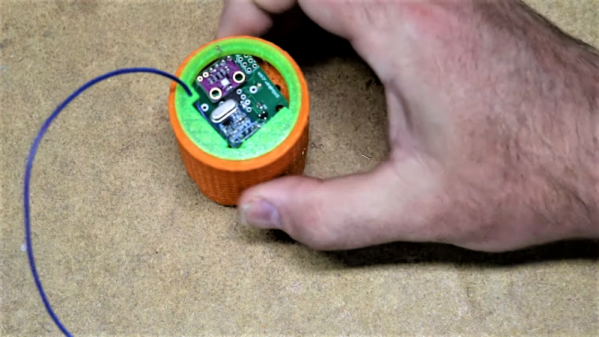
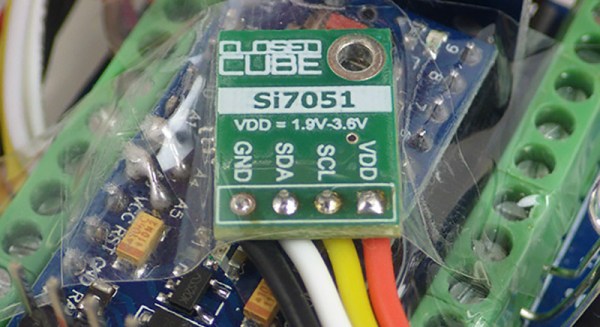
[Edward], creator of the Cave Pearl project, an underwater data logger, needed a way to measure temperature with a microcontroller. Normally, this problem is most easily solved by throwing a temperature sensor on the I2C bus — these sensors are cheap and readily available. This isn’t about connecting a temperature sensor in your Arduino. This build is about using the temperature sensor in your clock.

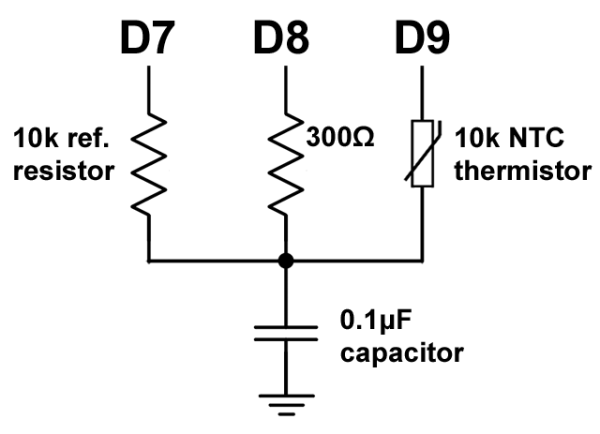
The ATMega328p, the chip at the heart of all your Arduino Uno clones, has within it a watchdog timer that clicks over at a rate of 110 kHz. This watchdog timer is somewhat sensitive to temperature, and by measuring this temperature sensor you can get some idea of the temperature of the epoxy blob that is a modern microcontroller. The trick is calibrating the watchdog timer, which was done with a homemade ‘calibration box’ in a freezer consisting of two very heavy ceramic pots with a bag of rice between them to add thermal mass (you can’t do this with water because you’re putting it in a freezer and antique crocks are somewhat valuable).

By repeatedly taking the microcontroller through a couple of freeze-thaw cycles, [Edward] was able to calibrate this watchdog timer to a resolution of about 0.0025°C, which is more than enough for just about any sensor application. Discussions of accuracy and precision notwithstanding, it’s pretty good.

This technique measures the temperature of the microcontroller with an accuracy of 0.005°C or better, and it’s using it with just the interrupt timer. That’s not to say this is the only way to measure the temperature of an ATMega; some of these chips have temperature sensors built right into them, and we’ve seen projects that use this before. However, this documented feature that’s clearly in the datasheet seems not to be used by many people.

Thanks [jan] for sending this in.

Solar-Powered IoT Sensor Saves Wine Batch From Overheating

Making wine isn’t just about following a recipe, it’s a chemical process that needs to be monitored and managed for best results. The larger the batch, the more painful it is to have something go wrong. This means that the stakes are high for small vineyards such as the family one [Mare] works with, which have insufficient resources to afford high-end equipment yet have the same needs as larger winemakers. The most useful thing to monitor is the temperature profile of the fermentation process, and [Mare] created an exceptional IoT system to do that using LoRa wireless and solar power.

It’s not enough just to measure temperature of the fermenting liquid; viewing how the temperature changes over time is critical to understanding the process and spotting any trouble. [Mare] originally used a Raspberry Pi, I2C temperature sensor, and a Wi-Fi connection to a database to do the monitoring. This was a success, but it was also overkill. To improve the system, the Raspberry Pi was replaced with a LoRaDunchy board, an STM-based module of [Mare]’s own design which is pin-compatible with the Arduino Nano. It includes a battery charger, power management, and LoRa wireless communication. Adding a solar cell and lithium-polymer battery was all it took to figuratively cut the power cord.

Sensing the temperature of fermentation is done by sealing the temperature sensor into a thin aluminum tube, and lowering that into the vat. There it remains, with the LoRaDunchy board periodically waking up to read the sensor and report the tempurature over LoRa before going back to sleep, all the while sipping power from the battery which in turn gets recharged with solar power.

It’s an elegant system that has already paid off. A 500 litre vat of wine generated an alarm when the temperature rose above 24 Celsius for 10 minutes. An email alert allowed the owner to begin mixing the solution and add ice water to put the brakes on the runaway reaction. The temperature dropped and slow fermentation resumed, thanks to the twin powers of gathering the right data, then doing something meaningful with it.

Vineyards and LoRa have joined forces before, for example in the Vinduino project which aims to enable water-smart farming. If you’re unfamiliar with LoRa in general, the LoRa on the ESP32 project page contains a good primer, and if the antenna on the module shown here looks familiar to you it’s because we recently featured [Mare]’s guide on making DIY LoRa antennas from salvaged wire.

Low-Quality Capacitors Turned Into High-Quality Temperature Sensors

When life hands you a bunch of crummy capacitors, what do you do? Make a whole bunch of temperature sensors, apparently.

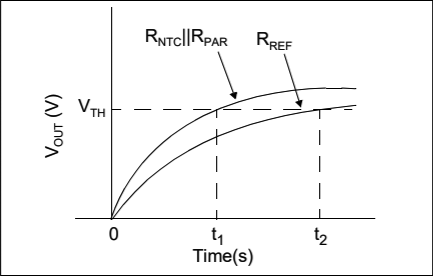
The less-than-stellar caps in question came to [pyromaniac303] by way of one of those all-in-one assortment kits we so love to buy. Stocked with capacitors of many values, kits like these are great to have around, especially when they’ve got high-quality components in them. But not all ceramic caps are created equal, and [pyromaniac303] was determined not to let the lesser-quality units go to waste. A quick look at the data sheets revealed that the caps with the Y5V dielectric had a suitably egregious temperature coefficient to serve as a useful sensor. A fleck of perf-board holds a cap and a series resistor; the capacitor is charged by an Arduino output pin through the resistor, and the time it takes for the input pin connected to the other side of the cap to go high is measured. Charge time is proportional to temperature, and a few calibration runs showed that the response is pretty linear. Unfortunately the temperature coefficient peaks at 10°C and drops sharply below that point, making the sensor useful only on one side of the peak. Still, it’s an interesting way to put otherwise unloved parts to use, and a handy tip to keep in mind.

Temperature sensing isn’t the only trick capacitors can do. We’ve seen them turned into touch sensors before, and used to turn a 3D-printer into a 3D-scanner.

Laser Draws Weather Report

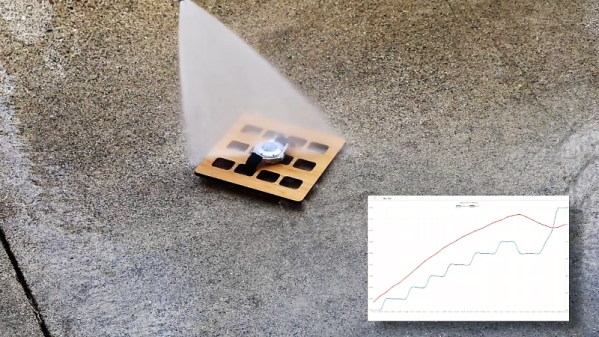
Have you ever wished that a laser could tell you the weather? If you have, then [tuckershannon] has you covered. He’s created a machine that uses a laser and some UV sensitive paper to draw the temperature and a weather icon! And that’s not all! It’s connected to the internet, so it can also show the time and print out messages.

Building on [tuckershannon]’s previous work with glow-in-the-dark drawing, the brains inside this machine is a Raspberry Pi Zero. The laser itself is a 5mw, 405nm laser pointer with the button zip-tied down. Two 28BYJ-48 stepper motors are used to orient the laser, one for the rotation and another for the height angle. Each stepper motor is connected to a motor driver board and then wired directly to the Pi.

The base and arm that holds the laser were designed in SolidWorks and then 3d printed. The stepper motors are mounted perpendicular to one another and then the laser pointer mounted at the end. The batteries have been removed from the laser and the terminals are also wired directly to the raspberry pi. The Pi is then connected to Alexa via IFTTT so that it can be controlled by voice from anywhere.

The real beauty of [tucker]’s laser drawing machine is that is will draw out the temperature and weather icon, as well as drawing the time in either digital or analog forms! We’ve seen [tuckershannon]’s work before. The precursors to this project were his clock which uses a robotic arm with a UV LED on it to draw the time and another clock which uses similar robotic arm only with a laser attached. Let’s hope we get to see the rest of [tucker]’s progress!

Continue reading “Laser Draws Weather Report”

A Tinfoil-Free Internet Of Ceiling Fans

Putting everything on the Internet is getting easier and easier, what with the profusion of Internet-ready appliances as well as cheap and plentiful IoT modules to integrate legacy devices. Think IoT light bulbs, refrigerators and dishwashers that can be controlled from a smartphone, and the ubiquitous Sonoff modules. But once these things are on the net, what are they talking about? Are they saying things behind your back? Are they shipping data about your fridge contents off to some foreign land, to be monetized against your will?

Maybe, maybe not, but short of a tinfoil helmet the only way to protect yourself is to build your own system. This IoT control for ceiling fans is a good example, with the added benefit that most wireless ceiling fan remotes are kind of lousy. [microentropie] didn’t like the idea of going the Sonoff route, so his custom controller is based on that IoT workhorse, the ESP8266. There are two versions, one switching the light and fan loads with relays, and one with triacs. The ESP serves up its own web page for control rather than using a cloud service, and is capable of setting up the fan to turn on and off automatically at preset times or temperatures. Everything sits in an unobtrusive box on the ceiling near the fan, but we bet this could be miniaturized enough to fit right inside the fan housing.

If some of [microentropie]’s code looks familiar, it might be because he borrowed it from his IoT rice cooker project.

Speaking The Same Language As A Wireless Thermometer

Temperature is a delicate thing. Our bodies have acclimated to a tight comfort band, so it is no wonder that we want to measure and control it accurately. Plus, heating and cooling are expensive. Measuring a single point in a dwelling may not be enough, especially if there are multiple controlled environments like a terrarium, pet enclosure, food storage, or just the garage in case the car needs to warm up. [Tim Leland] wanted to monitor commercially available sensors in several rooms of his house to track and send alerts.

The sensors of choice in this project are weather resistant and linked in his project page. Instead of connecting them to a black box, they are linked to a Raspberry Pi so your elaborate home automation schemes can commence. [Tim] learned how to speak the thermometer’s language from [Ray] who posted about it a few years ago.

The system worked well, but range from the receiver was only 10 feet. Thanks to some suggestions from his comments section, [Tim] switched the original 433MHz receiver for a superheterodyne version. Now the sensors can be a hundred feet from the hub. The upgraded receiver is also linked on his page.

We’ve delved into thermocouple reading recently, and we’ve featured [Tim Leland] and his 433MHz radios before.

DIY Cryogel Sustains Live Cells

We like to think our readers are on the cutting edge. With the advent of CRISPR kits at home and DIY bio blooming in workshops across the world, we wanted to share a video which may be ahead of its time. [The Thought Emporium] has just shown us a way to store eukaryotic cells at room temperature. His technique is based on a paper published in Nature which he links to from the YouTube page, but you can see his video after the break.

Eukaryotic cells, the kind we are made of, have been transported at low temperatures with techniques like active refrigeration, liquid nitrogen, and dry ice but those come with a host of problems like cost, convenience, and portability. Storing the cells with cryogel has been shown to reliably keep the cells stable for up to a week at a time and [The Thought Emporium] made some in his homemade freeze-dryer which he’s shown us before. The result looks like a potato chip, but is probably less nutrious than astronaut ice cream.

If cell transport doesn’t tickle your fancy, cryogel is fascinating by itself as a durable, lightweight insulator similar to Aerogel. You can make Aerogel at home too.
Continue reading “DIY Cryogel Sustains Live Cells”