LayerLapse Simplifies 3D Printer Time-lapse Shots

We know you’ve seen them: the time-lapses that show a 3D print coming together layer-by-layer without the extruder taking up half the frame. It takes a little extra work compared to just pointing a camera at the build plate, but it’s worth it to see your prints materialize like magic.

Usually these are done with a plugin for OctoPrint, but with all due respect to that phenomenal project, it’s a lot to get set up if you just want to take some pretty pictures. Which is why [Whopper Printing] put together the LayerLapse. This small PCB is designed to trigger your DSLR or mirrorless camera once its remotely-mounted hall effect sensor detects the presence of a magnet.
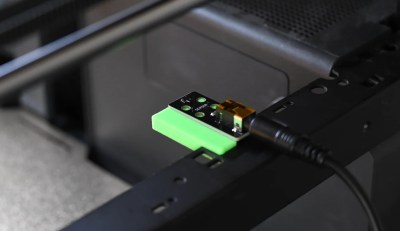
The remote hall effect sensor.

The idea is that you just need to stick a small magnet to your extruder, add a bit of extra G-code that will park it over the sensor at the end of each layer, and you’re good to go. There’s even a spare GPIO pin broken out should you want to trigger something else on each layer of your print. Admittedly we can’t think of anything else right now that would make sense, other than some other type of camera, but we’re sure some creative folks out there could put this feature to use.

Currently, [Whopper Printing] is selling the LayerLapse as a finished product, though it does sound like a kit version is in the works. There’s also instructions for building a DIY version of the hardware using your microcontroller of choice. Whether you buy or build the hardware, the firmware is available under the MIT license for your tinkering pleasure.

Being hardware hackers, we appreciate the stand-alone nature of this solution. But if you’re already controlling your printer through OctoPrint, you’re probably better off just setting up one of the available time-lapse plugins.

Simple Hack Lets Smartphone Take Resin Printer Time-Lapses

With how cheap they’re getting, everyone seems to be jumping on the resin printer bandwagon. They may not be able to fully replace your trusty old FDM printer, but for certain jobs, they just can’t be beaten. Sadly though, creating those smooth time-lapse videos of your prints isn’t quite as easy to do as it is on their filament-based counterparts.

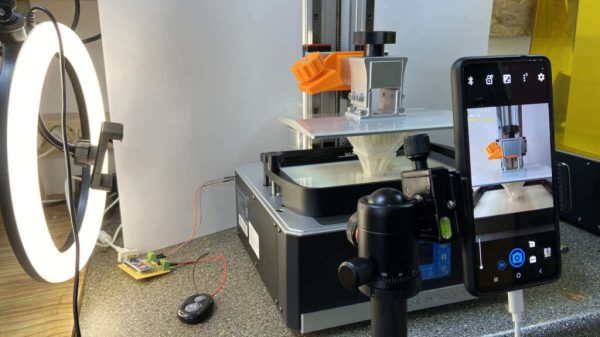
Not as easy, perhaps, but not impossible. [Fraens] found a way to make time-lapses on any resin printer, and in a wonderfully hacky way. First, you need to find a smartphone, which shouldn’t be too hard, given how often we all tend to upgrade. [Fraens] recommends replacing the standard camera app on the phone with Open Camera, to prevent it from closing during the long intervals with nothing happening. The camera is triggered by any readily available Bluetooth dongle, which is connected via a simple transistor circuit to an Arduino output. To trigger the shutter, a light-dependent resistor (LDR) is connected to one of the microcontroller’s inputs. The LDR is placed inside the bed of the resin printer — an Anycubic Photon in this case — where light from the UV panel used to cross-link the resin can fall on it. A simple bit of Arduino code triggers the Bluetooth dongle at the right moment, capturing a series of stills which are later stitched together using DaVinci Resolve.

The short video below shows the results, which look pretty good to us. There are other ways to do this, of course, but we find the simplicity of this method pleasing.

Continue reading “Simple Hack Lets Smartphone Take Resin Printer Time-Lapses”

Motorized Camera Slider Rides On Carbon

While not every camera mount needs to have six degrees of freedom, one or two can be extremely helpful in the photographic world. In order to make time-lapse shots with some motion or shots that incorporate some parallax, a moving camera mount or dolly is needed, and this small one builds upon a pre-existing, although non-motorized, camera slider.

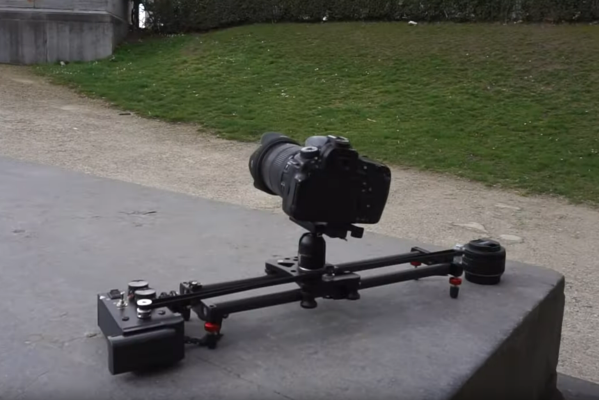
The slider is an inexpensive model from everyone’s favorite online warehouse, with rails that are at least coated in carbon, if not made out of it entirely, to ensure smooth camera motion. To add the motorization to automatically move the camera, a stepper motor with a belt drive is used which is controlled by an Arduino. A few limit switches are added, letting the dolly perform different movement patterns automatically, and a pair of potentiometers for fine and coarse speed control are included as well, letting the camera take both time-lapse and video while using this mount at various controllable speeds.

With everything tucked into a relatively small box at one end of the dolly, the build is both accessible and functional. The code for the microcontroller is also available on the project’s GitHub page for anyone looking to replicate or build upon the project. And, for those looking to add more degrees of freedom to their camera setups, take a look at this DIY pan and tilt mount.

Continue reading “Motorized Camera Slider Rides On Carbon”

SLA printer rigged for time lapse

Silky Smooth Resin Printer Timelapses Thanks To Machine Vision

The fascination of watching a 3D printer go through its paces does tend to wear off after you spent a few hours doing it, in which case those cool time-lapse videos come in handy. Trouble is they tend to look choppy and unpleasant unless the exposures are synchronized to the motion of the gantry. That’s easy enough to do on FDM printers, but resin printers are another thing altogether.

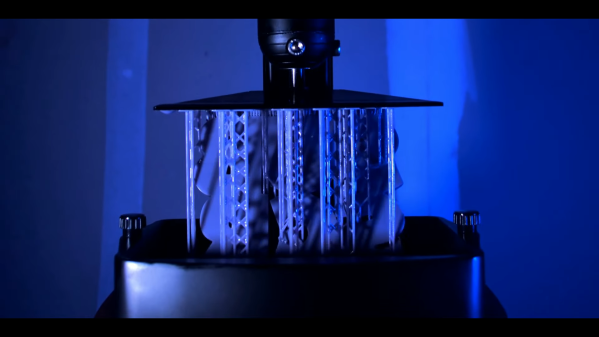
Or are they? [Alex] found a way to make gorgeous time-lapse videos of resin printers that have to be seen to be believed. The advantage of his method is that it’ll work with any camera and requires no hardware other than a little LED throwie attached to the build platform of the printer. The LED acts as a fiducial that OpenCV can easily find in each frame, one that indicates the Z-axis position of the stage when the photo was taken. A Python program then sorts the frames, so it looks like the resin print is being pulled out of the vat in one smooth pull.

To smooth things out further, [Alex] also used frame interpolation to fill in the gaps where the build platform appears to jump between frames using real-time intermediate flow estimation, or RIFE. The details of that technique alone were worth the price of admission, and the results are spectacular. Alex kindly provides his code if you want to give this a whack; it’s almost worth buying a resin printer just to try.

Is there a resin printer in your future? If so, you might want to look over [Donald Papp]’s guide to the pros and cons of SLA compared to FDM printers.

Continue reading “Silky Smooth Resin Printer Timelapses Thanks To Machine Vision”

Pi Cam Replaces Pinhole And Film For Digital Solargraphy

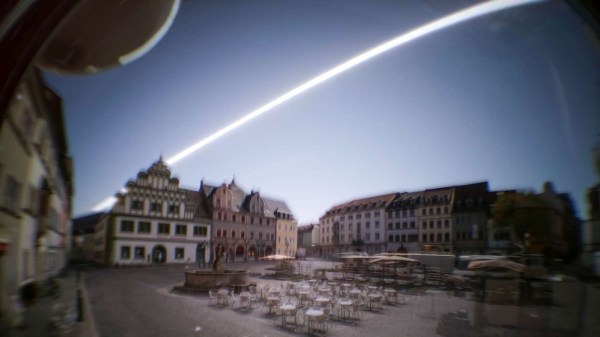
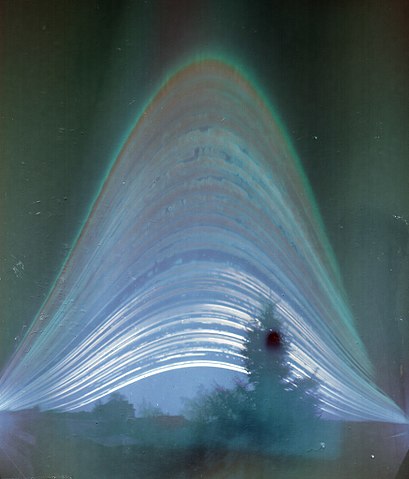
Solargraph from a one-year exposure on film. Elekes Andor / CC BY-SA

Have you ever heard of solargraphy? The name tells you much of what you need to know, but the images created with a homemade pinhole camera and a piece of photographic film can be visually arresting, showing as they do the cumulative tracks of the sun’s daily journey across the sky over many months. But what if you don’t want to use film? Is solargraphy out of reach to the digital photographers of the world?

Not at all, thanks to this digital solargraphy setup. [volzo] searched for a way to make a digital camera perform like a film-based solargraphic camera, first thinking to take a series of images during the day and average them together. He found that this just averaged out the sun from the final image. His solution was to take a pair of photos at each timepoint — one correctly exposed to capture the scene, and one stopped way down to just capture the position of the sun as a pinprick of light. All the foreground images are averaged, while the stopped-down sun images are overlaid upon each other, producing the track of the sun across the sky. Add the two resulting images and you’ve got a solargraph.

To automate the process, [volzo] used a Raspberry Pi and a Pi-Cam fitted in a weatherproof 3D-printed box. A custom hat powers up the Pi every few minutes, which boots up and takes the two pictures. Sadly, the batteries only last for a couple of days, so those long six-month exposures aren’t possible yet. But [volzo] has made all the sources available, so feel free to build on his work. If you prefer to use a DSLR for the job, this Bluetooth intervalometer might help.

Hackaday Podcast 052: Shorting Components, Printing Typewriter Balls, Taking Minimal Time Lapse, And Building A Makerspace Movie Prop

Hackaday editors Elliot Williams and Mike Szczys recap a great week in hardware hacking. There’s perfection in the air as clever 3D-printing turns a button and LED matrix into an aesthetically awesome home automation display. Take a crash course in RF modulation types to use on your next project. Did you know the DB-9 connector is actually a DE-9? Building your own underwater ROV tether isn’t as simple as it sounds. And Elliot found a treasure trove of zero-ohm jumpers in chip packages — what the heck are these things for?

Take a look at the links below if you want to follow along, and as always tell us what you think about this episode in the comments!

Take a look at the links below if you want to follow along, and as always, tell us what you think about this episode in the comments!

Direct download (60 MB or so.)

Continue reading “Hackaday Podcast 052: Shorting Components, Printing Typewriter Balls, Taking Minimal Time Lapse, And Building A Makerspace Movie Prop”

ESP32-Cam Does Time Lapse

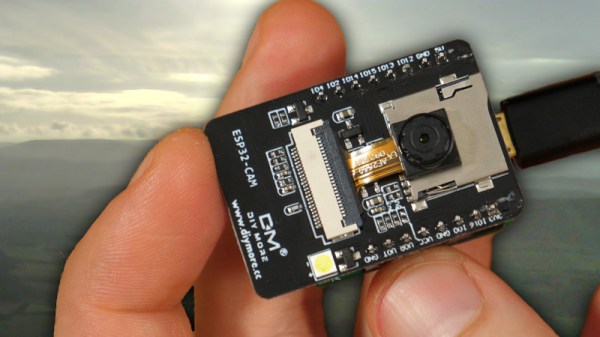
Just a few years ago, had someone asked you how much a digital camera with WiFi would cost, you probably wouldn’t have said $6. But that’s about how much [Bitluni] paid for an ESP32-CAM. He wanted to try making the little camera do time lapse, and it turns out that’s pretty easy to do.

Of course, the devil is in the details. The camera starts out needing configuration on the USB interface and that enables the set up of Arduino integration and WiFi configuration. Because it stores each frame of the image on an SD card, the board can’t take rapid-fire pictures. [Bitluni] reports a 3-second delay was about the shortest he could manage, but for most purposes, he was using at least ten seconds.

The program has a live preview window to help you set up the shot, but before your recordings start that should be turned off so as not to overload the little processor and the I/O buses. The result is a bunch of JPG images that you can easily convert to a video on a PC if you wish.

This might be a good way to fit a camera on a 3D printer, especially if the time lapse effect was desired. Otherwise, you might sync to a layer change. Now all [bitluni] needs is an orbital rig.

Continue reading “ESP32-Cam Does Time Lapse”