Opening The Door To Functional Prints

If you are going to do something as a joke, there is nothing to say that you can’t do a nice job of it. If you’re like [Michael], a whimsical statement like “Wouldn’t it be funny to put Gründerzeit-style doors on the server cabinet?” might lead down a slippery slope. True to his word, [Michael] not only installed the promised doors, but he did a darn nice job of it.

Buying new doors was the easy part because the door frame and hinges were not standardized back then, so there was nothing on the server cabinet to his mount doors. He walks us through all the steps but the most interesting point was the 3D printed door hinges which [Michael] modeled himself and printed in steel. His new hinges feature his personal flair, with some Voronoi patterning while matching the shape of the originals. We love seeing 3D printed parts used as functional hardware, and hinges are certainly a piece of hardware meant to hold up under pressure.

This is not the first 3D printed door hardware we’ve seen. Check out this innovative latch printed as a single piece and here’s the skinny on making flexible objects yourself.

Continue reading “Opening The Door To Functional Prints”

Upgrading RAM On A Nexus 5X

A screenshot of the status screen indicating the phone has detected the extended RAM.

A denizen of the venerable XDA forums reports that it is possible to upgrade the RAM of the Nexus 5X from 2GB to 4GB.  Having suffered the dreaded bootloop, [Cathair2906] decided to send their phone off to China for repair. The technician advised that since reflow of the CPU was necessary anyway, it makes sense to upgrade the RAM as well. This is due to the RAM actually being fitted directly on top of the CPU, a method amusingly known as Package on Package (SFW).

Upgrading RAM in the average computer is a relatively trivial task. Pop the case open, and you slide the new sticks into the extra slots. It’s not the same case for smartphones and tablets — in the endless quest for the slimmest form factor, all parts are permanently soldered. In addition, every device is essentially bespoke hardware; there’s no single overarching hardware standard for RAM in portable devices. You could find yourself searching high and low for the right chips, and if you do track them down, the minimum order quantity may very well be in the thousands.

Unless, of course, you had access to the Shenzhen markets where it’s possible to buy sample quantities of almost anything. Given access to the right parts, and the ability to solder BGA packages, it’s a simple enough job to swap a bigger RAM chip on top of the CPU during the repair.

It’s the sort of thing that’s trivial in Shenzhen, and almost mind-bogglingly impossible in the West. The price of the repair? About $60 USD. [Cathair2906] was even nice enough to share the address of the shop that did the work.

We’ve seen similar antics before – like this Nexus 5 storage upgrade to 64GB.

[via XDA Developers, thanks to Jack for the tip!]

Prusa Shows Us The New I3 MK2 3D Printer And Where The Community Is Headed

Josef Prusa’s designs have always been trustworthy. He has a talent for scouring the body of work out there in the RepRap community, finding the most valuable innovations, and then blending them together along with some innovations of his own into something greater than the sum of its parts. So, it’s not hard to say, that once a feature shows up in one of his printers, it is the direction that printers are going. With the latest version of the often imitated Prusa i3 design, we can see what’s next.

Continue reading “Prusa Shows Us The New I3 MK2 3D Printer And Where The Community Is Headed”

Philips Lamp Upgrade

Increasing The Brightness Of A Philips LivingColors Lamp

[Martin] recently purchased a Philips LivingColors lamp. It’s a commercial product that basically acts as mood lighting with the ability to change to many different colors. [Martin] was disappointed with the brightness of his off-the-shelf lamp. Rather than spend a few hundred dollars to purchase more lamps, he decided to modify the one he already had.

[Martin] started by removing the front cover of his lamp. He found that there were four bright LEDs inside. Two red, one green, and one blue. [Martin] soldered one wire to the driver of each LED. These wires then connected to four different N-channel MOSFET transistors on a piece of protoboard.

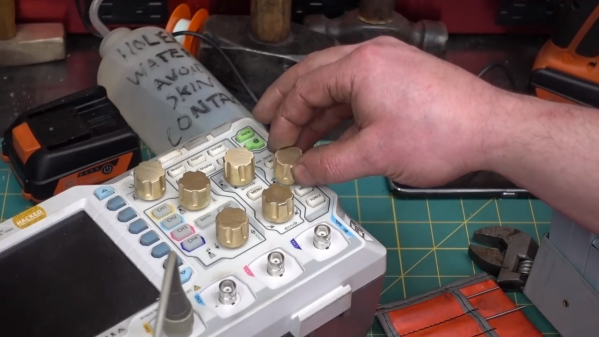
After hooking up his RIGOL oscilloscope, [Martin] was able to see that each LED was driven with a pulse width modulated signal. All he had to do was connect a simple non-addressable RGB LED strip and a power source to his new driver board. Now the lamp can control the LED strip along with the internal LEDs. This greatly extends the brightness of the lamp with minimal modifications to the commercial product. Be sure to check out the video below for a complete walk through. Continue reading “Increasing The Brightness Of A Philips LivingColors Lamp”

Meter Backlight

Adding A Backlight To A Cheap Multimeter

We don’t all need super high quality electronic testing gear. Sometimes second-hand or inexpensive equipment is accurate enough to get the job done. Though it can be a bit annoying to miss out on some of those “luxury” features. [Ekriirke] had this problem with his cheap multimeter. He wished the LCD screen had a backlight for easier visibility, so rather than upgrade to a more expensive unit he just added one himself.

After opening up the multimeter [Ekriirke] found that it ran on a single 12V battery. He realized that the simplest thing to do would be to wire up four white LEDs in series. The four LEDs were arranged within the case off to each side of the LCD, one in each corner. The leads were bent at 90 degree angles and soldered together “dead bug” style. Thin strips of copper foil tape were attached to the PCB in such a way that the anode and cathode from the LEDs would make contact when the case was closed back up.

The tape wraps around to the other side of the PCB where there was more room for the next piece of the circuit. A capacitor, resistor, and transistor are used in conjunction with a momentary switch. This circuit allows [Ekriirke] to turn on the light for about ten seconds by pressing the button one time. The circuit also runs through the meter’s dial switch, preventing the LEDs from being turned on while the meter itself is turned off.

[via Reddit]

Beach Sign

LED Sign Brightens Up The Beach After Dark

[Warrior_Rocker’s] family bought a fancy new sign for their beach house. The sign has the word “BEACH” spelled vertically. It originally came with blue LEDs to light up each letter. The problem was that the LEDs had a narrow beam that would blind people on the other side of the room. Also, there was no way to change the color of the LEDs, which would increase the fun factor. That’s why [Warrior] decided to upgrade the sign with multi-colored LEDs.

After removing the cardboard backing of the sign, [Warrior] removed the original LEDs by gently tapping on a stick with a hammer. He decided to use WS2811 LED pixels to replace the original LEDs. These pixel modules support multiple colors and are individually addressable. This would allow for a wide variety of colors and animations. The pixels came covered in a weatherproof resin material. [Warrior] baked the resin with a heat gun until it became brittle. He was then able to remove it entirely using some pliers and a utility knife. Finally, the pixels were held in place with some hot glue.

Rather then build a remote control from scratch, [Warrior] found a compatible RF remote under ten dollars. The LED controller was removed from its housing and soldered to the string of LEDs. It was then hot glued to a piece of cardboard and placed into the sign’s original battery compartment. Check out the video below for a demonstration. Continue reading “LED Sign Brightens Up The Beach After Dark”

Upgrading A Microsoft Surface To A 1 TB SSD

The Microsoft Surface Pro 3 is a neat little tablet, and with an i7 processor, a decent-resolution display, and running a full Windows 8.1 Pro, it’s the closest you’re going to get to a desktop in tablet format. Upgrading the Surface Pro 3, on the other hand, is nigh impossible. iFixit destroyed the display in their teardown, as did CNET. [Jorge] wanted to upgrade his Surface Pro 3 with a 1 TB SSD, and where there’s a will there’s a way. In this case, a very precise application of advanced Dremel technology.

Taking a Surface Pro 3 apart the traditional way with heat guns, spudgers, and a vast array of screwdrivers obviously wasn’t going to work. Instead, [Jorge] thought laterally; the mSSD is tucked away behind some plastic that is normally hidden by the small kickstand integrated into the Surface. If [Jorge] could cut a hole in the case to reveal the mSSD, the resulting patch hole would be completely invisible most of the time. And so enters the Dremel.

By taking some teardown pictures of the Surface Pro 3, printing them out to scale, and aligning them to the device he had in his hand, [Jorge] had a very, very good idea of where to make the incision. A Dremel with a carbide bit was brought out to cut into the metal, and after a few nerve-wracking minutes the SSD was exposed.

The only remaining task was to clone the old drive onto the new one, stuff it back in the Surface, and patch everything up. [Jorge] is using some cardboard and foam, but a sticker would do just as well. Remember, this mod is only visible when the Surface kickstand is deployed, so it doesn’t have to look spectacular.

Thanks [fridgefire] and [Neolker] for sending this in.