Reverse Engineering A Topfield VFD Front Panel

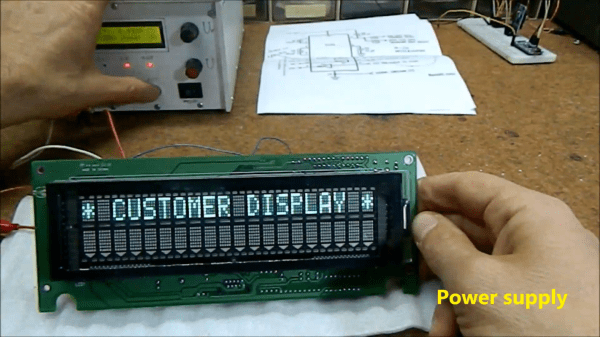
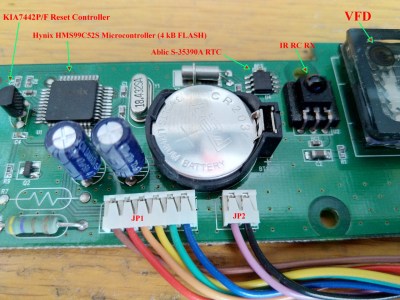
Hackers love the warm glow of a vacuum fluorescent display (VFD), and there’s no shortage of dead consumer electronics from which they can be pulled to keep our collective parts bins nicely stocked. Unfortunately, figuring out how to actually drive these salvaged modules can be tricky. But thanks to the efforts of [Lauri Pirttiaho], we now have a wealth of information about a VFD-equipped front panel used in several models of Topfield personal video recorders.

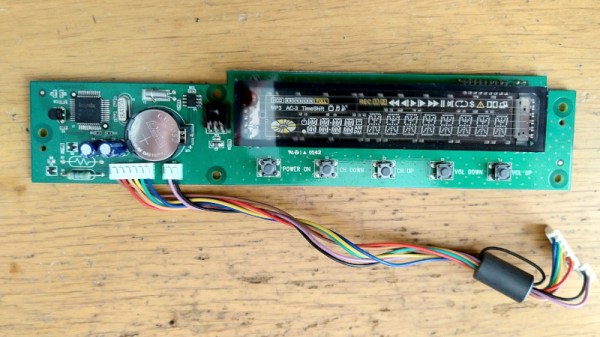
The board in question is powered by a Hynix HMS99C52S microcontroller and includes five buttons, a small four character 14-segment display, a larger eight character field, and an array of media-playback related icons. There’s also a real-time clock module onboard, as well as an IR receiver. [Lauri] tells us this same board is used in at least a half-dozen Topfield models, which should make it relatively easy to track one down.

After determining what goes where in the 6-pin connector that links the module with the recorder, a bit of poking with a logic analyzer revealed that they communicate over UART. With the commands decoded, [Lauri] was able to write a simple Python tool that lets you drive the front panel with nothing more exotic than a USB-to-serial adapter. Though keep in mind, you’ll need to provide 17 VDC on the appropriate pin of the connector to fire up the VFD.

What’s that? You don’t need the whole front panel, and just want to pull the VFD itself off the board? Not a problem. Our man [Lauri] was kind enough to document how data is passed from the Hynix microcontroller to the display itself; critical information should you want to liberate the screen from its PVR trappings.

If you manage to get your hands on one of these modules, it would be an ideal addition to a custom media streamer. Though we suppose simply turning it into a network-controlled clock would be a suitable alternative if you’re looking for something a bit easier.

Continue reading “Reverse Engineering A Topfield VFD Front Panel”

Vintage Displays Hack Chat With Fran Blanche

Join us on Wednesday, August 11 at noon Pacific for the Vintage Displays Hack Chat with Fran Blanche!

In terms of ease of integration and density of the information that can be shown, it’s hard to argue with the fact that modern displays like LCD panels are anything but superior to the character-based displays of yore. Throw one into a project, add a little code from a few off-the-shelf libraries to drive it, and you’re on to the next job.

Efficient, yes, but what does this approach do for the engineer’s soul? What design itch does it scratch; what aesthetic does it celebrate? Nostalgic questions, true, and not every project lends itself to exploring old display technologies. But some still do, thankfully, and when the occasion calls for it, we’re glad that there are those out there who are still actively involved in the retro display community, making sure that what was once state-of-the-art technology is still able to be added to modern projects.

There’s no doubt that Fran Blanche is one of those passing the torch of vintage displays down to the next generation. You’ll certainly know Fran from her popular Fran Lab channel on YouTube, where in addition to about a million other interests, she has explored some really cool vintage displays: the Nimo cathode-ray tube, super-bright incandescent seven-segment displays, the delightfully strange “Bina-View”, and many, many more. Fran will stop by the Hack Chat to talk about all these retro displays, what she’s learned from collecting them, and how they shaped the displays we take so much for granted these days. Oh, and perhaps we’ll also talk about her upcoming ride on “G-Force 1” as well.

join-hack-chatOur Hack Chats are live community events in the Hackaday.io Hack Chat group messaging. This week we’ll be sitting down on Wednesday, August 11 at 12:00 PM Pacific time. If time zones have you tied up, we have a handy time zone converter.

Z80 Family Reunion Discovered In Old PoS Card Swiper

[Ben Heck] found an old card-swipe point-of-sale box at the Goodwill store, took it home, and tore it down to see what was inside. He found a completely serviceable single board computer based on the Z80. In fact, there’s a whole family of four Z80 chips: the CPU itself, the DART chip (dual UART), the PIO chip (parallel input/output interface), and the CTC chip (counter/timer circuit). That’s not all — there’s a landline telephone modem, a real time clock, 32K of RAM and UV-EPROM. The second PCB of this assembly holds a hefty sixteen-key keypad and a sixteen-character vacuum fluorescent alphanumeric display. All this for the bargain price of $2.99.

Surely [Ben] will dig into the Z80 system in the future, but in this video he tries to make the display work. An OKI Semiconductor controller drives the VFD. After tracking down the data sheet, [Ben] wires it up to an Arduino and writes a quick program. Only a few YouTube minutes later, he conquers the display, drawing sample text anywhere he wants on the screen with any brightness he desires.

You never know what you may find lurking inside old equipment like this. You might find a proprietary ASIC with no documentation, or like [Ben] did here, you could find a fully functioning embedded computer. If [Ben] can whip up a RAM-based emulator to replace the 32K UV-EPROM, he’ll have a perfect evaluation board for Z80 projects.

Let us know in the comments if you have found any treasures like this. Also, how would you use this board if you had found it? Thanks to reader [Nikša Barlović] for sending in the tip.

Continue reading “Z80 Family Reunion Discovered In Old PoS Card Swiper”

Custom Built 12-Port A/V Switch Keeps CRT Well Fed

Classic gaming aficionados who prefer to play on real hardware know the struggle of getting their decades-old consoles connected to a modern TV. Which is why many gamers chose to keep a contemporary CRT TV around for when they want to take a walk down memory lane. Unfortunately those old TVs usually didn’t offer more than a few A/V ports on the back, so you’ll probably need to invest in a A/V switch to keep them all hooked up at once.

That’s the situation [Thomas Sowell] found himself in, except he couldn’t find one with enough ports. Rather than chain switches together, he decided to build his own custom 12-port console selector. With an integrated amplifier to keep everything looking sharp, a handsome walnut and metal enclosure, and a slick graphical interface that shows the logo of the currently selected console on a Vacuum Fluorescent Display (VFD), the final product is a classic gamer’s dream come true.

A peek under the hood.

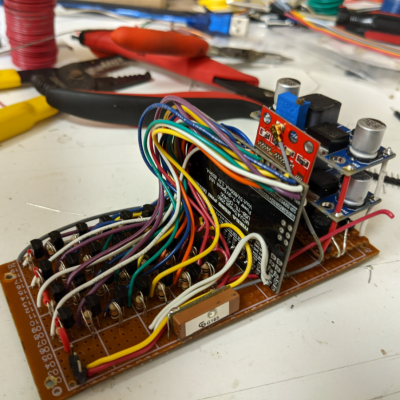
To switch the audio [Thomas] is using a pair of ADG1606 16-channel analog multiplexers, while video is shuffled around with four MAX4315 8-channel video multiplexer-amplifiers. The math might seem a bit off at first, but he’s using one ADG1606 for each stereo channel and since the switch is for S-Video, each device has a luminance and color signal that needs to be handled separately. The multiplexers are flipped with a ATmega2561 microcontroller, which is also responsible for reading user input from a rotary encoder on the front of the case and displaying the appropriate console logo on the 140×32 Noritake VFD.

You may be surprised to find that [Thomas] considered himself an electronics beginner when he started this project, and that this is only the second PCB he’s ever designed. Was this a bold second project? Sure. But it also speaks to how far DIY electronics has come over the last years. Powerful open source tools, modular components, and of course a community of creative folks willing to share their knowledge and designs, has gone a long way towards redefining whats possible for the individual hacker and maker.

Continue reading “Custom Built 12-Port A/V Switch Keeps CRT Well Fed”

The Most Annoying Among Us Tasks Created In Real Life

Among Us is a hit game of deception and intrigue. Those who have played it know the frustration of trying to complete some of the intentionally difficult tasks onboard the Skeld. [Zach Freedman] decided to recreate some of these in real life.

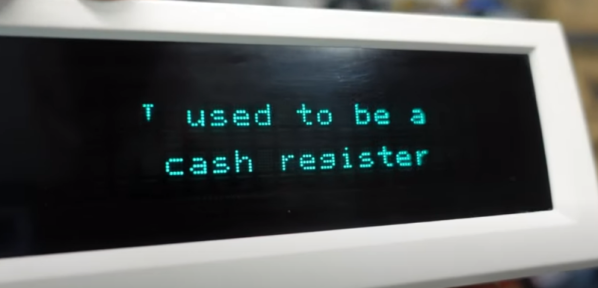
[Zach] built what are arguably the three most frustrating tasks from the game. There’s the excruciatingly slow upload/download station built out of an old Samsung tablet and an NFC tag, and the reactor start console created using a Raspberry Pi 3B, Teensy 3.2, and a custom mechanical keyboard. But perhaps most annoying of all is the infamous card reader. Built with another Teensy, it requires the user to swipe their ID card at just the right speed, except that speed is randomly generated for every swipe. Also, the machine fails 20% of good swipes just because. Perhaps what we love most is the way [Zach] recreated the classic VFD look by putting an OLED display behind bottle-green plastic and using a 14-segment font.

It’s a fun homage to a wildly successful indie game, and we could imagine these props would be a hit at a makerspace party. We’ve featured other Among Us themed builds before, too. Video after the break.

Continue reading “The Most Annoying Among Us Tasks Created In Real Life”

Sunrise, Sunset, Repeat

Sunrises and sunsets hardly ever disappoint. Still, it’s difficult to justify waking up early enough to catch one, or to stop what you’re doing in the evening just to watch the dying light. If there’s one good thing about CCTV cameras, it’s that some of them are positioned to catch a lovely view of one of the two, and a great many of them aren’t locked down at all.

[Dries Depoorter] found a way to use some of the many unsecured CCTV cameras around the world for a beautiful reason: to constantly show the sun rising and setting. Here’s how it works: a pair of Raspberry Pi 3B + boards pull the video feeds and display the sunrise/sunset location and the local time on VFD displays using an Arduino Nano Every. There isn’t a whole lot of detail here, but you can probably get the gist from the high-quality pictures.

If you wanted to recreate this for yourself, we might know where you can find some nice CCTV camera candidates. Just look through this dystopian peephole.

Thanks for the tip, [Luke]!

An Old Calculator Lives Again

There was a time when any electronics student would have a slide rule hanging off their belt. By the 1970s, the slide rule changed over to an electronic calculator which was a pricy item. Today you can buy calculators at the dollar store. [JohnAudioTech] pulled out an old Radio Shack vacuum fluorescent display (VFD) calculator and found it didn’t work. Obviously, that means it is time to open it up.

It is fun to see one of these old devices opened up again. Consumer electronics with big through-hole ICs! Troubleshooting the device wound up being anti-climatic, as a broken wire to the battery compartment explained the whole thing.

As a teardown, though, this is a fun video. Not only are all the parts through-hole, but the PCB is clearly a manual layout with serpentine traces flowing across the board like some sort of art piece. Continue reading “An Old Calculator Lives Again”