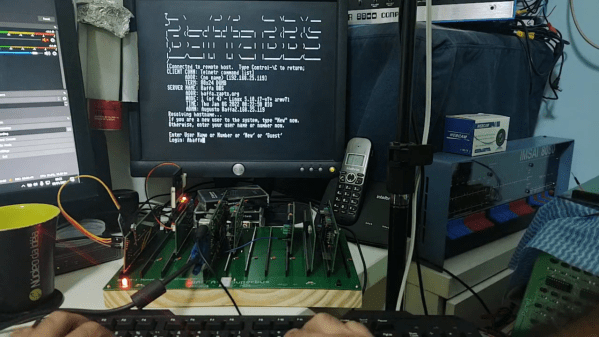
Picture of a monitor with a fake "ransomware" banner on it, and a PC with the ESP32 VGA devboard mounted into it in the foreground

ESP32 Pretends To Be GPU; Gives You A Ransomware Scare

Sometimes a piece of hardware meets a prank idea, and that’s how the fun Hackaday articles are born. [AnotherMaker] shows us some harmless entertainment at the expense of an IT enthusiast in your life – programming an ESP32-powered devboard with a VGA output to show an ever-feared “all your files are encrypted” screen on a monitor connected to it. The ASCII text in its 8-bit glory helps sell this prank, making it look exactly like a BIOS-hijacking piece of malware it claims to be; akin to UIs of the past that skilled hackers would whip up in x86 assembly. The devboard’s integration into a PCI card backplate is a cherry on top, a way to seamlessly integrate this into a PC case, making it look not particularly different from an old graphics card. In such a configuration, we don’t doubt that this would be a head-scratcher to a certain kind of an IT department worker.

If you already have someone in mind as a target for this prank, you’re in luck, since [AnotherMaker] has shared his source code, too, and all you need is a ESP32 with a VGA port set up. You can get the same devboard, or you can even solder it all together with an ESP32 breakout and resistors, if you’re on a time or money budget, since the schematics for the LilyGO devboard are public. Not all devboards gets such a fun application, but it’s always fun to see when someone thinks of one – a perfect prank scenario that calls for a very specific devboard.

Wondering how it’s even possible to output VGA from the ESP32? We’ve covered this in the past – like this R&D project done by [bitluni], who then went ahead and expanded on it by connecting six displays at once. If you’ve connected your ESP32 to a VGA port and ran some test sketches, a UI library will help you upgrade your idea into a ready project in no time.

Continue reading “ESP32 Pretends To Be GPU; Gives You A Ransomware Scare”

A Slim 7400 Logic VGA Board For All Your Retro Needs

Over the years we’ve seen a number of hackers generate VGA with 74xx logic chips, but they’ve generally not been the most practical of builds. Often put together as part of a competition or purely for the challenge, these circuits are usually implemented in a mass of jumper wires and often take up multiple breadboards. Not exactly something you can toss in a drawer when you’re done with it.

But the Vectron VGA Plus, created by prolific hacker [Nick Bild], manages to improve on things considerably. Designed specifically to be smaller and simpler than its predecessors, the custom PCB contains far fewer chips than we’re used to seeing for this kind of thing. At the same time it provides a handy header row along the bottom that allows the user to connect whatever they’re working on, from microcontrollers to retro computers.

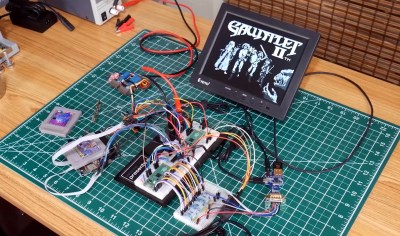
When your breadboard looks like this, it’s time for a PCB.

It looks like the PCB could still be shrunk down considerably if you’re really looking to maximize desk space, but we imagine for his purposes, [Nick] felt this was more than compact enough. Especially when you look at what the same circuit looked like during the breadboard phase. Yikes.

So, what did it take to simplify this 640 x 480 VGA interface? The short answer is adding more RAM. Wherever possible, dedicated hardware was replaced with software operations that could be performed by the externally connected device. [Nick] has provided some sample code for the Arduino that lets the microcontroller push data into the board’s memory and take control.

We can trace the origins of this project back a few years, to when [Nick] was working on adding an LCD to his homebrew 6502 computer. A few months later he put together the earlier version of this board, the Vectron VGA, before switching gears and handing VGA generation duty over to a FPGA. We’re excited to see the next evolution of this project, and given the track record of this particular hacker, we shouldn’t have to wait long before it hits our inbox.

Some Pleasing Experiments In 8-Bit Video Cards

These days, supply chain factors and high demand have made it incredibly difficult to lay one’s hands on a GPU. However, if you’re into older computers, you might find it hard to source old-school video cards too. Fear not, for [Dave’s Dev Lab] has been cooking up some experiments with a goal of eventually producing a new 8-bit ISA video card from scratch.

The long term goal is to recreate the original design of early IBM hardware, namely, the MDA and CGA video cards of decades past. The experiments center around the venerable Motorola 6845 which was widely used in computers in the 1980s. However, [Dave] intends to make them suitable for outputting to modern screens using typical VGA and DVI outputs, as well as those expected by modern TFT LCDs.

Thus far, [Dave] has achieved successful VGA output in a 40×35 text mode. With an 8×16 font, and the display running at 640×480 resolution at 60 Hz, everything hums along nicely. Similar experiments with a modern 480×272 LCD display have also worked well.

There’s a long way to go before [Dave’s] hardware is playing Commander Keen, but it’s great to see such effort being put into the platform. It could yet serve as a great upgrade for those wishing to use their vintage IBM metal without having to source a tired old CGA monitor.

We’ve seen similar work before too, with the Graphics Gremlin from [Tube Time] achieving a similar task. If you’ve been brewing up your own ISA hardware at home, do drop us a line.

A wall clock with exposed circuit boards

Drunk Wall Clock Uses Convoluted Circuits To Display Time

Here at Hackaday we can never get enough of odd clocks, and we’re delighted to see [Dan O’Shea]’s creation called the Wifi-Telnet-FPGA-NTSC Drunk Wall Clock. That mouthful is an accurate description of what it does: at the heart of the device is an ESP32 that uses WiFi to connect to a Raspberry Pi. It then telnets into the system, logs in, and requests the current time using the Linux date command. So far, so ordinary.

The “FPGA” part is where it gets weirder: the ESP32 is hooked up to a VGA1306 board. This is a little PCB with an FPGA that emulates an OLED display and outputs the image to a VGA connector. [Dan] could have simply hooked up a VGA display to this, but instead went for another layer of complexity by converting the VGA signal to something resembling composite video, using nothing more than three resistors. The resulting “NTSC” signal is then fed into a small TFT display that shows the time.

The clock got its “drunk” label because the process of repeatedly running the date command and parsing its output is slow and prone to hiccups, resulting in a display where the seconds advance in a somewhat unsteady manner. This fits well with the overall aesthetic of the clock, which consists of a heap of PCBs held together with cable ties and electrical tape. Mounted on a round panel of recycled wood, it makes a beautiful wall ornament for any hacker lab.

We love projects like this that accomplish a simple task in a convoluted way, and there’s no shortage of needlessly complicated clocks, whether physically drawing the time or using machine-learning data. But if you simply like your clocks with their electronics exposed, check out this free-form LED clock or this neat circuit sculpture clock.

Continue reading “Drunk Wall Clock Uses Convoluted Circuits To Display Time”

Save That Old VGA Monitor From The Trash

It’s quite a while since any of us unpacked a brand new VGA monitor, but since so many machines still have the ability to drive them even through an inexpensive adaptor they’re still something that finds a use. With so many old VGA flat panel monitors being tossed away they even come at the low low price of free, which can’t be argued with. CNXSoft’s [Jean-Luc Aufranc] was tasked with fixing a dead one, and wrote an account of his progress.

Seasoned readers will no doubt be guessing where this story will lead, as when he cracked it open and exposed the PSU board there was the tell-tale puffiness of a failed electrolytic capacitor. For relative pennies a replacement was secured, and the monitor was fixed. As repair hacks go it’s a straightforward one, but still worth remarking because a free monitor is a free monitor.

We called the demise of VGA back in 2016, and have seen no reason to go back on that. But for those of us left with a few legacy monitors it’s worth remembering that DVI and thus the DVI compatibility mode of HDMI is little more than a digitised version of the R, G, and B channels you’d find on that trusty blue connector. Maybe that little dongle doesn’t make such a bad purchase, and of course you can also use it as an SDR if you want.

VGA PCB.

Running Six VGA Projectors From A Single ESP32

Today’s microcontrollers are high-speed powerhouses that can do absolutely wonderous things. By virtue of fast clock speeds and special DMA hardware, it’s often possible to achieve great feats that seem almost ridiculous at face value. [Bitluni] decided to demonstrate just that, running six (6!) VGA displays from a single ESP32.  (Video, embedded below.)

The ESP32 clocks in at 240 MHz at top speed. It also features some nifty DMA hardware along with GPIO mapping that makes it perfectly suited to this task. [Bitluni] was thus able to set it up to drive up to six VGA displays at one bit per pixel monochrome output. Alternatively, ganging up six output pins into two sets of three, he was able to run two VGA displays with 3-bit color. The resolution is an impressive 640 x 400 in both cases, and [Bitluni] demonstrated the hardware by driving six projectors with a starfield display.

Is it useful? Perhaps not yet, but there’s certainly a few applications we could think of. Share your own ideas in the comments. In the meantime, check out [Bitluni]’s other great works for the ESP32.

Continue reading “Running Six VGA Projectors From A Single ESP32”

VGA From Scratch On A Homebrew 8-bit Computer

[James Sharman] has built an impressive 8-bit homebrew computer. Based on TTL logic chips, it has a pipelined design which makes it capable of Commodore-level computing, but [James] hasn’t quite finished everything yet. While it is currently built on its own custom PCB, it has a limiting LCD display which isn’t up to the standards of the rest of the build. To resolve this issue, he decided to implement VGA from scratch.

This isn’t a bit-bang VGA implementation, either. He plans for full resolution (640×480) which will push the limits of his hardware. He also sets goals of a 24-bit DAC which will allow for millions of colors, the ability to use sprites, and hardware scrolling. Since he’s doing all of this from scratch, the plan is to keep it as simple as possible and make gradual improvements to the build as he goes. To that end, the first iteration uses a single latching chip with some other passive components. After adding some code to the CPU to support the new video style, [James] is able to display an image on his monitor.

While the image of the parrot he’s displaying isn’t exactly perfect yet, it’s a great start for his build and he does plan to make improvements to it in future videos. We’d say he’s well on his way to reproducing a full 8-bit retrocomputer. Although VGA is long outdated for modern computers, the standard is straightforward to implement and limited versions can even be done with very small microcontrollers.

Thanks to [BaldPower] for the tip!

Continue reading “VGA From Scratch On A Homebrew 8-bit Computer”