DIY Bookshelf Is More Than Meets The Eye

It might surprise you, Dear Reader, that not every project featured on Hackaday needs to pulsate with LEDs, or update the world about its goings-on over Twitter. They don’t even, contrary to what you may have heard, need to have an Arduino inside. No, sometimes you can pull off a pretty neat hack with nothing more than some wood, a couple of tools, and a unique idea which repurposes something that would otherwise be in a landfill.

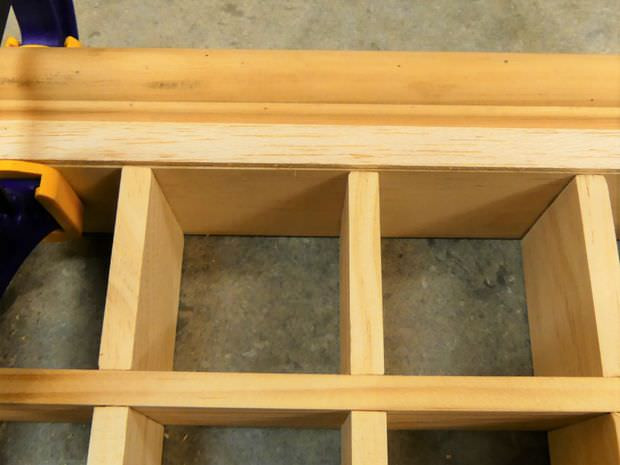
Such is the case with the latest project from [Keith Decent], which uses plywood and the spines of old books to create a secret compartment “bookshelf”. The concept is probably best described as a roll-top desk on its side, and while the action does appear a little stiff, it scores extra points for how easy it looks to replicate.

Using a router, [Keith] cuts a channel into the top and bottom sheets of plywood, which the “books” will eventually ride in. This channel goes around the entire perimeter of the shelf, and it’s important to make it as straight as possible so nothing binds up. To make sure things move through as smoothly as possible, some sandpaper is used to clean-up the inside edges.

The next step is to rip some books apart and salvage their spines. Used books can be purchased for next to nothing at flea markets, so even if you don’t have a home library filled with vintage tomes to eviscerate, it should be easy enough to get your hands on some if you want to build your own version. For sanity’s sake it would seem that books with the same size spines are ideal, so keep an eye out for old sets of encyclopedias and the like.

When the spines are removed from the books, they get glued to individual wooden slats. These slats then have holes drilled in the top and bottom, and standard wood screws driven in to act as “rollers”. Real rollers would undoubtedly make for smoother action, but you can’t beat his method if you’re trying to get it done cheaply and quickly.

The slats are then glued onto a piece of fabric, creating what is referred to as a tambour. The fabric backing links all the slats together and makes it so that pushing and pulling one slat will move them all together as one. The book spine tambour is then inserted in the routed channel, and the back panel of the shelf can be installed to lock it all together.

At this point the project is essentially done, but [Keith] does take it the extra mile by sealing all the book spines and doing some finish work on the shelf to make it look more like a real vintage piece of furniture instead of some scrap plywood screwed together.

If this exercise in woodworking has gotten you interested in the wonderful world of dead trees, you’re in luck. We’ve covered several woodworking projects from the hacker perspective, so you won’t be completely lost.

Continue reading “DIY Bookshelf Is More Than Meets The Eye”

Robotic Table Saw Automates Finger Joints

We’ve all seen finger joints or box joints, those interlocking puzzle pieces that make laser-cut plywood enclosures such a fixture for DIY projects. But laser cutters make finger joints look much easier to fabricate than they are with traditional woodworking tools, which often lead to disappointing results.

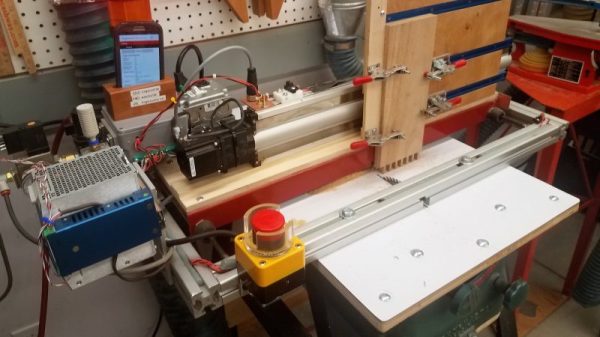
But this finger joint cutting robot is no traditional woodworking tool, and [timschefter] put a lot of work into building the rig. We have to admit that when we first saw the video below, the thought of having a table saw in our shop that could be turned on with a button on a phone gave us pause. But on closer analysis, it looks like safety was a major concern with this build. With a prominent e-stop and an interlock switch, the small table saw that forms the foundation of the robot should be safe enough. On the table top is a sled with a linear slide that moves the workpiece perpendicular to the blade, and the sled moves back and forth over the blade with pneumatic cylinders. The joint is set up with a custom app which calculates the pin width and spacing, which can be evenly distributed across the panel, or, for a bit of geeky fun, controlled to make a joint that encodes a message in Morse.

A lot of work went into this, and while it’s not the first robotic finger joint cutter we’ve seen, it’s pretty impressive. Now if it could only automate dovetails.

Continue reading “Robotic Table Saw Automates Finger Joints”

The Majesty Of Saturn’s Rings Lighting Your Abode

[Modustrial Maker] is at it again with another seriously cool LED visualizer. This time around, he’s built pair of pendant lights inspired by the rings of Saturn.

The rings are made mostly of walnut plywood using a circle router jig to make the cut easier. If you are inspired to make these for yourself, [Modustrial Maker] is clear — the order in which you cut out the pieces of the rings is absolutely critical. The pieces are glued together — with any edges sanded smooth — and edgebanding applied using a hot air gun due to the curved surface before staining. Duplicate for the second (or more if you so choose!) rings. Be forewarned — a little geometry will be needed to find anchor points that will keep the rings properly balanced.

[Modustrial Maker] suggests an off-the shelf LED controller to handle the visualizations and lighting effects, but he used an Arduino Mega clone as the brains — code available here, a MonkeyJack MAX9814 electret mic, and a four-channel RF remote/transceiver to control the different modes. Pulsing along to the music, these rings make for sleek lighting indeed.

Continue reading “The Majesty Of Saturn’s Rings Lighting Your Abode”

Automatic Dust Collection For The Whole Shop

If you’ve got a woodworking area, or even if you’ve just got something that really churns out dust like a belt sander or table saw, there’s an excellent chance you hate sawdust with a passion. It gets all over your clothes, jams up everything mechanical, and as a fun little bonus can be explosive if not handled properly. Thankfully newer tools tend to come with their own dust collection bags (back in the old days, you weren’t really a man unless you were coughing up wood fibers), but if you’ve got a half a dozen tools with half a dozen different dust bags you’ve got to empty, that can get pretty annoying.

Especially if you take woodworking as seriously as [Brad Wright] does. Over on his YouTube channel [DIY Builds], he quickly runs through the construction of a whole-shop dust collection system with some very neat features. Not everyone needs a system this intricate, but the tips and tricks he shows off during the build are great and can certainly be adapted to less grandiose setups.

Dust collection connector with closeable gate
One of the scratch-built gates.

[Brad] goes into a bit more detail in this gallery, revealing that the heart of the build is a Harbor Freight dust collection system that he modified into a cyclone separator. Big chunks fall down into the 55 gallon bucket, and what’s left gets blown out of the shop via a louvered vent through an exterior wall. An intricate system of 4 inch PVC pipe is then used to connect up each individual machine’s dust collection port. Even individual hand sanders get into the act via a three way manifold. His table saw lacked a dust port, so he enclosed the motor with a piece of plywood and made his own.

One of the most interesting aspects of the build is the scratch-built blast gates. These are essentially valves which open and close the different sections of the PVC where they mate to the individual stations. This prevents the dust collection system from wasting suction by trying to pull from all the stations at once when only one is in use at any given time. [Brad] even wired up the blast gates with switches that will turn the dust collection system on when the gate is open, and off when it’s closed.

This isn’t the first time we’ve covered the lengths people will go to rid their shop of dust. Cyclone dust separators are an especially popular build, using everything from sheet metal to 3D printed parts.

Continue reading “Automatic Dust Collection For The Whole Shop”

Scratchbuilt Cryptex Would Make Da Vinci Weep

Here’s a fun fact, the kind of thing that you might (but we definitely did not) find out when writing a blog post: Dan Brown actually made up the cryptex for his book, The Da Vinci Code. We therefore have Mr Brown, with a bit of help from the filmmakers over at Sony, to thank every time we see somebody make their own version. To follow that line of logic to its conclusion, we believe you’ll agree that the following is without question the greatest thing Dan Brown has ever done in his life.

Created by [Stephen Peduto] as a ring box for an exceptionally lucky young lady, it required an estimated 127 hours to complete over the course of two months. From the incredible job [Stephen] did photographing and documenting the build, we don’t doubt it for a second. Expertly combing milled aluminum and lathe-turned bocote wood, this has got to be the most gorgeous ring “box” ever made.

Frankly, it’s hard to do justice to what [Stephen] has created in so short a space, and you really should browse through the 140+ images in his gallery. But the short version is that after some furious white board sketching, [Stephen] moved over to AutoCAD and then SolidWorks to design all the parts which would eventually get machined out of aluminum. As a very clever touch, he wisely added 17° slop in the locking mechanism so that the recipient wouldn’t fumble too much at the big moment.

When the machining was all said and done, [Stephen] then switched over to the woodworking part of the project. Rather than numbers or letters for a combination, this cryptex uses the grain pattern in the turned piece of wood. This gives the final product a more organic feel, while at the same time avoiding the head-scratching problem of getting the characters printed or engraved into the wheels.

Towards the end of construction there was a worrying moment when the newly made wooding rings warped so badly that the aluminum inserts would no longer fit. As a last resort, the rings were placed in a box with a humidifier for a week and slowly worked back into shape. [Stephen] says he’s still surprised it worked.

Even if some may argue that a cryptex is nothing but a prettied-up bike lock, people sure do love them. We’re no stranger to high quality cryptex builds here, though even mere mortals can play along if they’ve got a well calibrated 3D printer.

Imperial Rocker For Stopping Tiny Rebel Scum

Some of the luckiest kids in the world have to be the ones with hackers and makers as parents. While normal kids are stuck playing with cookie cutter mass produced toys, these kids get one-off gadgets and creations that will be the envy of the playground. Frankly, some of the stuff ends up being so cool that it’ll get the adults wishing they could go back in time and play with it.

One such parent, and one such project, is the Imperial Rocker by [Matthew Regonini]. Hoping to instill an obsession with a galaxy far, far, away on his offspring, [Matthew] designed this AT-AT rocking horse piece by piece in Illustrator, and then cut it all out of birch using his XCarve CNC router. Each piece was then meticulously glued together to produce a final 3D effect from the individual cutouts.

With a liberal application of spring clamps to hold it all together while it dried, all that was left to do was painstakingly sand all the parts so the edges of the laminated construction would be smooth. Dowels were then added for the handlebars and foot pegs, and a few coats of polyurethane seal up the plywood while bringing out a natural look.

[Matthew] notes some issues here and there, notably quite a bit of blowout in some of the detail cuts and a couple miscalculated dimensions. But he reasons that the rocker is going to live a pretty hard life anyway, so best not to sweat the small stuff.

While the Imperial Rocker has that quaint old-school charm, we wonder how long it will be before [Matthew’s] little Stormtrooper starts yearning for the blinking lights and buttons that youngsters just can’t get enough of.

Continue reading “Imperial Rocker For Stopping Tiny Rebel Scum”

Smooth And Steady Cuts With An Improvised Power Feeder

Some woodworking operations require stock to be fed at a smooth, steady rate, for which purpose a power feeder is usually employed. They’re expensive bits of gear, though, and their cost can usually be borne only by high-output production shops. But when you need one, you need one, and hacking a power feeder from a drill and a skate wheel is a viable option.

It should come as no surprise that this woodshop hack comes to us from [Matthias Wandel], who never seems to let a woodworking challenge pass him by. His first two versions of expedient power feeders were tasked with making a lot of baseboard moldings in his new house. Version three, presented in the video below, allows him to feed stock diagonally across his table saw, resulting in custom cove moldings. The completed power feeder may look simple — it’s just a brushless drill in a wooden jig driving a skate wheel — but the iterative design process [Matthias] walks us through is pretty fascinating. We also appreciate the hacks within hacks that always find their way into his videos. No lathe? No problem! Improvise with a drill and a bandsaw.

Surprised that [Matthias] didn’t use some of his famous wooden gears in this build? We’re not. A brushless motor is perfect for this application, with constant torque at low speeds. Want to learn more about BLDC motors? Get the basics with a giant demo brushless motor.

Continue reading “Smooth And Steady Cuts With An Improvised Power Feeder”